How to Propagate Scarlet keckiella?
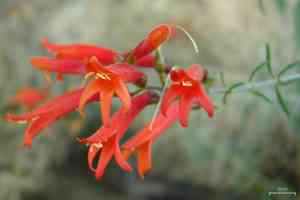
Scarlet keckiella is a visually captivating perennial recognized for its brilliant crimson flowers. Reproduction primarily entails planting seeds in soil that drains effectively. Confirm that seeds are lightly covered and consistently hydrated until sprouting. Transplanting young plants guarantees robust development. Reduce density to prevent excessive crowding. Horticultural publications concur that adequate spacing and illumination are crucial for this species' thriving establishment.
Optimal Period for Scarlet Keckiella Propagation?
Propagation Method
Seeding
Propagation Season
Spring
Equipment for Scarlet Keckiella Propagation?
Seed Tray
Utilized for sowing seeds and managing them in a controlled setting, crucial for successfully starting scarlet keckiella from seeds. Offers ample room and proper drainage, vital for preventing root decay.
Propagation Mix
A well-draining propagation medium is essential for the initial growth phase of the seeds. Ensures a balance of air and moisture, particularly beneficial for scarlet keckiella as it helps prevent damping-off disease.
Misting Bottle
Crucial for keeping the soil surface damp without over-saturating, which can harm seedling roots. Helps provide the necessary humidity levels for scarlet keckiella during germination.
Seedling Heat Mat
Maintains a steady and ideal soil temperature, which is critical for scarlet keckiella germination. Ensures quicker and more uniform seed sprouting by mimicking perfect growing conditions.
Humidity Dome
Used to maintain a consistent moisture level around the seeds. Prevents the delicate scarlet keckiella seedlings from drying out, ensuring successful germination and early development.
Labels and Marker
Assists in tracking sowing dates and plant identification. Ensures you can monitor and provide the necessary care for scarlet keckiella throughout its propagation stages.
Fine-mesh Sieve
Used to lightly cover seeds with soil or vermiculite. Provides an even soil layer, ensuring good seed-soil contact and consistent moisture levels for scarlet keckiella.
How to Propagate Scarlet Keckiella?
Propagation Type
Simple
Caring for Your Newly Propagated Scarlet Keckiella?
Caring for Your Newly Propagated Scarlet Keckiella?
Once scarlet keckiella seedlings have developed several true leaves, carefully move them into larger containers or directly into the garden. Provide partial to full sun exposure and ensure the soil remains well-draining. Water the plants regularly, allowing the soil to dry out slightly between waterings. Fertilize sparingly, as scarlet keckiella prefers lean soils. Protect young plants from harsh weather and pests.
Common Errors to Avoid When Propagating Scarlet Keckiella
Overwatering
Excessive moisture can lead to root rot, which will impede the plant's ability to develop a healthy root system.
Poor Soil Drainage
Using soil that does not drain well can result in waterlogged roots, causing the plant to suffocate and limiting nutrient uptake.
Improper Cutting Technique
Taking cuttings that are too large or using blunt tools can damage the stems, reducing the chance of successful rooting.
Insufficient Light
Providing inadequate light can slow down photosynthesis, making it harder for the cuttings to establish and grow.
Incorrect Humidity Levels
Too much or too little humidity can create an unsuitable environment, preventing the propagation process from proceeding smoothly.
Tips For Propagating Scarlet Keckiella
Moisture Control
Ensure the soil is consistently moist but never waterlogged to promote healthy root formation.
Use Well-Draining Soil
Choose a soil mix that offers good drainage, such as a blend of potting soil and perlite or sand, to prevent water stagnation.
Sharp Cutting Tools
Utilize sharp, sterilized tools to take cuttings of about 4-6 inches in length, and make clean cuts just below a node to increase rooting success.
Adequate Light
Scarlet keckiella requires bright, indirect sunlight. Providing ample light will aid in photosynthesis and stimulate growth.
Maintain Optimal Humidity
Keep the humidity levels moderate by using a humidity dome or placing a plastic bag over the cuttings to retain moisture without causing mold issues.


