How to Propagate Pineland water-willow?
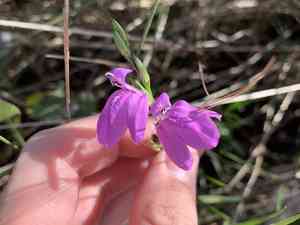
Pineland water-willow, a robust botanical species within the Acanthaceae family, can be effectively propagated by concentrating on planting its seeds in a damp, free-draining growing medium. Maintaining consistent hydration is crucial, yet excessive watering should be avoided to avert root decay. Ensure the substrate is abundant in nutrients to foster early development. As pineland water-willow flourishes under luminous, filtered illumination, furnish surroundings that emulate its native environment. Consult authoritative horticultural references to fine-tune these parameters.
Optimal Period for Pineland Water-willow Propagation
Propagation Method
Seeding
Propagation Period
Spring
Equipment for Pineland Water-willow Propagation
Seed Trays
Utilized for germinating pineland water-willow seeds in a controlled setting. These trays facilitate even moisture distribution and offer sufficient space for seedlings to grow before being transplanted.
Humidity Domes
Placed over seed trays to create a high-moisture atmosphere, crucial for pineland water-willow seed germination. These domes help maintain steady moisture levels, vital for successful seedling development.
Sterile Potting Mix
A medium free of pathogens and weeds, ensuring robust growth for pineland water-willow seedlings. The mix provides the correct balance of air circulation and moisture retention needed for young plants.
Misting Bottle
Used for gently watering pineland water-willow seeds and young plants. Misting ensures that delicate seeds and seedlings receive enough moisture without disturbing the soil or causing waterlogging.
Heating Mat
Positioned beneath seed trays to provide consistent warmth, which can boost the germination rate of pineland water-willow seeds. These mats are especially useful in colder climates where maintaining ideal soil temperature might be challenging.
Labels and Markers
Essential for tracking various planting dates and seed batches. Accurate labeling aids in monitoring growth stages and care routines for pineland water-willow, ensuring proper management of the seedlings.
Hand Trowel
Useful for blending sterile potting mix and for transplanting pineland water-willow seedlings once they are ready for a larger growing area. The trowel assists in carefully handling the seedlings, minimizing root disturbance.
How to Propagate Pineland Water-willow?
Propagation Type
Simple
Caring for Your Newly Propagated Pineland Water-willow
Caring for Your Newly Propagated Pineland Water-willow
Post-propagation, ensure pineland water-willow receives adequate attention to encourage healthy development. Water consistently to keep the soil damp, especially during dry spells. Provide partial shade to shield young plants from intense sun. Fertilize occasionally with a balanced, liquid fertilizer. Monitor for pests and diseases, and take appropriate action if necessary. As the plant matures, it will become more resilient to varied conditions but will thrive best in consistently moist, well-drained soil.
Common Errors to Avoid When Propagating Pineland Water-willow
Overwatering
Excessive moisture can lead to root decay, which can impede propagation and harm the plant's health.
Improper Soil Mix
Using soil that lacks proper drainage can cause waterlogging and root suffocation, leading to poor propagation results.
Insufficient Light
Providing inadequate light can result in weak, elongated growth, making it difficult for the plant to establish itself.
Incorrect Cutting Technique
Taking cuttings that are too long or from the wrong part of the plant can reduce the chances of successful rooting.
Neglecting Humidity
Failing to maintain adequate humidity can cause the cuttings to dry out and fail to root properly.
Not Using Clean Tools
Using unsterile or dirty tools can introduce diseases to the cuttings, compromising their health and viability.
Tips For Propagating Pineland Water-willow
Moderate Watering
Ensure the soil remains consistently moist but not waterlogged to promote healthy root development.
Well-Draining Soil
Use a soil mix rich in organic matter with good drainage to prevent waterlogging and root rot.
Adequate Light
Provide bright, indirect light to support robust growth and successful rooting.
Proper Cutting Techniques
Take semi-hardwood cuttings, ensuring they are 3-4 inches long and cut from healthy parts of the plant.
Maintaining Humidity
Place the cuttings in a humid environment, such as under a plastic dome or in a mini greenhouse, to encourage rooting.
Using Clean Tools
Always sterilize tools before making cuttings to minimize the risk of disease transmission.



