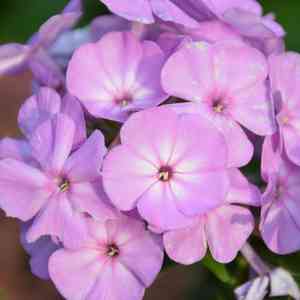
How to Propagate Hollyleaf gilia?
Gilia tricolor flourishes optimally in permeable soil under direct sunlight. To ensure successful planting, utilize fresh seeds, scatter them uniformly across the soil's surface, and gently press them down. Maintaining a slightly damp soil condition until sprouting is essential. Avoid significant disruption during the initial growth phase. After establishment, Gilia tricolor demonstrates impressive hardiness, needing very little upkeep.
Optimal Time for Hollyleaf Gilia Propagation
Propagation Method
Seeding
Propagation Period
Spring
Tools for Hollyleaf Gilia Propagation
Seed Trays
Seed trays offer a regulated setting for planting hollyleaf gilia seeds. They facilitate easy management of moisture, warmth, and spacing, all crucial for successful seed sprouting.
Fine Potting Mix
A suitable blend provides good drainage and air circulation, essential for hollyleaf gilia seed germination. It prevents seedlings from suffering from excessive watering or poor root growth.
Humidity Dome
A humidity dome helps maintain high moisture levels around the seeds, which is vital for the initial stages of sprouting. This tool reduces the risk of seeds drying out.
Seed Sowing Pencil
This tool aids in creating small, precise indentations in the soil for planting the tiny seeds of hollyleaf gilia. It ensures seeds are placed at the correct depth for optimal germination.
Spray Bottle
A spray bottle delivers a fine mist of water, preventing the disruption or washing away of seeds. This is particularly important for hollyleaf gilia, as its seeds are small and delicate.
Heat Mat
A heat mat provides consistent warmth to the bottom of seed trays, which can accelerate and improve germination rates for hollyleaf gilia by maintaining an ideal soil temperature.
Labels
Labels are crucial for tracking different seed batches, planting dates, and other relevant information, ensuring organized and accurate cultivation of hollyleaf gilia.
Seedling Transplanting Tool
Once hollyleaf gilia seedlings are ready for transplanting, this tool assists in gently lifting and placing them into new containers or garden beds without harming the young roots.
How to Propagate Hollyleaf Gilia?
Propagation Type
Simple
Caring for Your Newly Propagated Hollyleaf Gilia
Caring for Your Newly Propagated Hollyleaf Gilia
After sprouting, thin out seedlings to prevent overcrowding, keeping the healthiest ones. Gradually introduce young plants to outdoor conditions before transplanting, ensuring they get partial sun and well-drained soil. Water moderately, allowing soil to dry slightly between waterings. Mulch around plant bases to retain moisture and control weeds. Provide support as they mature to prevent wind damage and encourage upright growth.
Common Mistakes to Avoid When Propagating Hollyleaf Gilia
Overwatering
Excessive watering can lead to root rot, which can ultimately kill hollyleaf gilia. It is crucial to allow the soil to dry out between waterings.
Poor soil drainage
Using soil that doesn't drain well can result in waterlogged roots, depriving them of oxygenâa critical issue for the health of hollyleaf gilia.
Insufficient light
Failure to provide adequate sunlight can lead to weak, leggy growth, negatively impacting the overall vigor of hollyleaf gilia.
Improper seed depth
Planting seeds too deep or too shallow can hinder germination. Hollyleaf gilia seeds need to be at the correct depth for optimal growth.
Neglecting temperature control
Not maintaining appropriate temperature ranges can reduce germination rates and stunt seedling development.
Tips For Propagating Hollyleaf Gilia
Adequate watering
Water hollyleaf gilia when the top layer of soil is dry to the touch, taking care not to completely saturate the soil.
Well-draining soil
Utilize a soil mix that offers excellent drainage, incorporating sand or perlite to improve soil structure.
Sufficient light exposure
Ensure hollyleaf gilia receives plenty of sunlightâpreferably direct light for several hours a day to promote robust growth.
Correct seeding technique
Plant hollyleaf gilia seeds at the proper depth, generally just below the soil surface, and lightly cover them with a fine layer of soil.
Temperature management
Keep the germination area within the optimal temperature range to encourage healthy seedling development. Using a heat mat can help maintain consistent warmth if needed.


