How to Propagate Showy gilia?
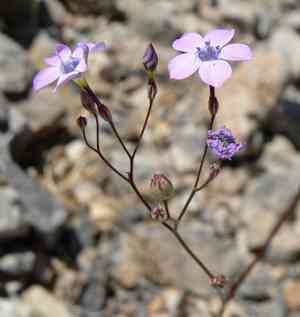
Gilia tricolor, a stunning, arid-resistant wild bloom, flourishes in permeable earth and ample sunlight. To cultivate, scatter seeds directly onto the soil's top layer, lightly concealing them for peak sprouting. Verify the location is devoid of unwanted vegetation and supply intermittent irrigation during the initial growth phase to aid development. Adequate distance between plants is vital to prevent congestion and foster robust blossoming.
Optimal Period for Showy Gilia Propagation
Propagation Method
Seeding
Propagation Period
Spring
Essential Tools for Showy Gilia Propagation
Seed Tray
A seed tray offers a controlled setting for showy gilia seed germination. It ensures uniform seed distribution and adequate growth space, vital for robust seedling development.
Seed Starting Mix
A light, well-draining seed starting mix supports the delicate root systems of germinating showy gilia seeds. This medium guarantees sufficient moisture retention and air circulation.
Seed Dibber
A seed dibber aids in creating precise holes for planting showy gilia seeds at the correct depth. This tool prevents seeds from being sown too deep, enhancing germination rates.
Watering Can with Fine Rose
A watering can equipped with a fine rose provides gentle, even water distribution, preventing soil disruption and ensuring showy gilia seedlings receive adequate hydration without over-saturation.
Labels and Marker
Labels and a waterproof marker are crucial for tracking showy gilia propagation progress. This helps maintain accurate records and prevents confusion.
Heat Mat
A heat mat delivers consistent warmth from below to encourage showy gilia seed germination, especially in cooler conditions. It helps maintain the ideal soil temperature for quicker and more reliable sprouting.
Humidity Dome
A humidity dome maintains elevated humidity levels around seedlings, reducing water loss and creating an optimal micro-environment for showy gilia seed germination and initial growth.
Seedling Light
A seedling light ensures showy gilia seedlings receive ample illumination, particularly during early stages when natural light might be insufficient. This fosters strong and healthy development.
Seedling Tray
Once showy gilia seeds sprout, transplanting them to a seedling tray allows for continued growth with more room. This step helps prevent overcrowding and root entanglement.
How to Propagate Showy Gilia?
Propagation Type
Simple
Caring for Your Newly Propagated Showy Gilia
Caring for Your Newly Propagated Showy Gilia
Post-transplant, ensure showy gilia receives ample sunlight. Water plants moderately, allowing soil to dry between waterings. Apply a balanced, low-nitrogen fertilizer sparingly during the growing season. Regularly check for pests and diseases, removing affected parts promptly to promote healthy growth.
Common Errors to Avoid When Propagating Showy Gilia
Overwatering
Excessive moisture can lead to root rot and fungal issues, severely impacting showy gilia's growth and survival.
Incorrect soil type
Using poorly draining soil can suffocate roots and hinder proper nutrient absorption, essential for showy gilia's propagation.
Inadequate light
Showy gilia needs abundant sunlight for successful growth. Placing it in low light conditions can result in weak, elongated growth.
Improper seed handling
Handling seeds too roughly or planting them too deep can impede germination and lead to poor propagation success.
Tips For Propagating Showy Gilia
Moderate watering
Water showy gilia sparingly to keep the soil moist but not waterlogged, ensuring healthy root development.
Well-draining soil
Utilize sandy or loamy soil with good drainage to provide an optimal growing environment for showy gilia.
Sufficient sunlight
Place showy gilia in an area where it will receive at least 6 hours of direct sunlight daily for vigorous growth.
Careful seed sowing
Handle seeds gently and plant them at the correct depth, usually just below the soil surface, to promote successful germination.


