How to Propagate Erica bracteolaris?
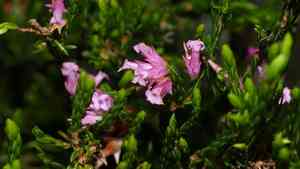
Erica bracteolaris can be successfully multiplied through the use of stem sections. Choose vigorous, partially matured stems and make a cut beneath a joint. Detach the bottom foliage, immerse the severed tip in rooting compound, and embed it in a substrate that drains efficiently. Maintain consistent moisture in the medium and ensure diffused illumination. Perseverance is vital, as root development may require an extended period, yet this technique produces resilient specimens.
Optimal Period for Erica Bracteolaris Propagation
Propagation Method
Cutting
Propagation Period
Spring,Summer
Tools Required for Erica Bracteolaris Propagation
Propagation Tray
This tray is vital for organizing and holding erica bracteolaris cuttings within a controlled setting. It assists in maintaining moisture and supports early root establishment.
Rooting Hormone
Rooting hormone enhances the probability of successful rooting by stimulating root growth. For erica bracteolaris, this can be especially helpful for quicker, healthier root development.
Sharp Pruners
Sharp pruners are essential for taking clean cuts from the parent erica bracteolaris plant. Clean cuts minimize tissue damage and lower disease risk, ensuring healthier cuttings.
Misting Bottle
A misting bottle is used to maintain humidity around erica bracteolaris cuttings, which is crucial for preventing dehydration and encouraging root development in the delicate initial stages.
Heating Mat
A heating mat provides consistent warmth from below, which can boost root formation in erica bracteolaris by keeping an ideal temperature range for root development.
Sterile Potting Mix
Employing a sterile potting mix reduces the chance of infection and disease. For erica bracteolaris, a well-draining yet moisture-retentive medium supports healthy root growth and prevents waterlogging.
Labels and Markers
Labels and markers are important for tracking different cuttings and their progress, ensuring organized propagation and preventing confusion.
How to Propagate Erica Bracteolaris?
Propagation Type
Moderately Difficult
Post-Propagation Care for Your Erica Bracteolaris
How to Care for Your Newly Propagated Erica Bracteolaris?
Once erica bracteolaris cuttings have rooted, gradually introduce them to lower humidity by incrementally removing the cover. Transplant established cuttings into individual pots with acidic soil. Provide consistent moisture, partial sunlight, and protection from extreme temperatures. Regularly inspect for pests and diseases, and apply a balanced fertilizer formulated for acid-loving plants according to product directions.
Common Errors to Avoid When Propagating Erica Bracteolaris
Overwatering
Too much moisture can lead to root rot and fungal issues, impeding root development and potentially killing the plant.
Using the wrong soil type
Incorrect soil can result in poor drainage and compaction, which can suffocate the plant's roots and hinder growth.
Incorrect light conditions
Providing too much or too little light can stress the plant, leading to weak or unhealthy growth.
Improper cutting technique
Damaged or poorly prepared cuttings may fail to root or become vulnerable to disease.
Neglecting humidity requirements
Insufficient humidity can cause cuttings to dry out and fail to establish roots.
Tips For Propagating Erica Bracteolaris
Use well-draining soil
When propagating erica bracteolaris, use a sandy or gritty soil mix to ensure good drainage and prevent root rot.
Water sparingly
Maintain moist but not waterlogged soil to promote healthy root development. Allow the soil surface to dry between waterings.
Provide bright, indirect light
Erica bracteolaris benefits from ample light without being exposed to direct, harsh sunlight. A location with filtered light is ideal.
Take healthy cuttings
Use sharp, sterilized tools to take cuttings from healthy, non-flowering stems to improve the chances of successful rooting.
Maintain adequate humidity
Place cuttings in a humid environment or cover them with a plastic dome to retain moisture and facilitate rooting. Regularly mist the cuttings if needed.



