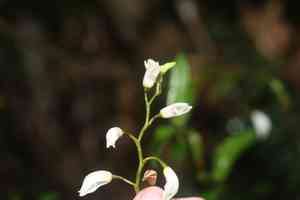
How to Propagate Parrotbeak orchid?
The Parrotbeak orchid flourishes in humid, aerated substrates and luminous, diffused light. For reproduction, the suggested technique involves separation. Gently divide robust rhizomes and transfer them into an appropriate orchid medium to foster vigorous development. Sustain consistent warmth and elevated atmospheric moisture to aid root formation. Frequent spraying and preventing excessive moisture will enhance the outcome.
Optimal Time for Parrotbeak Orchid Propagation
Method of Propagation
Division
Propagation Period
Spring,Autumn
Tools Required for Parrotbeak Orchid Propagation
Sharp Knife or Pruning Shears
Utilized for precise separation of parrotbeak orchid rhizomes or pseudobulbs. A clean cut minimizes harm and infection risk.
Sterilizing Solution
Crucial for sanitizing tools before and after use, preventing pathogen introduction that could harm parrotbeak orchid.
Orchid-Specific Potting Mix
A specialized substrate ensuring adequate aeration, drainage, and moisture retention, vital for parrotbeak orchid's delicate roots.
Plant Labels
Useful for identifying parrotbeak orchid divisions and monitoring their development. Essential for organized propagation records.
Small Pots or Containers
Used to house individual parrotbeak orchid divisions post-separation. Containers should allow good drainage, mimicking the plant's natural setting.
Rooting Hormone
Optional but beneficial for stimulating root growth after division. Especially helpful for smaller or less mature parrotbeak orchid sections.
Plastic Bags or Humidity Domes
Create a moist environment to support new parrotbeak orchid divisions, reducing stress and encouraging faster root establishment.
How to Propagate Parrotbeak Orchid?
Propagation Type
Easy
Post-Propagation Care for Your Parrotbeak Orchid
Post-Propagation Care for Your Parrotbeak Orchid
After propagation, provide parrotbeak orchid with consistent humidity, ideally using a humidity tray or humidifier. Water regularly, allowing the medium to dry slightly between waterings. Apply a balanced orchid fertilizer monthly during the growing season. Monitor for new growth to confirm establishment. Gradually introduce to more light as they strengthen.
Common Errors to Avoid When Propagating Parrotbeak Orchid
Overwatering
Excessive watering can cause root rot, impairing nutrient uptake and potentially killing the plant.
Improper Lighting
Too much direct sun or insufficient light can stress the plant. Direct sun can scorch leaves, while too little light hinders growth.
Incorrect Substrate
Using a substrate that retains too much moisture or lacks aeration can harm roots. Parrotbeak orchid needs a well-draining, airy substrate for healthy growth.
Inadequate Humidity
Failure to maintain high humidity can lead to dry leaves and poor growth, as parrotbeak orchid thrives in humid conditions.
Lack of Ventilation
Poor air circulation can promote mold and fungal growth, leading to diseases that can damage or kill the plant.
Tips for Propagating Parrotbeak Orchid
Use Appropriate Medium
Choose a well-draining, airy substrate like orchid bark, perlite, and sphagnum moss to replicate parrotbeak orchid's natural habitat.
Maintain High Humidity
Keep humidity levels high, ideally 60-80%, to encourage proper growth and prevent drying out.
Provide Indirect Light
Place parrotbeak orchid where it receives bright, indirect light, mimicking its natural understory environment, avoiding direct sun.
Water Sparingly
Water when the top inch of the substrate feels dry, ensuring roots are not waterlogged to prevent rot.
Ensure Good Ventilation
Ensure proper air circulation around the plant to prevent fungal infections and promote strong, healthy growth.


