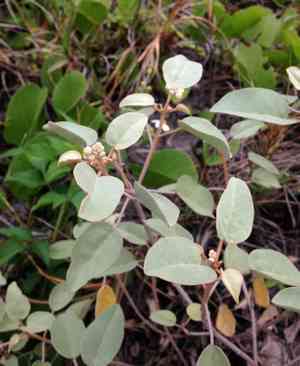
How to Propagate Gulf croton?
Crucial for sandy coastal regions, gulf croton flourishes in adequately drained substrates under direct sunlight. For reproduction, robust stem sections are advised, ensuring they possess a slight firmness yet remain pliable. Insert these sections into damp, sandy earth, maintaining a consistently moist atmosphere to foster root development. Consistent yet measured irrigation is vital, preventing excessive saturation to avert decay. Implementing these precise methods guarantees the prosperous growth and integration of gulf croton within the landscape.
Optimal Time for Gulf Croton Propagation
Propagation Method
Cutting
Propagation Period
Spring,Summer
Tools Required for Gulf Croton Propagation
Sharp Pruning Shears
Sharp pruning shears are crucial for obtaining clean cuttings from gulf croton. Utilizing clean, sharp instruments minimizes harm to both the parent plant and the cutting, which aids in preventing diseases and promotes faster healing and rooting.
Rooting Hormone
A rooting hormone powder or gel assists in accelerating the rooting process for gulf croton cuttings. It contains growth hormones that stimulate root development, enhancing the likelihood of successful propagation.
Propagation Trays
Propagation trays offer a controlled environment for gulf croton cuttings. The confined space helps maintain consistent moisture levels and provides support for the developing roots.
Seedling Heat Mat
A seedling heat mat positioned beneath the propagation tray helps maintain a consistent, warm temperature, which is vital for the root development of gulf croton. Proper temperature regulation ensures quicker and more vigorous root growth.
Humidity Dome
A humidity dome helps to maintain elevated humidity levels around gulf croton cuttings. This reduces moisture loss through transpiration and creates an ideal microenvironment for root initiation and growth.
Sterile Potting Mix
A sterile potting mix provides a clean, disease-free medium for rooting gulf croton cuttings. It ensures the young plants are not exposed to pathogens while offering good drainage and root aeration.
Disinfectant Solution
A disinfectant solution (e.g., a diluted bleach solution) is used to sterilize tools and containers prior to use. This prevents the introduction of diseases to gulf croton cuttings, ensuring a healthier propagation process.
How to Propagate Gulf Croton?
Propagation Type
Moderately Difficult
Caring for Your Newly Propagated Gulf Croton
Caring for Your Newly Propagated Gulf Croton
Once gulf croton cuttings have established roots, gradually acclimate them to normal growing conditions by reducing humidity and increasing light exposure. Transplant them into individual pots with well-draining soil and continue to water regularly, allowing the top inch of soil to dry out between waterings. Ensure gulf croton is placed in a location with indirect sunlight to prevent leaf scorch. Regularly check for pests and apply a balanced, diluted fertilizer every 4-6 weeks.
Common Mistakes to Avoid When Propagating Gulf Croton
Incorrect soil type
Using soil that is too dense or lacks proper drainage can lead to root rot and poor plant health.
Overwatering
Providing gulf croton with excessive water can cause roots to become waterlogged, resulting in root rot and fungal diseases.
Inadequate sunlight
Failure to provide sufficient light can result in weak, leggy plants that are more vulnerable to pests and diseases.
Improper cutting technique
Using dull tools or making imprecise cuts can damage plant tissue, reducing the chances of successful rooting.
Tips For Propagating Gulf Croton
Use well-draining soil
Opt for a sandy or loamy soil mix to ensure proper drainage and prevent waterlogging issues.
Water sparingly
Allow the soil to dry out slightly between waterings to prevent root rot and encourage healthy growth.
Provide sufficient light
Place gulf croton in a location that receives ample bright, indirect light to support robust growth and development.
Use sharp, sterile tools
Ensure that pruning shears or knives are sharp and clean to make precise cuts and minimize the risk of infection.


