How to Propagate Three-seed croton?
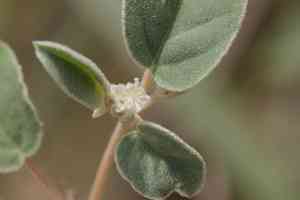
Three-seed croton flourishes in adequately drained substrates and requires abundant solar exposure. To multiply three-seed croton, obtain sections from robust, established specimens, making sure each possesses a minimum of two leaf nodes. Submerge the severed extremities in rooting compound to stimulate root formation, subsequently embedding them in a damp, sandy substrate. Sustain a warm, humid atmosphere to foster root expansion, and exercise patience, as the rooting process may span multiple weeks.
Optimal Time for Three-seed Croton Propagation
Propagation Method
Cutting
Propagation Period
Spring,Summer
Tools Required for Three-seed Croton Propagation
Pruning Shears
Utilized for taking clean cuttings from the parent plant, minimizing damage which is vital for reducing infection risk and fostering healthy root development in three-seed croton.
Rooting Hormone
Applied to the severed end of cuttings to boost root formation, ensuring a greater success rate for developing robust, viable roots in three-seed croton.
Propagation Tray
Offers a regulated environment for rooting cuttings, guaranteeing sufficient drainage and air circulation which is crucial for preventing rot and ensuring healthy growth of three-seed croton.
Sterile Scalpel
Ensures precise and clean incisions, lowering the probability of disease and promoting faster healing and rooting for three-seed croton.
Humidity Dome
Maintains suitable humidity levels around the cuttings, which is essential for preventing desiccation and encouraging root formation in three-seed croton.
Mister Bottle
Used to regularly dampen the cuttings without oversaturating, aiding in maintaining the necessary humidity and hydration for three-seed croton.
Heat Mat
Provides consistent warmth to the root area, which is particularly advantageous for three-seed croton as it promotes quicker and more vigorous root development.
Perlite and Peat Mix
Offers a well-draining and aerated growing medium, critical for preventing root rot and ensuring healthy root growth in three-seed croton.
How to Propagate Three-seed Croton?
Propagation Difficulty
Moderately Difficult
Caring for Your Newly Propagated Three-seed Croton
Caring for Your Newly Propagated Three-seed Croton
Once the new three-seed croton plants have rooted and begun to grow, gradually introduce them to standard growing conditions by removing the plastic covering. Continue to keep the soil consistently moist and provide bright, indirect illumination. As the plants become established, ensure they are protected from pests and regularly check for disease symptoms. Fertilize sparingly with a balanced, slow-release fertilizer to support ongoing growth.
Common Errors to Avoid When Propagating Three-seed Croton
Overwatering
Excessive moisture can lead to root decay, which is detrimental to the health and development of three-seed croton.
Insufficient Light
A lack of adequate sunlight can result in feeble growth and poor development of new plants.
Using the Wrong Soil
Poor soil drainage can hinder root development and elevate the risk of disease.
Improper Cutting Technique
Using dull or unclean tools can harm plant tissue and introduce pathogens.
Ignoring Humidity Needs
Failing to maintain adequate humidity can cause the cuttings to dry out before they can root.
Tips For Propagating Three-seed Croton
Moderate Watering
Ensure the soil is damp but not waterlogged to prevent root rot.
Provide Adequate Light
Position the cuttings in a spot where they receive indirect but bright light to encourage growth.
Use Well-Draining Soil
Choose a soil mixture that allows excess water to drain away, preventing waterlogging and root rot.
Clean Cutting Tools
Always use sharp, sanitized tools to make clean cuts and reduce the risk of infections.
Maintain Humidity
Cover the cuttings with a plastic bag or use a humidity dome to keep the environment humid and aid rooting.


