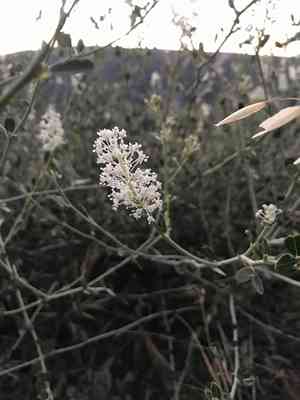
How to Propagate Palmer ceanothus?
To multiply palmer ceanothus, utilize semi-hardwood sections possessing a minimum of three nodes. Apply a rooting stimulant to the cuttings to boost development, and sustain elevated humidity. Confirm their placement in a substrate that drains effectively, exposed to filtered sunlight. Keep the growing medium damp, yet not oversaturated, throughout the rooting phase. This method encourages robust root formation particularly beneficial for palmer ceanothus.
Optimal Period for Palmer Ceanothus Propagation
Propagation Type
Cutting
Propagation Season
Spring,Summer
Equipment for Palmer Ceanothus Propagation
Sharp Pruning Shears
Utilized for making clean, precise cuts on palmer ceanothus. Clean cuts minimize harm to the parent plant and boost rooting success.
Rooting Hormone
Stimulates root development in palmer ceanothus cuttings. Applied to the cut end, it encourages quicker and stronger root growth.
Sterile Potting Mix
A well-draining, sterile medium supports palmer ceanothus cutting root development by lowering disease risk and providing an ideal rooting environment.
Propagation Trays with Domes
These establish a controlled humid environment crucial for palmer ceanothus cuttings to prevent drying out and promote root formation.
Heat Mat
Maintains a consistent, slightly elevated soil temperature, which benefits the root development of palmer ceanothus cuttings.
Spray Bottle
Delivers a fine mist to cuttings, keeping them moist without waterlogging, vital for successful palmer ceanothus propagation.
Labeling Stakes
Aids in identifying palmer ceanothus cuttings and maintaining accurate records, important for tracking progress and care needs.
Disinfectant Solution
Used to sanitize tools and containers to prevent contamination and infection of palmer ceanothus cuttings, ensuring healthy, viable plants.
Propagating Palmer Ceanothus Guide
Propagation Type
Moderately Difficult
Post-Propagation Care for Palmer Ceanothus
How to Care for Your Newly Propagated Palmer Ceanothus?
After propagation, ensure palmer ceanothus is planted in well-draining soil and receives ample sunlight. Water moderately, allowing soil to dry between waterings to prevent root rot. Mulch around the base to retain moisture and protect roots. Prune occasionally to maintain shape and encourage bushier growth. Avoid excessive fertilization; use a balanced, slow-release fertilizer if needed.
Common Errors to Avoid When Propagating Palmer Ceanothus
Overwatering
Excessive water can lead to root rot and fungal diseases, especially harmful for palmer ceanothus, which prefers well-drained soil.
Improper Soil Mix
Using rich, water-retentive soil instead of a suitable, well-draining mix can cause roots to suffocate and decay.
Lack of Sunlight
Placing palmer ceanothus in a shaded area can impede its growth and propagation, as it thrives in full sun.
Incorrect Cutting Technique
Taking cuttings from unhealthy or unsuitable plant parts can result in low rooting success rates and plant stress.
Neglecting Pest Control
Failure to monitor for pests can lead to infestations, weakening the plant and reducing propagation success.
Advice for Propagating Palmer Ceanothus
Proper Water Management
Ensure soil drains well and water only when necessary, allowing the soil to dry out between waterings.
Ideal Soil Composition
Use a gritty or sandy soil mix to promote optimal drainage, mimicking palmer ceanothus's natural habitat.
Sunlight Exposure
Position the plant where it can receive full sunlight for most of the day to encourage healthy growth.
Healthy Cuttings
Select robust, non-flowering cuttings from the current season's growth for improved rooting success.
Pest Monitoring
Regularly inspect the plant and propagation area for pests and take immediate action if any are found.


