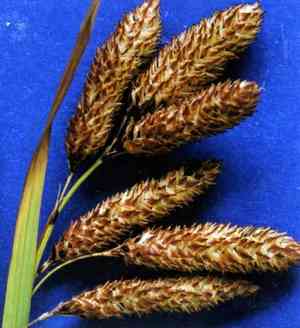
How to Propagate Mertens' sedge?
Mertens' sedge flourishes in damp, shaded habitats, frequently observed in riverside areas and marshlands. For propagation, begin with premium seeds, carefully dispersing them on the soil's surface prior to delicately blanketing them with a fine stratum of compost or earth. Unwavering humidity is vital during sprouting to guarantee effective propagation. Periodically inspect the substrate to maintain its moistness without saturation, fostering robust development and eventual rooting.
Optimal Time for Mertens' Sedge Propagation
Propagation Method
Seeding
Propagation Period
Spring
Tools for Mertens' Sedge Propagation
Seed Trays
Seed trays are crucial for planting mertens' sedge seeds. They offer a controlled setting for sprouting, ensuring ample room and ideal conditions for young seedlings to establish strong root systems.
Seed Starting Mix
This sterile, light medium supports the initial growth of mertens' sedge by providing good drainage and air circulation. It reduces disease risk and encourages robust seedling development.
Watering Can with Fine Rose
A watering can with a fine rose attachment gently irrigates mertens' sedge seeds without dislodging them or compacting the soil. This ensures even moisture distribution, vital for germination.
Label and Permanent Marker
Accurate labeling with a durable marker helps track the planting date and variety of mertens' sedge. This is essential for monitoring germination progress and managing multiple sowings.
Seedling Heat Mat
A seedling heat mat provides consistent warmth from below to seed trays, boosting the germination rate of mertens' sedge by maintaining an optimal soil temperature.
Humidity Dome
A humidity dome helps maintain a moist environment, preventing the drying out of mertens' sedge seeds and ensuring successful sprouting.
LED Grow Lights
LED grow lights ensure that mertens' sedge seedlings receive sufficient illumination if natural light is inadequate. This prevents stretching and supports vigorous, healthy growth.
Seed Dibber
A seed dibber is used to create uniform planting holes at the correct depth for mertens' sedge seeds, ensuring consistent and successful sprouting.
Tweezers
Tweezers are useful for handling mertens' sedge seeds, especially if they are small or require precise placement in the seed tray.
Mister or Spray Bottle
A fine misting spray bottle helps maintain soil moisture around mertens' sedge seeds without waterlogging, which is crucial for preventing fungal diseases.
Propagating Mertens' Sedge
Propagation Difficulty
Simple
Caring for Newly Propagated Mertens' Sedge
Caring for Newly Propagated Mertens' Sedge
Mertens' sedge prefers consistently moist soil and partial shade but can adapt to various light conditions. Regularly water the plant to maintain soil moisture, particularly during dry periods. Mulching can help retain soil moisture and regulate temperature. Prune dead or damaged foliage to encourage healthy growth. Fertilize with a balanced, slow-release fertilizer annually to support its growth.
Common Mistakes to Avoid When Propagating Mertens' Sedge
Incorrect Soil Type
Using poorly drained or overly rich soils can lead to waterlogged conditions and nutrient imbalances, which impede root development and overall plant health.
Overwatering
Excessive watering damages roots and can cause root rot, hindering successful propagation.
Inadequate Light
Insufficient light results in weak, leggy growth, impacting the establishment of new plantlets.
Neglecting Acclimation
Failing to acclimate young plants to outdoor conditions can cause transplant shock, stunting growth or killing new plants.
Tips For Propagating Mertens' Sedge
Use Well-Draining Soil
Ensure the soil mix is well-draining yet retains enough moisture for the roots, promoting healthy root development.
Moderate Watering
Water moderately, ensuring the soil is moist but not waterlogged, to prevent roots from rotting.
Indirect Light
Place young plants in a location with indirect light to prevent scorching while ensuring they receive enough energy for growth.
Gradual Acclimation
Gradually introduce young plants to outdoor conditions to minimize transplant shock, starting with a few hours of outdoor exposure and increasing over time.


