How to Propagate Marsh straw sedge?
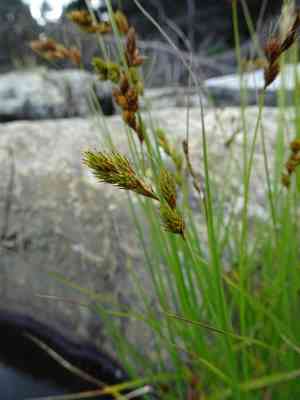
Carex lurida is a adaptable variety frequently encountered in damp, boggy habitats. Perfectly suited for waterlogged ground, it flourishes with little attention. Reproduction is best achieved via division, making sure every segment possesses roots for proper development. Splitting clusters aids in preserving plant vitality and controlling dimensions. Carefully detach sections during the active cultivation period and re-establish them to foster robust growth.
Optimal Time for Marsh Straw Sedge Propagation
Propagation Method
Division
Propagation Period
Spring,Autumn
Tools for Marsh Straw Sedge Propagation
Sharp Garden Spade
A keen garden spade is crucial for dividing marsh straw sedge. It enables clean, precise cuts through plant clumps, minimizing root damage and ensuring each division has a viable root system for successful re-establishment.
Hand Pruners
Hand pruners are used to trim any damaged or dead leaves and stems from each marsh straw sedge division. This reduces disease risk and allows the plant to focus energy on root and shoot growth during re-establishment.
Garden Fork
A garden fork is employed to carefully lift and separate marsh straw sedge divisions from the soil. Its tines gently tease apart intertwined roots without excessive damage, vital for maintaining plant health.
Rooting Hormone
Though not always required, a rooting hormone can aid root development in new marsh straw sedge divisions. It boosts the chances of successful rooting, especially in less-than-ideal soil conditions.
Watering Can with Fine Rose
A watering can with a fine rose attachment ensures gentle irrigation of newly divided marsh straw sedge plants. This prevents soil erosion and keeps delicate roots moist without disturbance.
Plant Labels
Plant labels are helpful for tracking different marsh straw sedge divisions, especially if propagated for various garden areas or for sale. Labeling ensures proper identification and care.
Mulch
Organic mulch is important for retaining moisture around marsh straw sedge divisions and suppressing weeds. It also helps regulate soil temperature, providing a stable environment for root development.
Marsh Straw Sedge Propagation Guide
Propagation Difficulty
Easy
Post-Propagation Care for Marsh Straw Sedge
Post-Propagation Care for Marsh Straw Sedge
After propagation, keep the soil consistently moist but not waterlogged. Apply a layer of mulch to help retain soil moisture and suppress weeds. Regularly check for signs of pests or disease, and remove any dead or damaged leaves to encourage healthy growth. For the best results, provide a balance of sun and shade to replicate the natural growing conditions of marsh straw sedge.
Common Errors to Avoid When Propagating Marsh Straw Sedge
Overwatering
Excessive moisture can lead to root rot, which severely affects the plant's overall health and can cause cuttings to decay before they establish roots.
Poor Soil Drainage
Using soil that retains too much water causes the roots to suffocate, impeding growth and increasing the risk of fungal infections.
Inadequate Light
Insufficient sunlight hampers photosynthesis, leading to weak, spindly growth that cannot support healthy propagation.
Improper Cutting Techniques
Taking cuttings incorrectly, such as using blunt tools or damaging the plant, can introduce pathogens and harm the parent plant and cuttings.
Neglecting Humidity Levels
Failing to maintain adequate humidity can result in desiccation of cuttings, causing them to dry out and fail to root.
Tips For Propagating Marsh Straw Sedge
Maintain Moderate Watering
Ensure the soil is consistently moist but not waterlogged to prevent root rot and promote healthy growth.
Use Well-Draining Soil
Opt for a sandy or loamy soil mix that allows excess water to drain, providing the roots with necessary oxygen and preventing fungal issues.
Provide Adequate Light
Place cuttings in a location where they receive indirect but bright light to support robust development without causing stress.
Use Sterile, Sharp Cutting Tools
Ensure cutting tools are clean and sharp to make precise cuts, reducing the risk of infection and promoting quicker healing.
Ensure High Humidity
Create a humid environment, possibly with a plastic cover or misting, to keep cuttings hydrated and encourage rooting.


