How to Propagate Northern sedge?
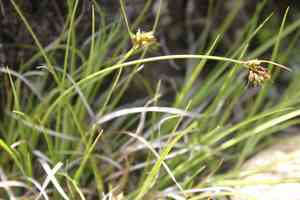
Northern sedge, a perennial member of the Cyperaceae family, thrives in colder environments. To successfully propagate this plant from seeds, plant them in a perpetually damp, adequately draining growing medium. A thin layer of soil should cover the seeds to facilitate sprouting. Provide consistent humidity and moderate illumination to encourage robust development. Periodically verify sufficient moisture without allowing the substrate to become waterlogged. Under these circumstances, germination is generally dependable.
Optimal Period for Northern Sedge Propagation
Propagation Method
Seeding
Propagation Period
Spring
Tools for Northern Sedge Propagation
Seed Trays
Seed trays are vital for organizing and sifting the small northern sedge seeds during sowing. They offer a controlled setting for effective seed germination.
Fine-mesh Sieve
A fine-mesh sieve is especially useful for ensuring only the best quality northern sedge seeds are used. It removes debris and uneven seed particles, promoting uniform development.
Seed Starting Mix
Employing a well-draining seed starting mix is critical for northern sedge, ensuring proper air circulation and moisture retention. This blend provides a balanced nutrient environment for young plants.
Misting Bottle
A misting bottle enables precise watering of northern sedge seeds without dislodging or harming them. Maintaining consistent moisture is crucial during initial germination stages.
Heat Mat
A heat mat can help regulate soil temperature, which is important for successful northern sedge seed germination, particularly in colder climates or seasons.
Humidity Dome
A humidity dome aids in maintaining high humidity levels, beneficial for northern sedge's germination process. It prevents rapid moisture loss and creates a stable microenvironment.
Small Trowel
A small trowel is needed for gently transplanting northern sedge seedlings once they are strong enough for potting. It minimizes root disturbance and ensures a smooth transition.
Plant Labels
Plant labels are important for tracking northern sedge seedlings, especially when multiple species are sown. Clear identification helps monitor growth and ensures accurate records.
How to Propagate Northern Sedge?
Propagation Type
Simple
Caring for Your Newly Propagated Northern Sedge
Caring for Your Newly Propagated Northern Sedge
Once seedlings have emerged and developed a few sets of true leaves, transfer them into individual pots with a similar well-draining soil mixture. Gradually introduce the seedlings to outdoor conditions by placing them in a protected area and increasing sun exposure over several days. Maintain a consistent watering schedule, ensuring the soil stays moist but not waterlogged. Regularly check for pests and diseases, and apply a thin layer of mulch to help retain moisture and suppress weeds. As the plants mature, they can be moved to their final outdoor locations, ideally in a well-drained, shaded to partially shaded spot.
Common Mistakes to Avoid When Propagating Northern Sedge
Improper soil selection
Using soil that is too compact or lacks adequate drainage can lead to root rot and stunted development.
Overwatering
Excessive irrigation can suffocate roots and foster an environment conducive to fungal diseases.
Insufficient light
A lack of adequate sunlight can hinder photosynthesis, resulting in weak and leggy growth.
Incorrect seed handling
Failing to stratify seeds or planting them too deeply can reduce germination rates.
Tips For Propagating Northern Sedge
Use well-draining soil
Select a sandy or loamy soil that allows water to pass through easily to prevent root rot.
Moderate watering
Water the plant enough to keep the soil damp but not waterlogged, ensuring roots have access to oxygen.
Adequate sunlight
Place northern sedge where it receives partial to full sunlight to promote healthy photosynthesis.
Proper seed stratification
Stratify seeds by exposing them to cold conditions before planting to break dormancy and enhance germination rates.


