How to Propagate Smallhead doll's daisy?
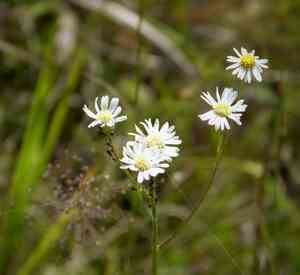
The smallhead doll's daisy flourishes in diverse soil compositions, encompassing sandy and adequately drained varieties. For reproduction, employing cuttings from vigorous, established specimens guarantees successful development. Relocate cuttings into prepared substrate, maintaining consistent moisture until root systems are firmly set. Place in areas receiving full sunlight to partial shade, supplying a moderate amount of water. Once growth recommences, ensure appropriate spacing to prevent congestion and foster strong plant vitality.
Optimal Time for Smallhead Doll's Daisy Propagation
Propagation Method
Cuttings
Propagation Period
Spring,Summer
Tools for Smallhead Doll's Daisy Propagation
Pruning Shears
Utilized for taking healthy, clean cuttings from smallhead doll's daisy. Ensure blades are sharp and sanitized to prevent disease spread.
Rooting Hormone
Applied to the cut end of smallhead doll's daisy cuttings to stimulate root growth, boosting propagation success rates.
Propagation Trays
Offer a controlled setting for smallhead doll's daisy cuttings to root. They maintain appropriate moisture and allow for easy observation and care.
Seedling Heating Mat
Helps maintain an ideal temperature for root development in smallhead doll's daisy cuttings, especially useful during colder periods.
Mist Sprayer
Ensures smallhead doll's daisy cuttings stay sufficiently hydrated without waterlogging the soil, encouraging healthy root formation.
Sterile Potting Mix
Provides a disease-free medium for smallhead doll's daisy cuttings to root in, ensuring good aeration and proper drainage.
Plastic Domes or Humidity Tents
Maintain high humidity around smallhead doll's daisy cuttings, reducing water stress and enhancing root development.
Labels and Markers
Used to identify and date smallhead doll's daisy cuttings, assisting in monitoring and documenting the propagation process.
Propagating Smallhead Doll's Daisy
Propagation Type
Simple
Caring for Your Newly Propagated Smallhead Doll's Daisy
Caring for Your Newly Propagated Smallhead Doll's Daisy
Once cuttings have developed strong roots, typically in 4-6 weeks, gradually introduce them to outdoor conditions. Transplant the new smallhead doll's daisy plants into the garden or larger containers with well-draining soil. Water consistently but avoid soggy conditions. Provide full sun to partial shade and ensure good air circulation to prevent fungal issues.
Common Errors to Avoid When Propagating Smallhead Doll's Daisy
Overwatering
Excessive water can lead to root rot, stunted growth, and plant demise. Smallhead doll's daisy prefers well-drained soil.
Incorrect Soil Type
Using dense, clay-rich soil can impede root development and water drainage, resulting in poor plant health.
Insufficient Light
Lack of adequate sunlight can lead to weak, leggy plants with fewer blooms.
Ignoring Pest Control
Failing to monitor and manage pests can result in infestations that harm or destroy young plants.
Advice for Propagating Smallhead Doll's Daisy
Well-Drained Soil
Utilize sandy or loamy soil to ensure proper drainage, preventing root rot.
Moderate Watering
Water plants consistently but avoid saturating the soil. Allowing the top inch of soil to dry between waterings helps prevent root problems.
Adequate Sunlight
Position smallhead doll's daisy in a spot where it receives full sun to partial shade for optimal growth.
Regular Monitoring
Inspect plants frequently for signs of pests or diseases and address any issues promptly to maintain plant health.



