How to Propagate Lily-pad begonia?
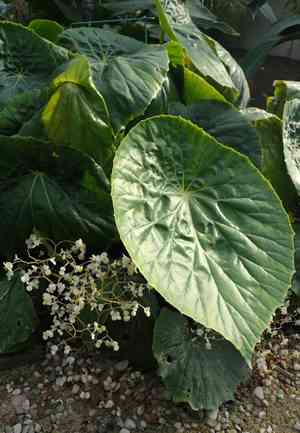
Begonia 'Lily-pad' is a unique botanical specimen recognized for its expansive, circular foliage reminiscent of water lilies. For propagation, utilize stem sections harvested from robust, established plants. Confirm that each cutting possesses a minimum of one or two nodes, and strip away any basal leaves to stimulate root formation. Position these cuttings in a potting blend that drains effectively, maintaining consistent moisture without saturation. A damp atmosphere and diffused illumination are optimal conditions for fostering successful root emergence.
Optimal Time for Lily-pad Begonia Propagation
Propagation Method
Cuttings
Propagation Period
Spring,Summer
Tools Required for Lily-pad Begonia Propagation
Pruning Shears
Shears are vital for taking cuttings from lily-pad begonia. They ensure precise cuts to minimize plant trauma, promoting robust cuttings capable of successful rooting. Use sanitized, sharp shears to prevent disease spread.
Rooting Hormone
Rooting hormone aids in the development of roots on lily-pad begonia cuttings. This powder or gel contains auxins, plant hormones that stimulate root growth, thereby increasing the speed and success rate of propagation.
Propagation Trays
Propagation trays with individual compartments help keep lily-pad begonia cuttings organized and provide an ideal environment for root growth. They allow for proper drainage and air circulation, reducing the risk of rot and other problems.
Mist Sprayer
A mist sprayer is used to maintain high humidity around lily-pad begonia cuttings without over-saturating the soil. Consistent humidity helps prevent drying out and supports the rooting process, as lily-pad begonia thrives in moist conditions.
Heat Mat
A heat mat placed beneath the propagation tray provides consistent, gentle warmth, encouraging faster root formation for lily-pad begonia. Maintaining the correct soil temperature can be crucial for optimal root development, especially in cooler climates.
Transparent Dome
A clear dome or mini greenhouse covers the propagation tray to maintain high humidity and stable temperatures for lily-pad begonia. It creates a microclimate that reduces stress on cuttings and accelerates rooting.
Propagating Lily-pad Begonia: A Guide
Propagation Difficulty
Easy
Caring for Your Newly Propagated Lily-pad Begonia
Caring for Your Newly Propagated Lily-pad Begonia
Once cuttings have established strong roots, gradually introduce them to normal humidity levels by removing the cover for longer durations daily. Transplant the young lily-pad begonia into a larger pot with well-draining soil. Water moderately, avoiding waterlogging. Position the plant in an area with indirect sunlight, and maintain a consistent temperature. Regularly fertilize with a balanced, water-soluble solution to encourage healthy growth. Monitoring for pests and preventing overwatering will ensure a thriving plant post-propagation.
Common Errors to Avoid When Propagating Lily-pad Begonia
Overwatering
Excessive watering can lead to root rot and other fungal diseases, significantly hindering propagation success.
Insufficient Humidity
Failure to maintain adequate humidity levels can cause dehydration of the propagation cutting, impeding root development.
Inadequate Lighting
Placing cuttings in an area with too little light can slow growth and hinder successful root formation.
Poor Soil Mix
Using a soil mix that lacks proper drainage can result in waterlogging, leading to root rot and other issues.
Incorrect Cutting Technique
Taking cuttings improperly, such as cutting too small a section or damaging the cutting, can reduce the chances of successful propagation.
Tips for Propagating Lily-pad Begonia
Use Well-Draining Soil
Select a potting mix that ensures good air circulation to prevent waterlogging and root rot.
Maintain High Humidity
Utilize a humidity dome or mist the cutting regularly to keep the environment moist, which promotes healthier root development.
Provide Adequate Light
Place the cutting in bright but indirect light to encourage healthy growth without causing the cutting to dry out or burn.
Proper Cutting Technique
Make a clean cut just below a node using sterile tools to ensure the cutting has the best chance to develop roots.


