How to Propagate Preuss' milkvetch?
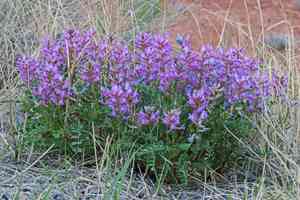
Preuss' milkvetch, a species within the pea family, flourishes in dry, stony habitats. For successful propagation, seeds require scarification to improve sprouting. A growing medium that drains efficiently supports robust development, replicating preuss' milkvetch's native surroundings. Maintain moderate moisture levels for young plants, but prevent excessive saturation. Place them in a brightly lit area to encourage peak growth. Consistent inspection for harmful insects and illnesses is crucial for preserving a vigorous specimen.
When Is the Optimal Time to Propagate Preuss' Milkvetch?
Propagation Method
Seeding
Propagation Period
Spring
What Tools Are Utilized for Preuss' Milkvetch Propagation?
Seed Tray
Used for planting seeds in a regulated setting. The tray facilitates easy observation of preuss' milkvetch sprouts and guarantees sufficient room for root growth for each seed.
Seed Starting Mix
A sterile, well-draining medium that encourages robust seed sprouting. This blend supplies vital nutrients and reduces the chance of fungal infections that could harm preuss' milkvetch young plants.
Humidity Dome
Maintains elevated moisture levels around the seeds, crucial for successful germination of preuss' milkvetch. This device aids in creating a microclimate conducive to seed emergence.
Heating Mat
Positioned beneath the seed tray to provide consistent warmth, which is vital for the germination of preuss' milkvetch, ensuring the temperature stays within the ideal range for seedling development.
Misting Bottle
Employed to gently moisten the seeds without disturbing them. Ensures that preuss' milkvetch seeds remain damp without becoming waterlogged, preventing potential fungal issues.
Grow Lights
Delivers the necessary light spectrum for photosynthesis, especially if preuss' milkvetch is being grown indoors or in low-light conditions. Promotes vigorous seedling development.
Labeling Tags
Assists in tracking various seed batches, including those of preuss' milkvetch. Essential for organization and monitoring the progress of young plants.
Fine Mesh Sieve
Used to cover seeds with a thin layer of seed starting mix or sand. This tool ensures that preuss' milkvetch seeds are covered just enough to encourage germination without impeding it.
How to Propagate Preuss' Milkvetch?
Propagation Method
Simple
How to Care for Your Newly Propagated Preuss' Milkvetch?
How to Care for Your Newly Propagated Preuss' Milkvetch?
Post-transplantation, ensure preuss' milkvetch plants are situated in full sun with well-draining soil. Water regularly, but allow the soil to dry between waterings to prevent root rot. Monitor for pests and diseases, and shield young plants from harsh weather. Mulching around the base can help retain moisture and suppress weeds. Fertilize sparingly, as preuss' milkvetch prefers low-nutrient soils typical of its natural habitat.
Common Errors to Avoid When Propagating Preuss' Milkvetch
Excessive watering
Too much water can lead to root rot, which impedes healthy root development crucial for successful propagation.
Poor soil drainage
Soil that drains inadequately can hold excess water, resulting in root rot and fungal infections.
Insufficient sunlight
A lack of adequate sunlight hinders photosynthesis, reducing the plant's energy for growth and propagation success.
Using inappropriate soil
Employing soil that is overly rich in nutrients or too dense can obstruct root development and water drainage.
Neglecting temperature control
Exposing the plant to extreme temperatures can cause stress and negatively impact its growth and propagation ability.
Tips For Propagating Preuss' Milkvetch
Appropriate watering schedule
Water the plant only when the top inch of soil feels dry, ensuring a balance between dry and moist conditions.
Well-draining soil
Utilize sandy or gritty soil to enhance drainage and prevent waterlogging. This will help prevent root rot and promote healthy growth.
Ensure ample light
Place the plant in a location that receives sufficient sunlight, ideally 6-8 hours daily, to support photosynthesis and robust growth.
Correct soil selection
Opt for a well-aerated, slightly alkaline soil mix, which aids in nutrient absorption and root development.
Maintain optimal temperature
Keep the plant in a stable environment with mild temperatures, avoiding exposure to extreme heat or cold for optimal growth.


