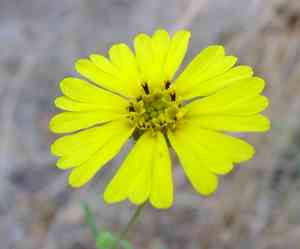
How to Propagate Smallhead arnica?
Arnica chamissonis, a member of the Arnica family, flourishes when reproduced via seeding. Seeding is best carried out in areas with dappled sunlight, utilizing soil that drains effectively and possesses moderate fertility. To achieve peak outcomes, ensure continuous hydration without waterlogging, and contemplate a thin layer of organic ground cover to aid seedling growth and soil integrity.
Optimal Time for Smallhead Arnica Propagation
Propagation Method
Seeding
Propagation Period
Spring
Tools for Smallhead Arnica Propagation
Seed trays
Seed trays are vital for sowing smallhead arnica seeds in a controlled setting. They enable even seed distribution and efficient use of space. Their shallow compartments are perfect for smallhead arnica's tiny seeds, preventing them from being buried too deeply, which could hinder germination.
Fine-textured potting mix
A fine-textured potting mix is essential for successful smallhead arnica seed germination. This mix provides necessary aeration and drainage while maintaining adequate moisture around the seeds. It supports the delicate roots of smallhead arnica seedlings as they grow, reducing root rot risk and promoting healthy development.
Misting bottle
A misting bottle is used to gently moisten smallhead arnica seeds, ensuring proper moisture levels without disturbing the soil or displacing the seeds. This tool is especially beneficial for smallhead arnica, as it requires consistent moisture to boost germination rates without causing waterlogging.
Grow lights (optional for indoor propagation)
Grow lights can be used for indoor smallhead arnica propagation to provide the necessary light spectrum and intensity, simulating natural sunlight. This tool is particularly helpful during seasons or in areas where natural sunlight is insufficient, thus supporting the photosynthetic needs of smallhead arnica seedlings.
Heating mat (optional)
A heating mat is used to maintain the soil at an ideal temperature for smallhead arnica seed germination. This tool is especially useful in cooler climates or during colder months, as it ensures consistent soil temperature, thereby aiding in faster and more uniform seed germination.
How to Propagate Smallhead Arnica?
Propagation Type
Easy
Caring for Newly Propagated Smallhead Arnica
Caring for Newly Propagated Smallhead Arnica
After propagation, continue to provide your smallhead arnica plants with ample indirect sunlight and water them regularly to maintain slightly moist soil. Fertilize lightly with a balanced, slow-release fertilizer monthly during the growing season. Avoid overhead watering to reduce disease risk. Gradually harden off the seedlings before transplanting them into the garden to help them acclimate to their new outdoor environment.
Common Mistakes to Avoid When Propagating Smallhead Arnica
Overwatering
Excessive watering of smallhead arnica can lead to root rot, which impairs the plant's ability to absorb nutrients effectively and can ultimately result in its demise.
Using the wrong soil mix
Employing a soil mix that lacks proper drainage can cause water to accumulate around the roots of smallhead arnica, hindering adequate air circulation and fostering fungal diseases.
Excessive handling
Smallhead arnica possesses delicate structures, and too much handling during propagation can harm stems and leaves, negatively impacting the plant's growth and ability to establish itself.
Tips For Propagating Smallhead Arnica
Use well-draining soil
Utilize a blend of loam and sand to ensure proper drainage and air circulation around the roots of smallhead arnica, which is vital for its health and development.
Moderate water application
Water smallhead arnica just enough to keep the soil moist but not waterlogged, mimicking its natural alpine habitat to prevent root rot and support healthy growth.
Gentle handling
Handle smallhead arnica with care during propagation to avoid damaging the plant. Gently press the soil around the base without compacting it too much, to encourage root development.


