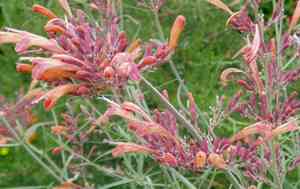
How to Propagate Threadleaf giant hyssop?
Agastache rupestris flourishes in adequately drained ground and ample sunlight. For optimal outcomes, propagation mainly via cuttings is advised. To propagate, select robust cuttings from the specimen, strip off the bottom leaves, and embed them in a potting blend. Maintain moisture for the cuttings until they establish roots. This method guarantees sturdy, thriving new specimens.
Optimal Period for Threadleaf Giant Hyssop Propagation
Propagation Method
Cutting
Propagation Period
Spring,Summer
Tools Required for Threadleaf Giant Hyssop Propagation
Pruning Shears
Utilized for obtaining cuttings from the parent plant. They must be sharp and sanitized to ensure clean cuts and prevent disease spread.
Rooting Hormone
Helps stimulate root formation on cuttings. Particularly beneficial for threadleaf giant hyssop to ensure quicker and stronger root growth.
Propagation Trays
Offer a controlled environment for cuttings to establish roots. Ensure proper drainage to prevent root decay, which is vital for threadleaf giant hyssop.
Humidity Dome
Maintains elevated humidity levels around the cuttings, reducing water loss and helping to keep them hydrated.
Seedling Heat Mat
Provides consistent warmth from below to encourage root development. This is especially advantageous for threadleaf giant hyssop as it enhances the rooting process.
Sterilized Potting Mix
Offers a disease-free medium that supports root growth. Well-draining mixes are crucial to prevent waterlogging.
Spray Bottle
Used for misting cuttings to maintain humidity without over-saturating the soil. Keeping the foliage moist is essential for threadleaf giant hyssop propagation.
How to Propagate Threadleaf Giant Hyssop?
Propagation Difficulty
Easy
Caring for Your Newly Propagated Threadleaf Giant Hyssop
Caring for Your Newly Propagated Threadleaf Giant Hyssop?
Following successful propagation of threadleaf giant hyssop, gradually introduce the new plants to outdoor conditions by slowly increasing their exposure to sunlight over a 1-2 week period. Plant them in well-draining soil in a sunny spot. Water the plants moderately, allowing the soil to dry out slightly between waterings. Regularly check for pests and diseases and provide occasional, balanced fertilization to ensure robust growth. Prune as needed to maintain the desired shape and encourage fuller growth.
Common Errors to Avoid When Propagating Threadleaf Giant Hyssop
Overwatering
Excessive irrigation can lead to root rot, which can rapidly kill young cuttings or seedlings of threadleaf giant hyssop. Appropriate moisture levels are critical for successful propagation.
Using Heavy Soil
Employing dense, poorly draining soil prevents adequate root aeration and can result in fungal infections and stunted development.
Neglecting Light Requirements
Insufficient light can lead to weak, elongated stems that cannot support the plant. Inadequate light also negatively impacts root development.
Incorrect Use of Fertilizer
Over-fertilizing newly propagated plants can cause nutrient burn and impede root development. Conversely, a lack of essential nutrients can slow down growth.
Improper Cutting Techniques
Taking poorly made or incorrectly sized cuttings can reduce the chances of successful rooting. Rough cuts or removing inappropriate amounts can also harm the parent plant.
Advice for Propagating Threadleaf Giant Hyssop
Well-Draining Soil
Utilize a well-draining, loam-based or sandy soil mix to prevent waterlogging and promote healthy root development.
Adequate Light
Ensure that new cuttings or seedlings receive ample indirect sunlight to encourage strong growth without scorching the young plants.
Proper Watering
Maintain consistent moisture in the soil without overwatering. Allow the top layer of soil to dry out slightly between waterings to avoid root rot.
Clean Cutting Tools
Use sterilized and sharp tools to take cuttings to prevent infectious diseases and ensure a clean cut which aids in quicker root growth.
Humidity Control
Maintain a high humidity environment around cuttings by using a humidity dome or a plastic bag. This creates a micro-climate conducive to rooting.


