How to Propagate Blackwood?
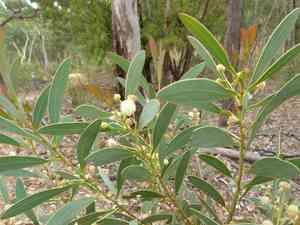
For propagating blackwood, employing cuttings offers a dependable technique. Choose robust, semi-mature cuttings, making sure each possesses a minimum of two nodes. Detach the bottom leaves, immerse in rooting compound, and embed in a substrate that drains effectively. Preserve moisture levels by enclosing with a plastic cover and guarantee steady dampness until root systems develop. This methodology, corroborated by gardening manuals, boosts successful outcomes.
When Is the Optimal Time to Propagate Blackwood?
Propagation Method
Cutting
Propagation Period
Autumn,Winter
What Equipment Is Utilized in Blackwood Propagation?
Sterile Pruning Shears
Clean pruning shears are crucial for taking blackwood cuttings. Ensure blades are sanitized to prevent disease and make a clean cut, encouraging faster root growth.
Rooting Hormone
Rooting hormone aids in stimulating root development in blackwood cuttings. Dip cutting ends in the hormone to boost the likelihood of successful root formation.
Propagation Trays
Propagation trays are employed to hold blackwood cuttings. These trays help maintain humidity and offer a controlled setting for initial growth.
High-Quality Potting Mix
A premium potting mix is vital for blackwood cuttings. The mix should drain well yet retain sufficient moisture to keep cuttings hydrated.
Misting Bottle
A misting bottle is useful for regularly dampening blackwood cuttings without over-saturating. This helps maintain the necessary humidity for root initiation.
Heat Mat
A heat mat can provide consistent warmth from below, which benefits blackwood's root development. Stable temperatures can accelerate root growth.
Humidity Dome
Humidity domes are placed over propagation trays to maintain high moisture levels, crucial for preventing blackwood cuttings from drying out during rooting.
Labeling Supplies
Labeling materials like waterproof markers and tags are helpful for tracking blackwood cuttings. Proper labeling ensures accurate progress monitoring and effective propagation management.
How to Propagate Blackwood?
Propagation Difficulty
Moderately Difficult
How to Care for Your Newly Propagated Blackwood?
How to Care for Your Newly Propagated Blackwood?
Once blackwood cuttings have rooted, gradually introduce them to outdoor conditions if outdoor planting is intended. Repot cuttings into larger containers if needed, using well-draining soil. Water consistently but avoid overwatering, and ensure ample sunlight. Protect young plants from harsh weather. Regularly inspect for pests and diseases.
Common Errors to Avoid When Propagating Blackwood
Insufficient Scarification
Without proper seed scarification, blackwood's tough seed coat prevents water absorption, impeding germination.
Improper Soil Mix
Using a soil mix that holds too much moisture can lead to root rot, negatively impacting seedling development.
Overwatering
Excessive watering can drown seeds or young roots, resulting in poor germination rates and plant health.
Shallow Planting
Planting seeds too close to the surface can result in poor root establishment and exposure to environmental stressors.
Neglecting Light Requirements
Failure to provide adequate light conditions can lead to weak and leggy seedlings that struggle to thrive.
Advice For Propagating Blackwood
Proper Scarification
Manually nick or use hot water treatment to break the seed coat before planting to enhance water uptake and seed germination.
Well-Draining Soil
Use a mix that ensures good drainage to prevent root rot, such as a combination of sand and potting soil.
Moderate Watering
Provide just enough water to keep the soil moist but not waterlogged, to support healthy root development.
Correct Planting Depth
Plant seeds at a depth of about 2-3 times their diameter to support robust root growth and protect them from environmental stress.
Adequate Light Exposure
Ensure seedlings receive plenty of light, ideally full sunlight, to promote strong and healthy growth.



