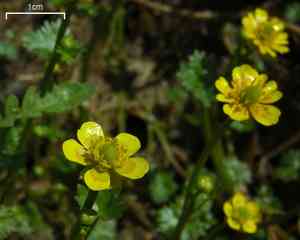
Yellow water buttercup (Ranunculus flabellaris)
Also known as: Yellow Water Buttercup, Fan-leaf Buttercup
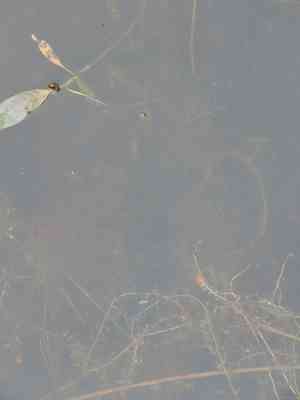
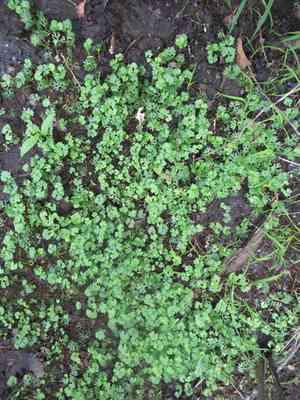
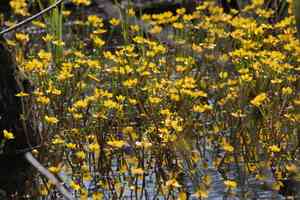
The yellow water buttercup, native to the United States and Canada, thrives in both aquatic and semi-aquatic environments such as calm, shallow waters and muddy areas. The plant exhibits different leaf shapes based on its growing conditions: submerged leaves are narrow and thread-like, whereas emergent or terrestrial leaves are broader with blunt lobes. Regardless of the leaf shape, all yellow water buttercup plants produce similar yellow flowers.
In This Article
Attributes of Yellow water buttercup
Lifespan
Perennial
Plant Type
Herb
Plant Height
15 cm to 46 cm
Spread
Typically forms mats up to 50 cm wide
Leaf Color
Green
Flower Size
1-2 cm
Flower Color
Yellow
Images of Yellow water buttercup
Quickly Identify Yellow water buttercup
1
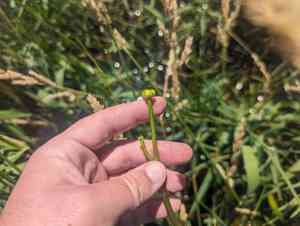
Identify by its distinctive fan-shaped leaves and bright yellow flowers with numerous stamens. The plant typically has a creeping habit and can form dense mats in water bodies.
Scientific Classification of Yellow water buttercup
Phylum
Vascular plants
Class
Dicotyledons
Order
Ranunculales
Family
Buttercup
Genus
Ranunculus
Species
Yellow water buttercup
Planting and Growing of Yellow water buttercup
Care Difficulty
Easy
Watering Schedule
Every 8 days
Sunlight Requirements
Full sun
Sunshine Duration
6-10 hours
Ideal Temperature
60-75℉
Soil Type
Potting Mix, Peat Mix
Soil pH
6.5-7.5
Fertilizer Type
Balanced
Pruning Season
Spring, Summer
Pruning Area
Branches, Leaves
Pruning Frequency
Once a year
Repotting Season
Spring
Pot Type
Terracotta, Plastic
 How to Water Yellow water buttercup?
The water requirement for Ranunculus flabellaris is quite specific. This plant thrives with its roots consistently moist but not waterlogged. When watering, aim to dampen the soil evenly without causing pooling. A rule of thumb is to use about 150 ml of water per session, ensuring the top inch of soil is moist without oversaturating the deeper layers. Adjust the amount during hotter weather when the soil dries out more quickly.
What are the symptoms of an underwatered Yellow water buttercup?
›
What should I do if my Yellow water buttercup is not getting enough water?
›
What are the symptoms of an overwatered Yellow water buttercup?
›
How to save an overwatered Yellow water buttercup?
›
 What Are the Sunlight Requirements for Yellow water buttercup?
Ranunculus flabellaris prefers conditions ranging from full sun to partial sun. Ensuring regular sun exposure helps it enhance flowering and maintain optimal growth.
More About Sunlight Requirements Techniques→
How much sunlight does it need?
›
Solutions to achieve ideal lighting
›
Benefits of ideal lighting
›
 What Is the Ideal Temperature Range for Yellow water buttercup?
Ranunculus flabellaris thrives best within a temperature range of 60°F to 75°F. This range ensures that the plant's metabolic processes operate optimally, promoting robust growth and vibrant blooms. Maintaining this temperature will facilitate efficient photosynthesis and nutrient uptake, leading to healthy development.
 What Soil is Best for Yellow water buttercup?
Ranunculus flabellaris thrives best in well-drained soils. This ensures water doesn't stagnate around the roots, preventing root rot while allowing for nutrient uptake, enhancing growth and flowering. The plant requires soil that can retain some moisture, yet also facilitate proper drainage. This combination helps maintain a consistent level of hydration that is crucial for its health and vibrant blooms. A nutrient-rich soil is essential for robust growth. Incorporating organic matter or compost can bolster the soil’s fertility, thereby providing Ranunculus flabellaris with the necessary minerals for thriving.
 How to Fertilize Yellow water buttercup?
For Ranunculus flabellaris, applying too much fertilizer can lead to lush foliage at the expense of blooms. Generally, dilute your liquid fertilizer to half the recommended strength on the package. Use about 1 tablespoon for every gallon of water to ensure a healthy balance without overwhelming the plant.
 How to Prune Yellow water buttercup?
Select the stems or leaves that appear withered or have exhausted their bloom. Carefully cut them back to the base or just above a healthy leaf set to promote regeneration. After removing dead or damaged parts, focus on shaping the plant to maintain an aesthetically pleasing form. This might involve slightly shortening longer stems to encourage a bushier growth habit.
More About Pruning Techniques→
 How to Propagate Yellow water buttercup plant?
1
Harvest seeds from mature Ranunculus flabellaris plants in late spring when seedpods are dry. Allow seeds to dry naturally before storing them in a cool, dry place until spring.
2
For division propagation, carefully dig around the plant in early spring. Remove it from the soil and gently split the root clumps with a sharp knife, ensuring each division has healthy roots and shoots.
3
Sow seeds in a prepared seed tray filled with a light, moist soil mix or plant divided clumps directly into the garden. Ensure they are planted to a depth appropriate for their size and keep the soil consistently moist.
 How to Repot Yellow water buttercup plant?
1
Ranunculus flabellaris should be repotted when it shows signs of being root-bound, such as roots growing out of the drainage holes or a noticeable slowdown in growth. Early spring is ideal as the plant will have time to establish in its new pot before the growing season.
2
Select a pot that is 2-3 inches larger in diameter than the current one. Use a container with drainage holes to prevent waterlogging. A slightly deeper pot can accommodate the plant's root structure, promoting healthier growth.
3
Opt for a loose, well-draining soil mix that retains some moisture but prevents sogginess. Amending with perlite or sand can improve drainage, ensuring the roots receive adequate air circulation and reducing the risk of root rot.
Toxicity
Ingestion, Skin contact
WARNING
The judgment on toxicity and danger is for reference only. We DO NOT GUARANTEE any accuracy of such judgment. Therefore, you SHALL NOT rely on such judgment. It is IMPORTANT TO SEEK PROFESSIONAL ADVICE in advance when necessary.
Learn More About Yellow water buttercup Diseases
Anthracnose
Bacterial Leaf Spot
Bacterial Soft Rot
Bacterial Wilt
Crown Gall
Cyst Nematode
Damping-off
Downy Mildew
Drought Stress
Fusarium Wilt
Gray Mold
Leaf Spot
Mosaic
Nutrient Deficiency
Nutrient Toxicity
Powdery Mildew
Root Rot
Root-knot Nematode
Rusts
Sooty Mold
Spider Mites
Temperature Stress
Thrips Damage
White Mold
Chemical Injury



