Eragrostis ferruginea (Eragrostis ferruginea)
Also known as: Rusty Lovegrass
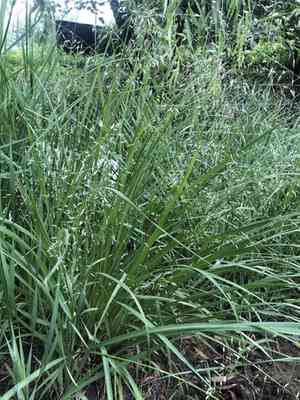
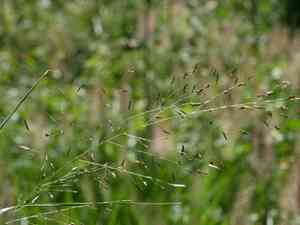
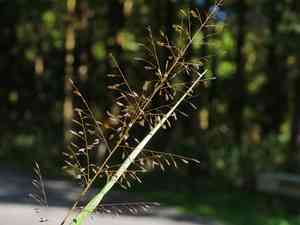
Eragrostis ferruginea brings a whimsical charm to grasslands with its fine, airy seed heads and graceful, slender stems. Its characteristic reddish tint, which is the inspiration for its name, stands out beautifully against the green backdrop. This warm-season grass flourishes in full sunlight, with its color becoming more vibrant under intense light. Adapted to endure occasional droughts, it remains a robust component of its natural habitat.
In This Article
Attributes of Eragrostis ferruginea
Lifespan
Perennial
Plant Type
Grass
Plant Height
30 cm to 1 m
Spread
N/A
Leaf Color
Green
Flower Size
2 mm to 2.5 mm
Flower Color
Yellow Purple Green Black
Images of Eragrostis ferruginea
Quickly Identify Eragrostis ferruginea
1
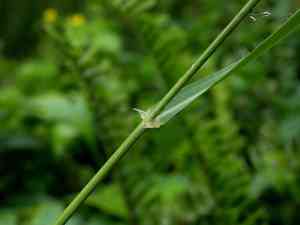
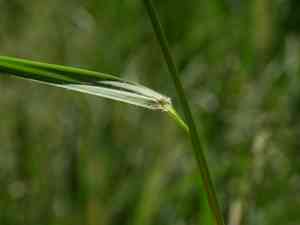
Rusty Lovegrass can be identified by its reddish or rusty-colored foliage, delicate spikelets, and open, airy flower panicles. The grass typically forms a loose, clumping habit.
Scientific Classification of Eragrostis ferruginea
Phylum
Vascular plants
Class
Monocotyledons
Order
Poales
Family
Grass
Genus
Lovegrasses
Species
Eragrostis ferruginea
Planting and Growing of Eragrostis ferruginea
Care Difficulty
Easy
Watering Schedule
Every 3 days
Sunlight Requirements
Full sun
Sunshine Duration
4-8 hours
Ideal Temperature
70-85℉
Soil Type
Potting Mix, Peat Mix
Soil pH
6.5-7.5
Fertilizer Type
Balanced
Pruning Season
Spring, Summer
Pruning Area
Branches, Leaves
Pruning Frequency
2 times a year
Repotting Season
Spring
Pot Type
Plastic, Ceramic
 How to Water Eragrostis ferruginea?
When watering Eragrostis ferruginea, ensure that the soil is evenly moist but not waterlogged. This grass thrives when allowed to dry slightly between waterings. A general rule of thumb is to water enough so that the top 2-3 inches of soil are moist, which usually translates to about 300 ml per session, depending on the size of the pot and environmental conditions.
What are the symptoms of an underwatered Eragrostis ferruginea?
›
What should I do if my Eragrostis ferruginea is not getting enough water?
›
What are the symptoms of an overwatered Eragrostis ferruginea?
›
How to save an overwatered Eragrostis ferruginea?
›
 What Are the Sunlight Requirements for Eragrostis ferruginea?
Eragrostis ferruginea flourishes in full sun to partial sun, requiring around 6 to 8 hours of daylight. This range optimizes photosynthesis, promoting healthy, vigorous growth and abundant flowering.
What is the ideal amount of sunlight for Eragrostis ferruginea?
›
What solutions exist to help Eragrostis ferruginea receive ideal lighting?
›
What benefits does Eragrostis ferruginea experience from ideal sunlight?
›
 What Is the Ideal Temperature Range for Eragrostis ferruginea?
Eragrostis ferruginea thrives best in an environment where the temperature stays between 70 and 85°F. These conditions promote optimal growth by ensuring efficient photosynthesis and nutrient uptake. Consistent temperatures within this range help the plant maintain metabolic functions without stress.
 What Soil is Best for Eragrostis ferruginea?
Eragrostis ferruginea thrives in well-draining soils which prevent waterlogging and root rot. The plant benefits from this condition as it ensures optimal root aeration and nutrient uptake, promoting robust growth and health. This grass prefers soils with moderate fertility. Excess nutrients can lead to rapid, weak growth, while too few can stunt growth. A balanced soil supports steady and sustainable plant development, which is advantageous for durability. This species does well in soils with low to moderate organic matter. It doesn't require high organic content, which could retain too much moisture, potentially harming the roots. Adequate organic matter supports healthy soil structure and microbial life.
 How to Fertilize Eragrostis ferruginea?
Eragrostis ferruginea, commonly known as rusty love grass, thrives best with measured nutrient inputs. Typically, a balanced fertilizer with an NPK ratio of 10-10-10 can be applied, especially during its growing season. Application should be at a rate of approximately 0.5 pounds per 100 square feet. Providing nutrients at this rate helps the plant develop robust foliage and beautiful seeds without overwhelming it.
 How to Prune Eragrostis ferruginea?
Start by removing any brown or diseased foliage using sharp scissors or garden shears. This step is vital for preventing the spread of diseases and allows the plant to redirect its energy into new, healthy growth. Make sure to dispose of the trimmed material properly to maintain garden cleanliness. After removing unhealthy parts, begin shaping the plant by thinning out overcrowded areas. This involves selectively trimming parts of the plant to enhance its natural shape while improving airflow. It's important to cut back to a new lateral shoot or node to encourage branching. Finally, make small adjustments to enhance the aesthetics of the plant. This could mean snipping stray stems or balancing out the plant's overall appearance. A focus on symmetry and form can make your Eragrostis ferruginea both healthy and pleasing to the eye.
More About Pruning Techniques→
 How to Propagate Eragrostis ferruginea plant?
1
Begin by filling seed trays with a well-draining potting mix. Sow the seeds evenly and cover them lightly with soil, ensuring they are not too deeply buried. Water gently to avoid displacing the seeds.
2
Select a healthy, mature plant for division. Gently remove it from its pot or the ground, then use a knife or spade to divide the root ball into sections, ensuring each has adequate roots and shoots.
3
Once seedlings have developed sufficient roots, carefully transplant them into individual pots or directly into the garden. Ensure they are planted at the same depth they were in the seed tray.
 How to Repot Eragrostis ferruginea plant?
1
Eragrostis ferruginea should be repotted when its roots begin to grow out of the drainage holes or the plant becomes pot-bound. This usually occurs when the plant shows stunted growth or the soil dries out more quickly than usual, indicating the roots have filled the pot.
2
Select a pot that is 1-2 inches larger in diameter than the current pot to give the roots room to grow. Ensure it has drainage holes to prevent waterlogging, which can lead to root rot. A slightly heavier pot will provide stability, preventing the plant from tipping over in strong winds.
3
Use a well-draining sandy loam soil mixture to replicate the plant's natural habitat. This ensures adequate drainage and prevents water buildup, reducing the risk of root rot while providing essential nutrients for healthy growth.


