Green comet milkweed (Asclepias viridiflora)
Also known as: Wand milkweed, Green-flower milkweed
Milkweed (*Asclepias* spp.), named after the Greek god of medicine, Asclepius, is native to the plains and prairies of the United States. Known for its deep roots that enable it to endure fire and drought, milkweed produces sweet-smelling flowers rich in nectar. It serves as a crucial host for female monarch butterflies, providing a place for them to lay their eggs, and the larvae feed exclusively on the plant.
In This Article
Attributes of Green comet milkweed
Lifespan
Perennial
Plant Type
Herb
Plant Height
30 cm to 91 cm
Spread
10-40 cm
Leaf Color
Green Gray
Flower Size
2.5 cm
Flower Color
Green Yellow
Images of Green comet milkweed
Quickly Identify Green comet milkweed
1
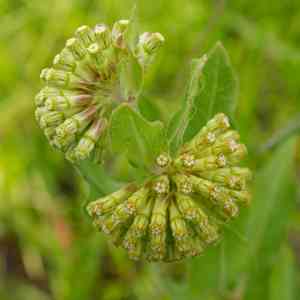
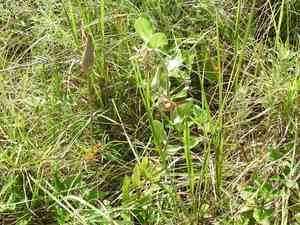
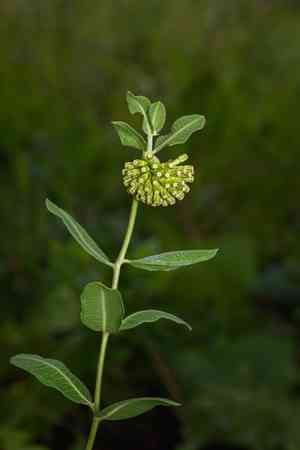
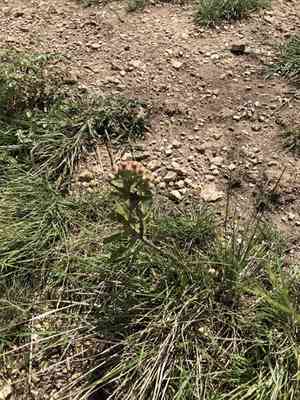
Upright plant reaching 1-2 feet (30-60 cm) with lanceolate leaves and umbels of starry flowers.
2
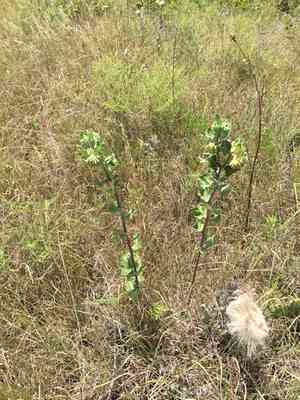
Distinctive fruit with smooth green follicles, brown when mature, releasing dark brown seeds with white tufts.
3
Opposite lance-shaped leaves, wavy margins, pinnate veination, varying shape based on soil moisture.
4
Sparse, fine-haired stem, light green to purple-green, unbranched, around 2-3 feet (60-90 cm) tall.
5
Flowers with yellow-green hues, dome-shaped clusters, five petals and sepals, blooming May-August.
Scientific Classification of Green comet milkweed
Phylum
Vascular plants
Class
Dicotyledons
Order
Gentianales
Family
Dogbane
Genus
Milkweeds
Species
Green comet milkweed
Planting and Growing of Green comet milkweed
Care Difficulty
Easy
Watering Schedule
Every 2 days
Sunlight Requirements
Full sun
Sunshine Duration
6-10 hours
Ideal Temperature
70-85℉
Soil Type
Potting Mix, Peat Mix
Soil pH
6.5-7.5
Fertilizer Type
Balanced
Pruning Season
Spring, Summer
Pruning Area
Branches, Leaves
Pruning Frequency
2 times a year
Repotting Season
Spring
Pot Type
Terracotta, Plastic
 How to Water Green comet milkweed?
When watering Asclepias viridiflora, aim to thoroughly soak the soil around the roots, ensuring about 250 ml of water per session. The goal is to moisten the soil to a depth of several inches, allowing for even moisture distribution without oversaturating. Watering should mimic natural rainfall patterns—significant yet spread apart—to support the plant's drought tolerance.
What are the symptoms of an underwatered Green comet milkweed?
›
What should I do if my Green comet milkweed is not getting enough water?
›
What are the symptoms of an overwatered Green comet milkweed?
›
How to save an overwatered Green comet milkweed?
›
 What Are the Sunlight Requirements for Green comet milkweed?
This plant does best in full sun to partial sun. When given enough light, Asclepias viridiflora produces healthier stems, leaves, and an abundance of flowers, which is ideal for pollinators.
More About Sunlight Requirements Techniques→
What is the best lighting condition?
›
How can I provide the ideal light?
›
What are the benefits of ideal light?
›
 What Is the Ideal Temperature Range for Green comet milkweed?
The ideal temperature range for Asclepias viridiflora, or Green Milkweed, typically falls between 70°F and 85°F. This range provides optimal conditions for growth, as the plant thrives in warm temperatures, allowing for proper photosynthesis and nutrient absorption.
 What Soil is Best for Green comet milkweed?
Asclepias viridiflora thrives in well-drained soil that prevents waterlogging. This type of soil ensures that roots receive adequate oxygen, preventing root rot and promoting healthy growth. Interestingly, this plant prefers nutrient-poor soils which keep it in check, preventing excessive foliage and encouraging the production of more flowers for pollinators. The soil should retain moderate moisture, striking a balance between dry and overly moist conditions. This characteristic helps maintain adequate hydration for optimal photosynthesis and growth.
 How to Fertilize Green comet milkweed?
For Asclepias viridiflora, apply a balanced liquid fertilizer at half the recommended strength. Too much fertilizer can harm this low-nutrient-requiring plant. If using slow-release granules, apply sparingly according to the instructions on the packaging.
 How to Prune Green comet milkweed?
Start by sterilizing your tools to prevent disease transmission. Identify the dead and wilted stems, cutting those back to their base. Focus on the tallest and most intrusive ones first. When pruning live stems, cut just above a leaf node to stimulate additional growth. Always aim for a balanced shape and remove no more than one-third of the plant at a time to avoid stress.
More About Pruning Techniques→
 How to Propagate Green comet milkweed plant?
1
Collect Asclepias viridiflora seeds during autumn when the pods open. Sow them in a seed tray filled with a well-draining potting mix. Lightly cover with soil and maintain a consistent moisture level until germination occurs.
2
Obtain root-cut segments during the dormancy period. Cut 4-6 inch segments and place them in a prepared tray with a rooting medium. Sprinkle a thin layer of soil over the cuttings.
3
Once seedlings or root cuttings develop strong roots, transplant them to individual pots or garden beds. Ensure the new location is weed-free and has good sunlight exposure.
 How to Repot Green comet milkweed plant?
1
Repot Asclepias viridiflora when you notice its roots crowding the drainage holes, indicating limited space for growth. Additionally, a slowdown in growth and poor water retention are signs it's time to give it a new home.
2
Choose a pot 1-2 inches larger in diameter to allow root expansion without overwhelming the plant. Ensure it has adequate drainage holes to prevent water from accumulating, which helps to keep the root environment healthy and free from rot.
3
Opt for a well-draining, sandy soil mix. This type of soil resembles the plant's natural habitat, encourages healthy root development, and reduces the risk of overwatering by maintaining optimal moisture levels.
Toxicity
Ingestion, Contact with sap
WARNING
The judgment on toxicity and danger is for reference only. We DO NOT GUARANTEE any accuracy of such judgment. Therefore, you SHALL NOT rely on such judgment. It is IMPORTANT TO SEEK PROFESSIONAL ADVICE in advance when necessary.
Learn More About Green comet milkweed Diseases
Anthracnose
Bacterial Leaf Spot
Bacterial Wilt
Chemical Injury
Crown Gall
Cyst Nematode
Damping-off
Downy Mildew
Drought Stress
Fusarium Wilt
Gray Mold
Leaf Spot
Mosaic
Nutrient Deficiency
Nutrient Toxicity
Powdery Mildew
Root Rot
Root-knot Nematode
Rusts
Sooty Mold
Spider Mites
Temperature Stress
Thrips Damage
White Mold


