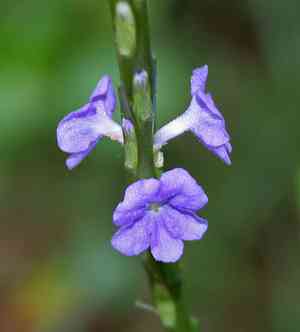
How to Transplant Blue porterweed?
The ideal period for relocating blue porterweed is from late spring's warmth through early to mid-summer, which fosters strong root establishment. Select a bright location featuring soil that drains effectively, and periodic transplanting advice can improve its acclimation.
Preparations Required Before Relocating Blue Porterweed
Optimal Period for Blue Porterweed Relocation?
Moving blue porterweed during the transition from late spring to early summer provides the best chance for successful establishment. This timeframe encourages strong root development due to mild temperatures and consistent daylight. By placing blue porterweed in its new spot during this season, you align with its natural growth cycle, leading to a more vigorous and thriving plant. Additionally, this timing allows blue porterweed to settle in before the peak summer heat, preventing stress and boosting its resilience. Introducing blue porterweed to the gentle warmth of early summer mornings can truly set the stage for an excellent growing season.
Recommended Spacing Between Blue Porterweed Plants?
When relocating your blue porterweed, allow ample room for each plant to expand. Aim to position them 2 to 3 feet (60-90 cm) apart. This ensures they receive sufficient nutrients from the soil and develop properly. Simple as that!
Best Soil Blend for Blue Porterweed Relocation?
Your blue porterweed thrives in a light, well-draining soil. Incorporate some compost or organic material to enrich the soil before you begin. A slow-release, balanced fertilizer offers excellent support for its development. Remember, healthier soil leads to a happier plant.
Where to Replant Your Blue Porterweed?
Select a sunny location for your blue porterweed! These plants adore sunlight and require at least 6 hours of direct sun daily. A south or west-facing spot should be ideal. You're doing great!
Equipment to Prepare Before Relocating Blue Porterweed
Gardening Gloves
To safeguard your hands while handling the soil and the blue porterweed plant.
Garden Trowel
Useful for excavating small holes when relocating the blue porterweed plant.
Watering Can
Crucial for supplying water to the blue porterweed during and after the relocation process.
Spade/Shovel
Essential for digging up the blue porterweed plant from its original site and for excavating a hole in the new location.
Wheelbarrow or Suitable Container
To safely transport the blue porterweed from its initial spot to the new planting area.
How to Extract Blue Porterweed from the Soil?
How to Extract Blue Porterweed from the Soil?
From Ground: Begin by hydrating the blue porterweed plant to moisten the earth. Using a spade or shovel, dig a wide circle around the plant, ensuring the plant's root ball remains undisturbed and intact. Carefully work the spade beneath the root ball to lift the blue porterweed plant from its original position. Place the plant in a wheelbarrow or an appropriate container, minimizing damage to the plant.From Pot: Adequately water the blue porterweed plant. Gently tilt the pot sideways and tap the rim on a firm surface like a table edge. Slide the blue porterweed out along with the soil. Be cautious not to harm the root ball.From Seedling Tray: Moisten the soil surrounding the blue porterweed seedling. Using a dibber or a slender stick, loosen the soil around the seedling. Carefully lift it out without damaging the delicate roots.
Step-by-Step Guide for Relocating Blue Porterweed
Preparation
Thoroughly water the blue porterweed plant a few hours before relocation to ensure it is well-hydrated.
Digging
Use a spade or a shovel to excavate a hole at the new site. The hole should be twice as wide and as deep as the root ball of the blue porterweed plant.
Placement
Carefully position the blue porterweed plant in the hole, ensuring the top of the root ball is level with the ground surface.
Backfilling
Refill the hole with the native soil, gently pressing the soil around the roots of the blue porterweed plant without compacting it.
Watering
Generously water the blue porterweed plant after relocation.
Post-Relocation Care for Blue Porterweed
Consistent Watering
Water the blue porterweed plant daily for the initial week, then gradually reduce the frequency, but not the volume, as the plant becomes established. Over-watering or under-watering can stress the plant.
Pruning
Lightly trim the blue porterweed plant after planting to lessen its demand for water and nutrients while it establishes its roots in the new location.
Growth Monitoring
Closely observe the blue porterweed plant, especially during the first few weeks. Any wilting or discoloration may require immediate attention and care.
Protection
Shield the relocated blue porterweed from pests, strong winds, and intense sunlight. Install a barrier if needed until it becomes established.
Addressing Common Issues with Blue Porterweed Relocation.
When is the optimal season to relocate blue porterweed?
The best time to move blue porterweed is between the third and fifth seasons, offering them the highest chance for success.
What's the recommended distance between two blue porterweed plants during relocation?
Allow blue porterweed ample room to grow by maintaining a separation of 2-3 feet (60-90 cm) between each plant.
Why is my relocated blue porterweed wilting?
Wilting might be due to stress from the relocation or insufficient watering. Ensure the newly relocated blue porterweed is watered thoroughly and frequently.
What type of soil is ideal for relocating blue porterweed?
Blue porterweed prefers well-drained soil, which is crucial to prevent waterlogging and root rot. A blend of sand, silt, and a small amount of clay is perfect.
Should I prune blue porterweed before or after relocation?
It's best to lightly prune blue porterweed during relocation, which reduces water demand while the plant establishes new roots. Just avoid removing too much foliage.
Can I relocate blue porterweed into a pot?
Certainly! Ensure the pot is large enough to accommodate growth and has adequate drainage holes to prevent waterlogging. Remember, blue porterweed needs some space to thrive.
Why are the leaves of my relocated blue porterweed yellow?
Yellow leaves could indicate overwatering or a nutrient deficiency. Make sure blue porterweed is not sitting in standing water and you're providing nutrients as per the plant's requirements.
Should I fertilize blue porterweed immediately after relocation?
No, wait approximately 2-3 weeks before fertilizing your relocated blue porterweed to allow it time to establish. Over-fertilizing early can damage the new roots.
How much sunlight does blue porterweed need after relocation?
Blue porterweed thrives in bright, indirect sunlight. About 6-8 hours daily should be sufficient. Be careful not to expose it to harsh afternoon sun right after relocation.
What's the ideal depth for relocating blue porterweed?
Plant blue porterweed at the same depth it was previously growing, typically around 10 inches (25 cm). This will ensure roots gain proper stability and access to nutrients.


