How to Transplant Philippine ground orchid?
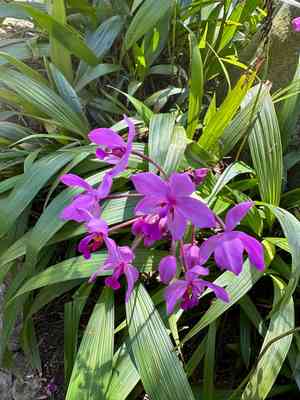
For optimal development of philippine ground orchid, transplant it during the balmy, post-spring season, which is typically the most favorable time for root integration. Select a location with ample, diffused light and sustain adequate soil hydration to facilitate its adjustment.
What Preparations are Needed Before Transplanting Philippine Ground Orchid?
What is the Ideal Time for Transplanting Philippine Ground Orchid?
The optimal period for relocating philippine ground orchid is from late spring to early summer. This timeframe provides a combination of warm soil and mild temperatures, creating perfect conditions for root establishment without the harshness of peak summer heat. Moving philippine ground orchid during this window promotes vigorous development, allowing the plant ample time to adapt before winter. Following this schedule aligns with philippine ground orchid's natural growth cycle, fostering health and vitality. Let's carefully move philippine ground orchid to its new spot during this prime repotting season!
How Much Space Should You Leave Between Philippine Ground Orchid Plants?
When moving philippine ground orchid, position each plant approximately 1-2 feet (30-60 cm) apart. This spacing prevents competition for resources, giving them the best opportunity to thrive.
What is the Best Soil Mix for Philippine Ground Orchid Transplanting?
For philippine ground orchid, prepare a well-draining soil with a rich organic base. Incorporate a slow-release, granular fertilizer to supply nutrients over time. Additional perlite will enhance soil aeration and drainage.
Where Should You Relocate Your Philippine Ground Orchid?
Philippine ground orchid thrives in areas with dappled sunlight. A spot beneath a partially shaded tree or on a patio could be suitable. This location will mimic the plant's natural environment and ensure it receives appropriate light levels.
What Equipments Should You Prepare Before Transplantation Philippine Ground Orchid?
Gardening Gloves
To safeguard your hands while handling soil and philippine ground orchid.
Spade or Shovel
Used for excavating a hole in the ground to accommodate the root ball of philippine ground orchid.
Pruning Shears
To remove any damaged or dead sections of the plant during the relocation.
Watering Can
For hydrating philippine ground orchid before and after the move to keep it moist.
Trowel
A small hand tool utilized to manipulate the soil during transplanting.
Wheelbarrow or Container
If moving from the ground, this aids in safely transporting the philippine ground orchid without causing damage.
Rooting Hormone
This encourages root development in the new location.
How Do You Remove Philippine Ground Orchid from the Soil?
How Do You Remove Philippine Ground Orchid from the Soil?
From Ground: First, water philippine ground orchid to moisten its soil. Then, dig a wide trench around the plant using a spade or shovel, ensuring the root ball remains as intact as possible. Carefully work the spade beneath the root ball to lift philippine ground orchid from its original spot.From Pot: Water philippine ground orchid thoroughly until the soil is damp. Turn the pot on its side, hold the plant's base, and tap the bottom of the pot until the plant slides out. Be gentle and avoid harming the root ball.From Seedling Tray: Water the seedlings to dampen the soil and carefully handle the seedling by its leaves, not by the stem or root. Use a spoon or small tool to lift the seedling and its roots. Place it in a container for transport.
Step-by-Step Guide for Transplanting Philippine Ground Orchid
Initial Prep
Start by watering philippine ground orchid generously the day before moving it. This will help philippine ground orchid accumulate sufficient hydration prior to a stressful relocation process.
Digging Hole
At the new planting site, excavate a hole that is twice as wide and as deep as the root ball.
Placing philippine ground orchid
Carefully position philippine ground orchid in the hole, ensuring it is at the same depth as it was in its previous location. The top of the root ball should be level with the ground surface.
Backfilling
Refill the hole with the original soil or compost, making sure there are no air pockets.
Watering
Water thoroughly after transplanting to promote new root growth and establishment.
How Do You Care For Philippine Ground Orchid After Transplanting?
Watering
Ensure to water the philippine ground orchid sufficiently but avoid making the soil waterlogged. The soil should be kept consistently moist.
Pruning
Trim off any dead or weaker sections of the plant to allow it to focus its energy on new growth.
Monitoring
Keep a close watch on the philippine ground orchid to identify any signs of distress, such as wilting or yellowing leaves. If such signs appear, consider adjusting the watering schedule or checking for pest activity.
Acclimation
Understand that the plant may experience a period of 'transplant shock'. This can manifest as a temporary halt in growth. It's entirely natural, and the plant should recover in time with proper care.
Troubleshooting Common Issues with Philippine Ground Orchid Transplantation.
What is the best time for transplanting philippine ground orchid?
The ideal period to relocate philippine ground orchid is during the late spring to early summer season.
How much space does philippine ground orchid need when transplanting?
Philippine ground orchid requires ample room to thrive. A spacing of approximately 1-2 feet (30-60 cm) between each plant is optimal.
What type of soil should I use for transplanting philippine ground orchid?
Select a well-draining potting mix rich in organic matter. Ensure the pH is between 6.0 and 7.5 for philippine ground orchid's development.
How can I protect my philippine ground orchid from diseases during transplanting?
Properly sanitize your tools and use healthy, disease-free potting soil to prevent introducing diseases while moving philippine ground orchid.
What amount of sunlight does my transplanted philippine ground orchid require?
Philippine ground orchid prefers partial shade to full sun. Adjust its location to shield it from afternoon sun if it shows signs of scorching.
How frequent should be the watering schedule for transplanted philippine ground orchid?
Water philippine ground orchid thoroughly immediately after transplanting. Afterward, maintain moisture but avoid over-watering to prevent root rot.
Should I fertilize philippine ground orchid after transplanting? If yes, then how often?
Yes, philippine ground orchid benefits from regular fertilization. Apply a balanced, slow-release fertilizer every 2 months during the growing season.
How can I ensure my transplanted philippine ground orchid establishes itself well?
Keep the plant in a stable environment, maintain the correct watering and feeding schedule, and provide the appropriate amount of sunlight.
How deep should the pot or hole be for transplanting philippine ground orchid?
The depth should comfortably accommodate philippine ground orchid's root system. A 12 inches (30 cm) deep pot or hole is usually sufficient.
Can temperature changes affect my transplanted philippine ground orchid and how do I mitigate this?
Yes, extreme temperatures can impact philippine ground orchid. Maintain a consistent temperature of 60-80°F (15-27°C) and avoid sudden fluctuations.



