How to Transplant Yellow ‘ilima?
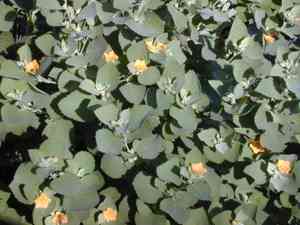
Yellow 'ilima prospers when relocated during the revitalizing season of early spring. It thrives in bright, adequately drained environments. Handle with care to avoid disrupting its root system.
What Preparations are Needed Before Relocating Yellow âilima?
What is the Ideal Time for Relocating Yellow âilima?
Yellow âilima should be moved in early spring or late autumn when temperatures are moderate. This provides the perennial with optimal growing conditions and lessens transplant shock. Moving during these times encourages strong root development before extreme weather stress, boosting plant health and vitality.
How Much Space Should You Leave Between Yellow âilima Plants?
When relocating yellow âilima, ensure each plant is spaced 18-24 inches (45-60 cm) apart. This allows ample room for growth and promotes good air circulation, which helps maintain plant health.
What is the Best Soil Mix for Yellow âilima Relocation?
For yellow âilima, utilize well-draining soil rich in organic matter. Incorporate compost or a balanced slow-release fertilizer into the top 6 inches (15 cm) of soil to supply essential nutrients.
Where Should You Relocate Your Yellow âilima?
Select a sunny spot for relocating yellow âilima. This plant thrives in full sun, requiring at least 6-8 hours of direct sunlight daily. This ensures it receives the necessary energy for lush and vibrant growth.
What Equipment Should You Prepare Before Relocating Yellow âilima?
Gardening Gloves
To safeguard your hands while handling soil and the plant.
Trowel
For excavating small holes and scooping earth.
Shovel or Spade
To dig a broader trench around the plant if it's in the ground.
Pruning Shears
To trim any damaged or excess roots or foliage.
Watering Can or Hose
To hydrate the plant before and after relocation.
Bucket
To transport soil if necessary.
Wheelbarrow
To move the plant from one spot to another if it's large.
Mulch
To aid in retaining soil moisture post-relocation.
How Do You Extract Yellow âilima from the Soil?
How Do You Extract Yellow âilima from the Soil?
From Ground: First, water the yellow âilima plant to moisten the soil. Then, dig a wide trench around the plant using a shovel or spade, ensuring the plant's root ball remains intact. Carefully work the spade beneath the root ball to lift the plant from its original position.From Pot: Begin by watering the yellow âilima plant to dampen the soil. Gently tap the pot's sides to loosen the soil, then grasp the plant's base and carefully pull it out. If the plant is resistant, you can invert the pot while supporting the plant with your other hand.From Seedling Tray: Water the yellow âilima seedling to keep the soil moist. Using a trowel or your fingers, gently lift the seedling from the tray, being careful not to harm the delicate roots. If multiple seedlings are intertwined, gently separate them.
Step-by-Step Guide for Relocating Yellow âilima
Preparation
Prepare the new planting site by digging a hole that is twice as wide and approximately the same depth as the root ball of the yellow âilima plant.
Amend Soil
If needed, improve the soil in the new location to ensure good drainage and nutrient availability for the yellow âilima.
Place Plant
Carefully position the yellow âilima in the prepared hole, ensuring that the top of the root ball is level with the ground surface.
Backfill
Gently refill the hole with soil, ensuring there are no air pockets around the roots. Firmly press the soil down using your hands or the back of the trowel.
Watering
Water the relocated yellow âilima thoroughly to help settle the soil around the root ball.
Mulching
Apply a layer of mulch around the base of the yellow âilima, keeping it a few inches away from the stem to prevent rot.
How Do You Care For Yellow âilima After Relocation?
Watering
Keep the soil around the yellow âilima consistently moist, but not waterlogged, for the initial weeks after relocation to aid in establishing strong roots.
Monitoring
Regularly inspect the yellow âilima for signs of stress such as wilting or yellowing leaves, and adjust care as necessary.
Weeding
Keep the area around the yellow âilima free of weeds to reduce competition for nutrients and water.
Support
If the yellow âilima is tall or has delicate stems, provide support with stakes or garden ties to keep it upright as it establishes itself.
Troubleshooting Common Issues with Yellow âilima Relocation.
When is the best time to relocate yellow âilima?
The optimal times are early spring, late fall, early winter, or mid-winter for relocating yellow âilima.
How far apart should I space yellow âilima plants?
For ideal growth, space yellow âilima plants 18-24 inches (45-60 cm) apart.
How should I prepare the soil for yellow âilima?
Use well-draining soil with organic compost to support yellow âilima during relocation.
How deeply should yellow âilima be planted?
Plant yellow âilima at the same soil depth as in its original container.
How much should I water yellow âilima after relocating?
Water yellow âilima thoroughly until established, but ensure the soil remains well-drained.
Can yellow âilima handle relocation shock?
Minimize relocation shock by handling yellow âilima gently and ensuring optimal soil and water conditions.
What should I do if yellow âilima wilts after relocating?
If yellow âilima wilts, ensure adequate watering and consider providing some shade temporarily.
Do I need to fertilize yellow âilima after relocating?
Fertilize sparingly with a balanced fertilizer to support new growth in yellow âilima.
What's the ideal sunlight for relocated yellow âilima?
Place yellow âilima in full sun to partial shade for best growth.
Should I prune yellow âilima after relocating?
Light pruning can help yellow âilima focus on root establishment but avoid heavy pruning initially.



