How to Transplant Securigera orientalis?
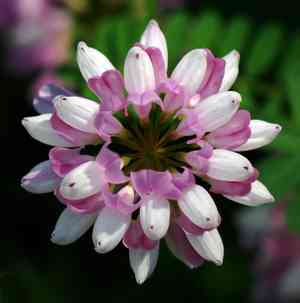
Securigera orientalis, a perennial species, flourishes most effectively when relocated during the period of 'early to mid-spring' once the ground temperature has risen. Select sites that receive full sun to partial shade and possess good drainage for peak development. Ensure thorough watering after the transplanting process.
What Preparations are Necessary Before Relocating Securigera Orientalis?
What is the Optimal Period for Moving Securigera Orientalis?
Relocating securigera orientalis during early to mid-spring guarantees optimal root establishment and growth momentum. This timing capitalizes on cool, damp soil and moderate temperatures, which minimize transplant stress and promote swift acclimation. Such conditions enhance the perennial's survival and vigor, preparing it for robust development throughout the upcoming growing season.
What Distance Should You Maintain Between Securigera Orientalis Plants?
Ensure to position securigera orientalis approximately 18-24 inches (45-60 cm) apart. This provides each plant with sufficient room to expand and flourish without overcrowding.
What is the Best Soil Blend for Securigera Orientalis Relocation?
For securigera orientalis, prepare well-draining soil enriched with organic matter. Incorporating compost or a balanced foundational fertilizer will give your plants a robust start.
Where Should You Replant Your Securigera Orientalis?
Place securigera orientalis in a spot that receives full sunlight, ideally 6-8 hours daily. This will help your perennials thrive and produce beautiful blossoms.
What Equipment Should You Prepare Before Relocating Securigera Orientalis?
Gardening Gloves
To safeguard your hands while handling soil and plants.
Trowel
For excavating precise holes and furrows.
Shovel or Spade
For digging around and lifting the plant from its initial spot.
Watering Can or Hose
For hydrating the plant before and after its move.
Wheelbarrow or Bucket
To transport the plant to its new location.
Garden Fork
To loosen and aerate the soil in the new planting area.
Stakes and Ties
For supporting the plant if it requires stabilization.
How Do You Extract Securigera Orientalis from the Ground?
How Do You Extract Securigera Orientalis from the Ground?
From Ground: First, hydrate the securigera orientalis plant to moisten the soil. Then, excavate a wide trench around the plant using a shovel or spade, ensuring the plant's root ball remains intact. Carefully use the spade to lift the plant from its original position by sliding it beneath the root ball.From Pot: Water the securigera orientalis thoroughly to facilitate removal. Gently tilt the pot sideways and tap the sides to loosen the soil. Carefully pull the plant out by its base, taking care not to harm the root ball.From Seedling Tray: Ensure the soil in the tray is damp before attempting removal. Gently push up from the bottom of the tray or use a small tool like a pencil to delicately lift each seedling from its cell, being careful to keep the roots intact.
Step-by-Step Guide for Relocating Securigera Orientalis
Prepare the Site
Use a garden fork to loosen and aerate the soil in your chosen spot. This will facilitate root expansion.
Dig the Hole
Create an excavation that is twice as wide and equally deep as the plantâs root ball. This provides ample room for the roots to grow.
Position the Plant
Place the securigera orientalis in the hole. The top of the root ball should be level with the ground surface. Backfill with soil, gently firming it around the plant.
Water Generously
Water the securigera orientalis liberally immediately after relocating to help settle the soil around the roots and minimize transplant shock.
Stake if Necessary
If the securigera orientalis is tall or top-heavy, secure it with stakes and ties to provide support as it establishes itself in the new location.
How Do You Care For Securigera Orientalis After Relocation?
Watering
Keep the soil around the securigera orientalis consistently moist, but not waterlogged, for the initial few weeks after relocating to help establish strong roots.
Mulching
Apply a layer of mulch around the base of the plant to retain moisture and regulate soil temperature.
Monitoring
Regularly inspect the securigera orientalis for signs of stress, such as wilting or yellowing leaves, and adjust watering or support as needed.
Pruning
Trim any damaged or dead leaves to help the plant direct its energy towards new growth.
Troubleshooting Common Issues with Securigera Orientalis Relocation.
When is the optimal time to relocate securigera orientalis?
Early to mid-spring is ideal for relocating securigera orientalis to ensure healthy growth.
How should I prepare the soil for securigera orientalis?
Ensure well-draining soil mixed with organic compost to provide a nutrient-rich environment for securigera orientalis.
What is the recommended spacing for securigera orientalis plants?
Securigera orientalis should be spaced 18-24 inches (45-60 cm) apart to ensure proper growth and airflow.
How deep should I plant securigera orientalis?
Plant securigera orientalis at the same depth as its current container to avoid stress.
How do I minimize transplant shock for securigera orientalis?
Water thoroughly before and after relocating securigera orientalis to reduce transplant shock.
Should I prune securigera orientalis during relocation?
Lightly prune any damaged roots or stems before planting securigera orientalis to encourage new growth.
How much water does securigera orientalis need after relocating?
Water securigera orientalis deeply immediately after relocating and keep the soil moist but not waterlogged.
Can I relocate securigera orientalis in the fall?
While early to mid-spring is ideal, you can also relocate securigera orientalis in early fall with care.
What kind of fertilizer is best for newly relocated securigera orientalis?
Use a balanced, slow-release fertilizer to provide steady nutrients for securigera orientalis after relocating.
How to handle securigera orientalis's roots during relocation?
Gently loosen the root ball of securigera orientalis without damaging the roots to encourage establishment in new soil.



