How to Transplant European scopolia?
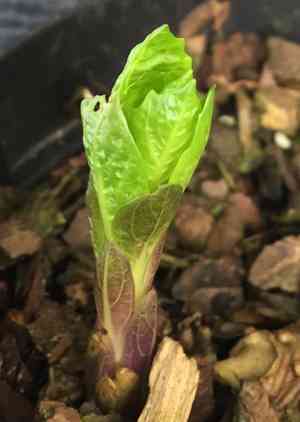
For European scopolia, the ideal period for relocation extends from the conclusion of late frosts to the onset of early summer. Select a shaded spot featuring damp, adequately draining earth. Bear in mind that careful management of the root system facilitates a smooth transition to its new environment.
What Preparations are Needed Before Transplanting European Scopolia?
What is the Ideal Time for Transplanting European Scopolia?
The prime period for moving european scopolia spans from early spring's onset to the beginning of summer. This timeframe allows roots ample chance to settle, benefiting from mild temperatures and increased moisture, which together create an ideal growth setting. Transplanting european scopolia then ensures a strong start for robust development, setting the stage for a vigorous season. It's also vital to check soil readiness before the move, making sure it's fertile, drains well, and is properly amended if needed. By transplanting during this window, gardeners promote a smooth transition with minimal stress on european scopolia, leading to a thriving display year after year.
How Much Space Should You Leave Between European Scopolia Plants?
Hello, budding gardener! Let's ensure your european scopolia has ample room to thrive. Aim to position them roughly 12-18 inches (30-46 cm) apart. This provides each plant sufficient space to develop robustly and healthily.
What is the Best Soil Mix for European Scopolia Transplanting?
For your european scopolia, rich, well-draining soil is key to a happy plant life. Before transplanting, mix in some organic compost to give them a nutrient-rich start. A balanced, slow-release fertilizer will also provide a beneficial boost.
Where Should You Relocate Your European Scopolia?
Finding the perfect sunny spot for your european scopolia is like choosing a comfortable corner for a good book. An area with partial shade to full sun will keep them content. It offers the best of both worlds, providing ample sunlight while shielding them from intense midday heat.
What Equipments Should You Prepare Before Transplantation European Scopolia?
Gardening Gloves
To safeguard your hands while handling soil and plants.
Shovel or Garden Spade
For excavating the plant and preparing a new hole in the ground.
Garden Trowel
For precise work around root systems and smaller planting holes.
Watering Can or Hose
To hydrate the plant before and after the relocation process.
Pruning Shears
To remove any dead or excess plant parts prior to transplanting.
Wheelbarrow or Garden Cart
To move the plant and soil if necessary.
Rooting Hormone (optional)
To assist in root growth following transplantation.
How Do You Remove European Scopolia from the Soil?
How Do You Remove European Scopolia from the Soil?
From Ground: Water the european scopolia plant thoroughly the day before removal to soften the soil. Carefully dig around the plant with a shovel or spade, avoiding root damage. Gradually deepen the circle and gently work the tool under the root ball. Once loose, lift the plant by its root ball, not by its stems or leaves.From Pot: Start by watering the european scopolia to moisten the soil, making plant removal easier. Gently tap the pot's sides to loosen the root ball. Turn the pot sideways and carefully pull the plant out by its base, supporting the root ball with your hand.From Seedling Tray: Moisten the soil around the european scopolia seedlings. Gently push the seedling up from the cell's bottom or use a garden trowel to scoop it out, preserving the root structure. Handle the seedling by its leaves, not its delicate stem.
Step-by-Step Guide for Transplanting European Scopolia
Dig the Hole
Excavate a hole twice as wide and roughly the same depth as the european scopolia's root ball to allow ample root space. Loosen the soil at the bottom of the hole.
Inspect the Roots
Gently remove any damaged roots using pruning shears. If the roots are tightly coiled in a pot shape, carefully separate them with your fingers.
Position the Plant
Place the european scopolia in the center of the hole, ensuring the top of the root ball is level with the surrounding ground to prevent water accumulation around the stem.
Refill the Hole
Partially backfill the hole with excavated soil, gently firming to eliminate air pockets. Water the soil to help it settle, then complete the backfilling.
Stabilize the Plant
Gently firm the soil around the base of the european scopolia with your hands. This helps secure the plant and ensures it stands upright.
Final Watering
Water the transplanted european scopolia generously to provide moisture and aid root recovery from transplant shock.
How Do You Care For European Scopolia After Transplanting?
Initial Watering
For the first few weeks, water the european scopolia regularly to maintain consistent soil moisture and help roots establish in the new location.
Mulch
Apply a layer of organic mulch around the base of european scopolia to retain moisture, regulate soil temperature, and reduce weed growth.
Pruning
Trim any dead foliage to encourage new growth and lessen stress on the european scopolia.
Supports
If the european scopolia is tall or top-heavy, consider using a stake or plant support to prevent stem breakage.
Monitoring
Watch for signs of stress, such as discoloration or wilting, and adjust care as needed.
Troubleshooting Common Issues with European Scopolia Transplantation.
When is the perfect time to transplant european scopolia?
The optimal period for transplanting european scopolia is from early to late spring, when growth is vigorous.
How far apart should I space european scopolia when transplanting?
Aim for ample spacing, placing european scopolia 12-18 inches (30-45 cm) apart, allowing for optimal growth.
What soil conditions favor european scopolia after transplanting?
Ensure rich, well-draining soil with a touch of shade; european scopolia thrives in such earthy comfort.
How much should I water european scopolia post-transplant?
Administer water generously at the roots immediately after transplanting, then moderate as the plant establishes.
What sun exposure is best for european scopolia after transplanting?
Partial shade is european scopolia's ideal sun exposure, protecting delicate leaves from harsh sunlight.
Why are my transplanted european scopolia's leaves wilting?
Wilting often indicates distress. Check for overly moist soil or intense sun, and adjust care.
Can transplant shock affect european scopolia, and how to minimize it?
Indeed, to lessen the impact, keep roots intact, water well, and shield from direct sun initially.
Is it necessary to fertilize european scopolia after transplanting?
After settling in, a balanced, slow-release fertilizer can aid in european scopolia's prosperity.
How do I know if european scopolia needs more space when transplanting?
If roots circle or overcrowd its container, larger accommodations are essential for european scopolia.
What should I avoid doing right after transplanting european scopolia?
Refrain from pruning or stressing european scopolia immediately; it needs all its energy to adapt.



