How to Transplant Star sansevieria?
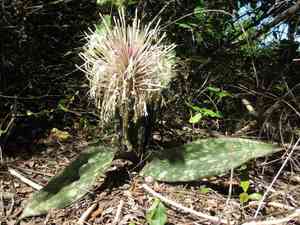
The revitalizing period of early to mid-spring presents an ideal opportunity for star sansevieria to relocate, capitalizing on strong developmental phases. Select a spot with ample, diffused illumination, making certain the substrate drains effectively. Stimulate star sansevieria by providing room for root expansion, which is crucial for its flourishing future.
What Preparations are Needed Before Transplanting Star Sansevieria?
What is the Ideal Time for Transplanting Star Sansevieria?
The beginning of the active growth phase, specifically early to mid-spring, is an optimal period for relocating star sansevieria. This timeframe promotes root establishment and development. Moving star sansevieria at this point maximizes its ability to adapt to a new setting before the intensity of summer heat. Deliberately selecting this period for relocation allows star sansevieria ample recovery time, fostering a vigorous growth cycle in harmony with seasonal rhythms.
How Much Space Should You Leave Between Star Sansevieria Plants?
When relocating star sansevieria, ensure adequate room for expansion. Aim for a separation of approximately 1-2 feet (30-60 cm) between each specimen. This prevents overcrowding and allows for unhindered growth.
What is the Best Soil Mix for Star Sansevieria Transplanting?
Star sansevieria thrives in well-draining soil, such as a cactus potting blend or standard potting soil enhanced with one-third sand. For initial nourishment, use a slow-release fertilizer. This preparation can stimulate early development and ensure your plant's health and vigor.
Where Should You Relocate Your Star Sansevieria?
Let's determine the perfect spot! Star sansevieria prefers indirect light, but it can also endure low light conditions. Therefore, select an area in your home or garden that receives ample, diffused sunlight. Avoid harsh, direct sun exposure.
What Equipments Should You Prepare Before Transplantation Star Sansevieria?
Garden Shovel
To excavate the star sansevieria from its original spot, and to dig the new planting hole at the chosen site.
Gardening Gloves
To safeguard your hands while handling soil and the plant.
Pruning Shears
To trim any unhealthy or damaged roots on the star sansevieria prior to relocation.
Spade
For refining the planting hole and removing excess soil.
Watering Can
To provide the star sansevieria with water both before and after its transfer.
Wheelbarrow or Large Container
To move the star sansevieria from its initial location to its new position.
How Do You Remove Star Sansevieria from the Soil?
How Do You Remove Star Sansevieria from the Soil?
From Ground: First, irrigate the star sansevieria to moisten the soil. This facilitates removal and lessens plant stress. Next, use a shovel to dig a wide perimeter around the plant, ensuring you go deep enough to get beneath the root ball. Carefully work the spade under the root ball and lift the plant from its original spot. Be cautious not to harm the roots.From Pot: Water the star sansevieria to loosen the soil. Then, gently tilt the container and extract the plant by grasping the base of its stems. You might need to lightly tap or shake the pot to help free the roots. Avoid pulling too forcefully, which could cause damage.From Seedling Tray: Allow the star sansevieria to mature until it's robust enough to handle and has developed a healthy root system. Then, gently hold the base of the star sansevieria and lift it from the seedling tray, taking care not to injure the delicate roots.
Step-by-Step Guide for Transplanting Star Sansevieria
Prune Roots
Before relocating your star sansevieria, examine its roots for any indications of damage or disease. Use pruning shears to remove any unhealthy sections.
Prep Transplant Hole
Use your garden shovel to excavate a hole that is twice as wide and the same depth as the root ball of your star sansevieria. This provides ample space for root expansion. Use the spade to refine the hole if necessary.
Insert Plant
Position your star sansevieria in the prepared hole. Ensure that the top of the root ball is level with the surrounding ground. If not, add or remove soil accordingly.
Backfill Hole
Carefully refill the hole with the same soil you removed. Lightly tamp it down with your hands to eliminate any large air pockets.
Water
After transplanting, thoroughly water the star sansevieria using the watering can. This will help settle the soil and minimize transplant shock.
How Do You Care For Star Sansevieria After Transplanting?
Watering
Maintain consistent moisture in the soil around the star sansevieria, but avoid waterlogging. Extra attention may be required during the initial weeks post-transplant, as the star sansevieria acclimates to its new environment.
Observation
Regularly inspect your star sansevieria for any indicators of stress, such as wilting or yellowing leaves. Should these appear, assess the soil and the plant's surroundings and make any necessary adjustments.
Foliage Maintenance
Remove any damaged leaves after transplant. This enables the star sansevieria to direct its energy towards establishing strong roots and new growth, rather than repairing old, compromised foliage.
Troubleshooting Common Issues with Star Sansevieria Transplantation.
What is the best time to uproot and transplant star sansevieria?
The optimal period to relocate star sansevieria is from early spring through summer.
How far apart should I space star sansevieria when transplanting?
When rehousing star sansevieria, you should maintain a separation of approximately 1-2 feet (30-60 centimeters) between each plant.
What type of soil is ideal for transplanting star sansevieria?
Relocate star sansevieria into well-draining soil. It does not require rich or specialized soil to flourish.
How should I handle the roots when transplanting the star sansevieria?
Be gentle! Damaged roots can stress the plant and impede its development. Aim to minimize root disturbance.
How deep should the transplant hole be for star sansevieria?
Excavate a hole just deep enough to cover the roots. Typically, about 4-5 inches (10-12 cm) is suitable.
Should I water star sansevieria immediately after transplanting?
Yes, irrigate star sansevieria once you've relocated it. This aids in settling the soil around the roots.
What pot size is most suitable for transplanting star sansevieria?
Select a pot that is roughly 10-12 inches (25-30 cm) larger than the root ball of star sansevieria.
What kind of care does star sansevieria need after transplantation?
Following relocation, provide star sansevieria with moderate sunlight, infrequent watering, and shield it from drastic temperature fluctuations.
How often should I transplant my star sansevieria?
Generally, star sansevieria should be moved every 2-3 years, or when the plant outgrows its current container.
I just transplanted star sansevieria, and it looks stressed. What should I do?
Don't be concerned, this is normal. Allow the plant time to acclimate to its new surroundings. Keep it hydrated and protect it from extreme weather or direct sunlight.



