How to Transplant Starrush Whitetop?
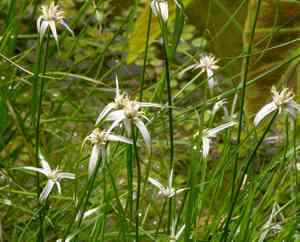
The revitalization of the natural world in springtime presents an ideal period for relocating starrush Whitetop, guaranteeing a vigorous beginning. Select a bright, damp spot, and carefully introduce the root system to its new surroundings for optimal outcomes.
What Preparations are Needed Before Transplanting Starrush Whitetop?
What is the Ideal Time for Transplanting Starrush Whitetop?
The perfect time for relocating starrush Whitetop is during the spring months. This period offers warm, welcoming soil, promoting robust root development. By moving starrush Whitetop at this time, you provide it with the best possible start, with mild temperatures supporting recovery and establishment before summer's heat. This precise timing aligns well with starrush Whitetop's growth cycle, ensuring a smoother transition for the plant and fostering lush, strong development.
How Much Space Should You Leave Between Starrush Whitetop Plants?
When preparing your area for transplanting starrush Whitetop, position each hole approximately 1-3 feet (30-90 cm) apart. This provides ample room for your plants to expand and flourish, boosting their health and chances of survival. Remember, every plant requires its own personal space!
What is the Best Soil Mix for Starrush Whitetop Transplanting?
For starrush Whitetop, utilizing well-draining soil is essential. Consider a loam or sandy soil type, both are highly effective. About 1 week prior to transplanting, prepare the soil and incorporate a base fertilizer. A slow-release, all-purpose fertilizer will be ideal to support starrush Whitetop's growth.
Where Should You Relocate Your Starrush Whitetop?
Placement is vital! Ensure to position starrush Whitetop in an area where it will receive full to partial sunlight daily. These plants do not tolerate excessive heat, so avoid intense mid-afternoon sun if possible. A bit of foresight can make a significant difference!
What Equipments Should You Prepare Before Transplantation Starrush Whitetop?
Gardening Gloves
For safeguarding hands while working with soil and plants.
Shovel or Spade
Essential for excavating the new planting site and extracting starrush Whitetop from its original spot.
Trowel
Perfect for handling young plants or smaller, mature starrush Whitetop.
Garden Hoe
For preparing and leveling the planting area.
Watering Can or Hose
Needed for hydrating the plant after transplantation.
Mulch
Helps maintain soil moisture following transplanting.
Wheelbarrow
Useful for moving starrush Whitetop if it is mature and heavy.
How Do You Remove Starrush Whitetop from the Soil?
How Do You Remove Starrush Whitetop from the Soil?
From Ground: First, water starrush Whitetop to slightly moisten the surrounding area, which simplifies the uprooting process. Use your shovel or spade to dig a wide circle around starrush Whitetop, ensuring the root ball remains intact. Afterward, carefully insert your spade beneath the root ball at various points and gently lift starrush Whitetop from its current location.From Pot: Begin the removal by watering starrush Whitetop in its container; this aids in easing the plant out. Place your hand with splayed fingers over the pot's top, allowing the plant stem to pass between your fingers. Gently invert and tap the pot to loosen starrush Whitetop. Slowly and carefully slide starrush Whitetop out of the pot, taking care not to harm the roots.From Seedling Tray: Start by firmly but gently pressing the soil beneath the seedling tray to loosen the soil around starrush Whitetop. Slightly lift starrush Whitetop from underneath using your trowel, being careful not to touch or damage the young stem or roots. It is important that as much of the original soil as possible remains attached to the roots of starrush Whitetop.
Step-by-Step Guide for Transplanting Starrush Whitetop
Prepare the Planting Site
Begin by carefully raking the area using your hoe. Remove any plant debris, rocks, or other unwanted material. Now, using your spade or shovel, dig a hole that is approximately twice the size of starrush Whitetop's root ball.
Prune if Necessary
Inspect starrush Whitetop for any damaged or excessively long roots and trim them using clean, sharp gardening shears for healthier growth after transplant.
Plant starrush Whitetop
Now, gently place starrush Whitetop into the hole. Ensure it's not positioned too deep or too shallow. The top of the root ball should be level with or slightly above the ground surface.
Filling the Hole
Backfill the hole with the original soil, pressing gently around the root ball with your hands to eliminate air pockets and ensure the plant is stable and upright.
Water Immediately
Once starrush Whitetop is planted, water generously using your hose or watering can. This helps to settle the soil around the roots.
Finish with Mulch
Finally, spread a layer of mulch around the transplanted plant, being careful not to pile it against the stem of starrush Whitetop. This aids in maintaining soil moisture.
How Do You Care For Starrush Whitetop After Transplanting?
Watering
For the initial few weeks after transplant, ensure to water starrush Whitetop daily. Always check if the top layer of soil is dry before watering again. Over time, reduce the frequency but not the volume of watering.
Pruning
As starrush Whitetop establishes in its new location, look for any signs of stress or disease. Remove damaged or dying foliage to redirect energy to healthy growth. However, avoid heavy pruning immediately after transplanting.
Monitoring Growth
Keep an eye on starrush Whitetop's growth after transplanting. Noticeable new growth indicates a successful transplant. If starrush Whitetop appears stressed or unhealthy, consider consulting your local nursery or garden center for advice and troubleshooting.
Troubleshooting Common Issues with Starrush Whitetop Transplantation.
When's the optimal time to transplant starrush Whitetop?
The best time to transplant starrush Whitetop is from early spring to late summer (S1-S3).
What is the correct spacing for transplanting starrush Whitetop?
Starrush Whitetop thrives when given ample room, ideally spaced 1-3 feet (30-90 cm) apart.
What to do if starrush Whitetop wilt after transplanting?
Do not worry, wilting is common. Starrush Whitetop may require time to adjust. Continue gentle watering and observe.
How deep should I dig a hole for transplanting starrush Whitetop?
The hole should be as deep as starrush Whitetop's root ball and twice its width.
What's the optimum soil type for starrush Whitetop?
Starrush Whitetop prefers moist, well-draining soil with a slight acidity. An ideal pH is 6.0-6.5.
Should I add compost or fertilizer when transplanting starrush Whitetop?
Yes, incorporating compost or a slow-release fertilizer into the planting hole can give starrush Whitetop a strong start.
What to to do if the leaves of starrush Whitetop turn yellow after transplanting?
Yellow leaves often indicate overwatering. Allow the soil to dry slightly between waterings and prevent waterlogging.
How much sun does starrush Whitetop need after transplanting?
Starrush Whitetop enjoys full sun to partial shade; providing it with about 6-8 hours of direct sunlight daily is perfect.
How often should I water starrush Whitetop after transplanting?
Starrush Whitetop prefers consistently moist soil. Water thoroughly after transplanting, then regularly keeping the soil evenly hydrated.
Do I need to mulch after transplanting starrush Whitetop?
Absolutely, mulching around starrush Whitetop helps to retain moisture, suppress weeds, and mimic a natural environment.



