How to Transplant Texas snoutbean?
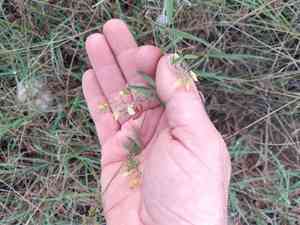
Texas snoutbean flourishes when relocated from the beginning to the end of spring, benefiting from rising temperatures. Select a bright spot with soil that drains effectively to guarantee peak development. It adjusts readily to its new environment if these requirements are satisfied.
What Preparations are Needed Before Transplanting Texas Snoutbean?
What is the Ideal Time for Transplanting Texas Snoutbean?
Texas snoutbean, a perennial plant, should ideally be moved in the early to late spring. This timing allows texas snoutbean to establish roots before the summer heat, ensuring healthier growth. The benefits include improved water uptake and robust development, leading to a strong start for the growing season.
How Much Space Should You Leave Between Texas Snoutbean Plants?
To give texas snoutbean plenty of room to grow, space the plants 12-18 inches (30-45 cm) apart. This ensures each plant has enough room to thrive without overcrowding.
What is the Best Soil Mix for Texas Snoutbean Transplanting?
Texas snoutbean prefers well-drained soil. Prepare the soil by mixing in compost or a balanced base fertilizer to enhance nutrient availability. This will help texas snoutbean establish strong roots.
Where Should You Relocate Your Texas Snoutbean?
Texas snoutbean loves sunlight, so choose a location that receives full sun for at least 6-8 hours a day. A sunny spot will help texas snoutbean grow strong and healthy.
What Equipments Should You Prepare Before Transplantation Texas Snoutbean?
Gardening Gloves
To protect your hands while working with the soil and plant.
Shovel or Spade
For digging out the plant and the new hole in the ground.
Trowel
Useful for working around the roots of the plant and the new planting area.
Watering Can or Hose
To keep the soil moist before, during, and after transplanting.
Mulch
To retain moisture and protect the plant's roots post-transplant.
How Do You Remove Texas Snoutbean from the Soil?
How Do You Remove Texas Snoutbean from the Soil?
From Ground: First, water the texas snoutbean to dampen the soil. Then, dig a wide trench around the plant using a shovel or spade, ensuring the plant's root ball remains intact. Carefully work the spade under the root ball to lift the plant from its original location.From Pot: Gently water the texas snoutbean and let the water drain to soften the soil. Tilt the pot while supporting the plant base and carefully slide it out, ensuring the roots remain undamaged.From Seedling Tray: Water the texas snoutbean seedlings and gently press on the bottom of the tray cells to release them. Use a trowel or your fingers to carefully lift each seedling by the root ball.
Step-by-Step Guide for Transplanting Texas Snoutbean
Prepare the New Site
Dig a hole in the ground that is twice as wide and the same depth as the root ball of the texas snoutbean. Make sure the soil around the hole is loose to help the roots establish more easily.
Amend the Soil
If your soil needs improvement, add compost or organic matter to the hole to promote healthy growth.
Place the Plant
Position the texas snoutbean in the center of the hole, spreading the roots out gently. The top of the root ball should be level with the surrounding soil.
Fill the Hole
Fill in the hole with the surrounding soil, pressing lightly to remove air pockets. Be careful not to compact the soil too much.
Water Thoroughly
Water the texas snoutbean immediately after transplanting to help settle the soil around the roots.
Add Mulch
Apply a layer of mulch around the base of the plant to retain moisture and keep the soil temperature consistent.
How Do You Care For Texas Snoutbean After Transplanting?
Watering
Keep the soil around the texas snoutbean consistently moist, but not soggy, for the first few weeks after transplanting to help establish strong roots.
Monitor for Stress
Watch for signs of transplant shock, such as wilting or yellowing leaves. If you notice these symptoms, ensure proper watering and avoid fertilizing until the plant recovers.
Mulching
Maintain a layer of mulch around the plant to protect the roots and retain moisture.
Troubleshooting Common Issues with Texas Snoutbean Transplantation.
When is the best time to transplant texas snoutbean?
Move texas snoutbean from early spring to late spring for optimal growth and establishment.
How should I space texas snoutbean when transplanting?
Space texas snoutbean 12-18 inches (30-45 cm) apart to ensure healthy development.
What should I do if texas snoutbean appears wilted after transplanting?
Ensure proper watering and avoid direct sunlight for a few days to aid recovery.
How deep should the hole be for transplanting texas snoutbean?
Dig a hole twice the width and the same depth as the root ball.
How can I avoid shocking texas snoutbean during transplanting?
Water thoroughly before and after transplanting, and handle roots with care.
Should I add fertilizer when transplanting texas snoutbean?
Incorporate compost or a balanced fertilizer in the soil to promote root establishment.
How do I protect texas snoutbean from pests after transplanting?
Use organic pest repellents and monitor regularly for any signs of pest activity.
What's the ideal soil type for texas snoutbean after transplanting?
Plant texas snoutbean in well-draining, sandy-loam soil enriched with organic matter for best results.
How often should texas snoutbean be watered after transplanting?
Water texas snoutbean deeply once a week, ensuring the soil remains moist but not waterlogged.
How can I tell if texas snoutbean is adjusting well post-transplant?
Look for new growth and vibrant foliage as indicators of successful transplanting.



