How to Transplant Hoary caper?
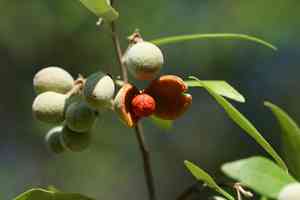
For hoary caper, the most favorable time for relocation is between late spring and mid-summer, owing to the warmer and more consistent environmental factors. Choose a bright, adequately drained spot for the transplant to guarantee vigorous development.
Essential Preparations Before Relocating Hoary Caper?
Optimal Period for Relocating Hoary Caper?
The best time to move hoary caper is from late spring through mid-summer. This timeframe ensures the soil is adequately warm and free from frost risks. Furthermore, it coincides with the plant's active growth, promoting robust root development and successful relocation. Transplanting hoary caper during this window encourages strong establishment, leading to healthier growth and improved flowering in the subsequent season.
Required Spacing Between Hoary Caper Plants?
When relocating hoary caper, ensure each plant is positioned 18-24 inches (45-60 cm) apart. This provides ample room for growth and prevents competition for vital resources.
Ideal Soil Blend for Hoary Caper Relocation?
Prepare a well-draining soil mixture for hoary caper, enriched with organic compost. Incorporate a balanced base fertilizer to supply essential nutrients. A soil pH between 6.0-7.5 is most suitable.
Recommended New Location for Your Hoary Caper?
Position hoary caper in a sunny spot where it can receive at least 6 hours of direct sunlight daily. This promotes vigorous growth and overall plant health.
Necessary Equipment for Hoary Caper Transplantation?
Gardening Gloves
To safeguard your hands while handling soil and the plant.
Shovel or Spade
For excavating around and lifting the plant from its initial spot.
Transplant Trowel
For more precise digging near the plant's root system.
Watering Can or Hose
To hydrate the plant before and after its relocation.
Mulch
To maintain moisture in the new soil and regulate its temperature.
Garden Fork
To loosen the soil in the designated new planting area.
Support Stakes and Ties
To offer stability to the plant post-transplantation.
Method for Extracting Hoary Caper from the Soil?
Method for Extracting Hoary Caper from the Soil?
From Ground: First, moisten the hoary caper plant's soil with water. Next, use a shovel or spade to dig a wide trench around the plant, ensuring the root ball remains intact. Carefully work the spade beneath the root ball to lift the plant from its original position.From Pot: Thoroughly water the hoary caper plant. Gently tap the pot's sides to loosen the soil. Tilt the pot and carefully slide the plant out, supporting the plant's base and root ball as you remove it.From Seedling Tray: Water the seedlings thoroughly. Use a transplant trowel or a small spoon to lift each seedling by scooping under its roots. Handle seedlings gently by their leaves, not the stem, to prevent damage.
Detailed Steps for Transplanting Hoary Caper
Prepare the New Location
Loosen the soil with a garden fork and dig a hole twice as wide and as deep as the root ball. Incorporate compost or organic matter if necessary.
Hydrate the Plant
Ensure the hoary caper plant is well-watered before moving it. This helps minimize transplant shock.
Relocate the Plant
Position the hoary caper plant in the center of the newly dug hole. Confirm the top of the root ball is level with the surrounding soil surface.
Backfill and Compact the Soil
Fill the hole with soil around the roots, pressing gently but firmly to eliminate any air pockets.
Water Generously
Water the newly transplanted hoary caper plant thoroughly to help settle the soil and establish root contact.
Apply Mulch
Spread a layer of mulch around the plant's base to retain moisture and regulate soil temperature.
Provide Support
Use stakes and ties if needed to offer stability to the hoary caper plant until its roots are firmly established.
Post-Transplantation Care for Hoary Caper?
Watering
Keep the soil around the hoary caper consistently damp, but not waterlogged, for the initial weeks after transplanting to encourage strong root development.
Mulching
Maintain a layer of mulch around the plant to help conserve moisture and inhibit weed growth.
Monitoring
Regularly inspect the hoary caper plant for signs of stress, such as wilting or yellowing leaves, and address any issues promptly.
Pruning
Remove any damaged or dead foliage to promote healthy growth and reduce stress on the plant.
Fertilizing
Apply a balanced, slow-release fertilizer as needed to support the hoary caper plant's growth.
Addressing Common Issues with Hoary Caper Relocation.
When is the best time to transplant hoary caper?
Late spring to mid-summer provides ideal conditions for relocating hoary caper.
What spacing should be maintained when transplanting hoary caper?
Maintain a distance of 18-24 inches (45-60 cm) when transplanting hoary caper for optimal growth.
How should I prepare the soil for transplanting hoary caper?
Utilize well-draining soil enriched with organic matter for a healthy beginning.
How can I reduce transplant shock for hoary caper?
Water thoroughly immediately after transplanting and keep the soil moist but not saturated.
Should I fertilize hoary caper during transplanting?
Apply a balanced, slow-release fertilizer to help hoary caper develop strong roots.
How deep should the hole be for hoary caper?
Excavate a hole twice the width and the same depth as the root ball.
Should hoary caper be watered before transplanting?
Yes, water the plant well a day prior to facilitate the transition.
What type of mulch is best for hoary caper after transplanting?
Use organic mulch to retain moisture and regulate soil temperature.
How can I protect hoary caper from pests after transplanting?
Monitor regularly and use natural deterrents like neem oil if pests emerge.
How much sunlight does hoary caper need after transplanting?
Ensure hoary caper receives full sun, approximately 6-8 hours of direct sunlight daily.



