How to Transplant Phleum hirsutum?
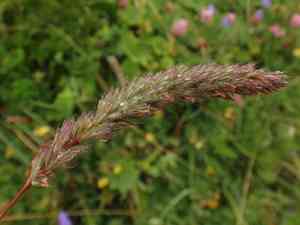
Phleum hirsutum flourishes when relocated between early and mid-spring, as it benefits from the warming ground and elevated humidity. Select a bright spot with adequately draining soil to guarantee a successful re-establishment. Consistently irrigate completely after transplanting to encourage root development.
What Preparations are Necessary Before Relocating Phleum Hirsutum?
What is the Optimal Period for Relocating Phleum Hirsutum?
Moving phleum hirsutum during the initial to middle spring season guarantees prime root development prior to summer's heat. This timing promotes vigorous growth and minimizes transplant stress, boosting long-term vitality and resilience. Early spring weather offers ample moisture and moderate temperatures, perfect for the plant's adjustment to its new setting.
What Spacing is Recommended Between Phleum Hirsutum Plants?
Phleum hirsutum should be positioned 12-18 inches (30-45 cm) apart when moved to ensure adequate room for expansion. This spacing facilitates proper air circulation and reduces competition for nutrients and water.
What is the Ideal Soil Mixture for Phleum Hirsutum Relocation?
Prepare soil that drains well and is rich in organic material for phleum hirsutum. Incorporating a balanced, slow-release base fertilizer during transplantation can supply essential nutrients. Steer clear of heavy clay soils unless enhanced with compost.
Where Should You Replant Your Phleum Hirsutum?
Phleum hirsutum flourishes best in spots receiving full sunlight for a minimum of 6 hours daily. Select a garden area that provides abundant direct sunlight and is not overshadowed by trees or structures.
What Tools Should You Gather Before Moving Phleum Hirsutum?
Gardening Gloves
To safeguard your hands while handling soil and plants.
Shovel or Spade
For excavating a broad trench around the plant.
Hand Trowel
Useful for smaller, more delicate tasks involving the root ball.
Watering Can
To hydrate the plant before extraction and after replanting.
Burlap or Plastic Sheeting
To encase the root ball if the plant requires transport.
How Do You Extract Phleum Hirsutum from the Ground?
How Do You Extract Phleum Hirsutum from the Ground?
From Ground: First, moisten the phleum hirsutum plant's soil. Then, excavate a wide trench around the plant using a shovel or spade, ensuring the plant's root ball remains intact. Carefully work the spade beneath the root ball to lift the plant from its original spot.From Pot: Hydrate the phleum hirsutum plant to facilitate removal. Gently tilt the pot sideways and carefully slide the plant out, supporting the root ball to prevent damage. If the plant is stuck, lightly tap the pot's sides or squeeze it if it's flexible.From Seedling Tray: Gently water the seedlings. Use a hand trowel or similar small tool to carefully lift each seedling from the tray, ensuring you preserve as much of the root system as possible.
Step-by-Step Guide for Relocating Phleum Hirsutum
Location Preparation
Select the new site for your phleum hirsutum plant. Confirm the area meets the plant's growth requirements.
Hole Excavation
Dig a hole that is twice as wide and equal in depth to the root ball of the phleum hirsutum plant. This ensures the roots have ample space to expand.
Planting
Carefully position the phleum hirsutum plant into the hole, ensuring it's at the same depth as its previous growth. Backfill the hole with soil, pressing gently to eliminate air pockets.
Watering
Thoroughly water the newly relocated phleum hirsutum to settle the soil and aid in plant establishment.
How Do You Care For Phleum Hirsutum After Relocation?
Monitoring
Regularly inspect the phleum hirsutum plant for indications of stress or shock, such as wilting or yellowing foliage.
Mulching
Apply a layer of mulch around the base of the phleum hirsutum plant to retain moisture and regulate soil temperature.
Protection
Shield the phleum hirsutum plant from strong winds or excessive sun exposure if necessary, using stakes or temporary shade cloth.
Pruning
Trim any damaged or overgrown parts to direct the plant's energy towards developing new roots.
Addressing Common Issues with Phleum Hirsutum Relocation.
When is the optimal time to relocate phleum hirsutum?
Early to mid-spring is ideal for moving phleum hirsutum. The mild weather aids in successful establishment.
What distance should I maintain between phleum hirsutum plants?
Space phleum hirsutum approximately 12-18 inches (30-45 cm) apart to ensure proper growth and air circulation.
What depth should the relocation hole be for phleum hirsutum?
Excavate a hole twice the width and equivalent depth to the root ball of phleum hirsutum.
Should I water phleum hirsutum immediately after relocation?
Yes, thoroughly water phleum hirsutum after moving it to help settle the soil around its roots.
What soil type is best for relocating phleum hirsutum?
Well-draining, loamy soil enriched with organic matter is optimal for relocating phleum hirsutum.
Is fertilization necessary for phleum hirsutum during relocation?
Apply a balanced, slow-release fertilizer during relocation to support phleum hirsutum's initial growth.
How should I handle phleum hirsutum roots during relocation?
Gently loosen the roots of phleum hirsutum to encourage spreading once replanted without causing damage.
How much sunlight does phleum hirsutum require post-relocation?
Phleum hirsutum thrives in full sun, needing at least 6 hours of direct sunlight daily.
How can I prevent transplant shock in phleum hirsutum?
Water consistently, minimize root disturbance, and provide initial partial shade to reduce shock.
Can I apply mulch around phleum hirsutum after relocation?
Yes, mulching around phleum hirsutum helps retain soil moisture and suppress weeds, but keep mulch away from the stem.



