How to Transplant Blacktack phacelia?
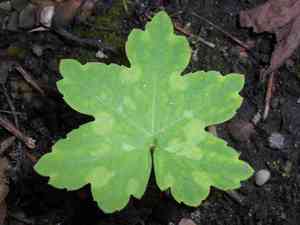
Blacktack phacelia flourishes when relocated between early and late spring, facilitating quick root development. Select bright, adequately drained sites. Although blacktack phacelia generally adjusts readily, steer clear of congested spaces to ensure robust development.
What Preparations are Needed Before Transplanting Blacktack Phacelia?
What is the Ideal Time for Transplanting Blacktack Phacelia?
The best period for relocating blacktack phacelia is from early to late spring. This timing ensures the ground has warmed sufficiently, creating optimal conditions for root development and robust growth. Transplanting during this window maximizes the plant's establishment and resilience, as it avoids the stresses of summer heat and potential frost damage.
How Much Space Should You Leave Between Blacktack Phacelia Plants?
When moving blacktack phacelia, ensure each plant is spaced 6-12 inches (15-30 cm) apart. This spacing provides ample room for growth and promotes good air circulation to maintain plant health.
What is the Best Soil Mix for Blacktack Phacelia Transplanting?
Prepare the soil for blacktack phacelia by ensuring it drains well and is sandy or loamy. To give the plants a strong start, incorporate a balanced base fertilizer according to package instructions before transplanting.
Where Should You Relocate Your Blacktack Phacelia?
Select a site for blacktack phacelia that receives full sun, meaning at least 6 hours of direct sunlight daily. This guarantees optimal growth and flowering for these sun-loving annuals.
What Equipments Should You Prepare Before Transplantation Blacktack Phacelia?
Gardening Gloves
To safeguard your hands while handling soil and plants.
Trowel
For loosening earth and excavating holes for relocation.
Transplanting Spade
To assist in lifting the root ball of the blacktack phacelia plant without harming the roots.
Watering Can or Hose
To hydrate the plant before and after its move.
A Healthy Soil Mix
To ensure the new location offers nutrient-rich and well-draining soil.
How Do You Remove Blacktack Phacelia from the Soil?
How Do You Remove Blacktack Phacelia from the Soil?
From Ground: First, water the blacktack phacelia plant to moisten the soil. Then, dig a wide trench around the plant using a shovel or spade, ensuring the plantâs root ball remains intact. Carefully work the spade beneath the root ball to lift the plant from its original spot.From Pot: Water the plant thoroughly before pressing or tapping the sides of the pot to loosen the soil. Gently slide the plant out, supporting the base to keep the root ball together.From Seedling Tray: Water the seedlings well. Use a pencil or similar tool to push gently from below, lifting the seedling by its leaves and keeping roots intact. Carefully separate them if they are too close.
Step-by-Step Guide for Transplanting Blacktack Phacelia
Plot Preparation
Choose a location that receives ample sunlight for improved growth. Prepare the soil by loosening it with a trowel and removing any weeds or debris.
Hole Digging
Excavate a hole that is slightly larger than the blacktack phacelia plant's root ball to comfortably accommodate the roots.
Transplanting
Carefully place the plant into the hole, ensuring it sits at the same depth as it was previously growing.
Soil Filling
Backfill the hole with the prepared soil mix, gently pressing down to eliminate air pockets. Ensure the plant is stable and upright.
Watering
Water the plant generously immediately after transplanting to help the soil settle around the roots.
How Do You Care For Blacktack Phacelia After Transplanting?
Watering
Keep the soil around the blacktack phacelia consistently moist, but not waterlogged, for the initial few weeks post-transplant to aid in establishing strong roots.
Mulching
Apply a layer of mulch around the plant's base to retain moisture and regulate soil temperature.
Weeding
Regularly remove weeds around the blacktack phacelia to reduce competition for nutrients and water.
Observation
Monitor your blacktack phacelia closely for the first few weeks to detect any signs of transplant shock or pests, and address any issues promptly.
Troubleshooting Common Issues with Blacktack Phacelia Transplantation.
When should I transplant blacktack phacelia for best results?
The optimal time to transplant blacktack phacelia is from early spring to late spring for peak growth.
How far apart should blacktack phacelia plants be spaced?
Position blacktack phacelia plants 6-12 inches (15-30 cm) apart to ensure healthy development and sufficient airflow.
What type of soil does blacktack phacelia prefer?
Blacktack phacelia thrives in well-drained soil. Loamy or sandy soil is ideal for this plant.
How should I prepare the soil before transplanting blacktack phacelia?
Loosen the soil and enrich it with compost to provide essential nutrients for blacktack phacelia.
How do I minimize transplant shock for blacktack phacelia?
Water blacktack phacelia thoroughly before and after transplanting to reduce stress and increase survival rates.
Should I fertilize blacktack phacelia after transplanting?
Lightly fertilize blacktack phacelia with a balanced, slow-release fertilizer a few weeks after transplanting.
How do I handle blacktack phacelia seedlings during transplanting?
Handle blacktack phacelia seedlings gently by their leaves, not stems, to avoid damaging the young plants.
What should I do if blacktack phacelia shows signs of wilting after transplanting?
Increase watering frequency and provide temporary shade to help blacktack phacelia recover from transplant shock.
How deep should I plant blacktack phacelia during transplanting?
Plant blacktack phacelia at the same depth as it was growing in its original container or seed tray.
When can I expect blacktack phacelia to start blooming after transplanting?
Blacktack phacelia typically begins blooming a few weeks after transplanting, given proper care and conditions.



