How to Transplant Changeable phacelia?
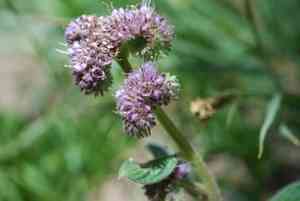
Changeable phacelia flourishes when relocated from the beginning to the end of spring, benefiting from the gentler temperatures and elevated soil hydration. Provide a site with ample sunlight to partial shade and soil that drains effectively for peak development. Irrigate sparingly after transplanting.
What Preparations are Needed Before Transplanting Changeable Phacelia?
What is the Ideal Time for Transplanting Changeable Phacelia?
Changeable phacelia flourishes when moved from early to late spring. This timeframe ensures the plant benefits from rising soil temperatures and increased sunlight, which foster strong root growth and vigorous development. Relocating during these months allows changeable phacelia to establish itself firmly before summer's heat and potential dry spells.
How Much Space Should You Leave Between Changeable Phacelia Plants?
For relocating changeable phacelia, aim to position the plants approximately 6-12 inches (15-30 cm) apart to provide ample room for growth. This spacing promotes good air circulation and helps prevent disease.
What is the Best Soil Mix for Changeable Phacelia Transplanting?
Prepare the soil for changeable phacelia by ensuring it drains well and is rich in organic material. Consider incorporating a balanced base fertilizer, such as a 10-10-10 (N-P-K) blend, to supply essential nutrients for healthy development.
Where Should You Relocate Your Changeable Phacelia?
When selecting a new spot to transplant changeable phacelia, seek an area that receives full sunlight for at least 6 hours daily. These plants thrive in bright, sunny locations.
What Equipments Should You Prepare Before Transplantation Changeable Phacelia?
Gardening Gloves
To safeguard your hands while handling soil and plants.
Shovel or Spade
To excavate the plant from its initial spot and to prepare the new planting hole.
Watering Can or Hose
To hydrate the plant before and after its relocation.
Trowel
To assist in carefully moving the plant from its original container or placing it in the ground.
Wheelbarrow
To transport the plant, especially if it is large or heavy.
Garden Fork
To loosen the soil surrounding the plant, making extraction simpler.
Stakes or Support Structures
To offer extra stability if required post-transplanting.
How Do You Remove Changeable Phacelia from the Soil?
How Do You Remove Changeable Phacelia from the Soil?
From Ground: First, irrigate the changeable phacelia plant to moisten the soil. Then, dig a wide trench around the plant using a shovel or spade, ensuring the plant's root ball remains intact. Carefully work the spade beneath the root ball to lift the plant from its original position.From Pot: Water the potted plant thoroughly to facilitate its removal. Gently tap and press the pot's sides to loosen the soil. Carefully tilt the pot sideways and slide the plant out, supporting the root ball as you do so.From Seedling Tray: Water the seedlings in the tray, making them easier to manage. Use a trowel or your fingers to gently lift the seedlings from their compartments, ensuring the entire root system is supported.
Step-by-Step Guide for Transplanting Changeable Phacelia
Site Preparation
Prepare the new planting location by digging a hole twice as wide and as deep as the plant's root ball.
Soil Preparation
Ensure the soil in the new spot drains well and is suitable for changeable phacelia. If necessary, amend the soil to enhance its quality.
Root Inspection
Examine the roots of the changeable phacelia plant once it's removed from its initial location. Trim any damaged or excessively long roots with clean, sharp shears.
Plant Placement
Position the plant in the new hole, making sure the top of the root ball is level with the surrounding soil.
Backfill and Firming
Refill the hole with soil, gently firming it around the root ball to eliminate air pockets.
Watering
Water the plant thoroughly after planting to help settle the soil around the roots and lessen transplant shock.
Adding Support
Install stakes or support structures if the plant needs them to remain upright and stable.
How Do You Care For Changeable Phacelia After Transplanting?
Watering
Keep the soil around the changeable phacelia consistently damp, but not waterlogged, for the initial few weeks post-transplant to aid in establishing strong roots.
Monitoring
Check the plant regularly for indications of transplant shock, such as wilting or yellowing leaves, and take appropriate action.
Mulching
Apply a layer of mulch around the plant's base to retain moisture, regulate soil temperature, and suppress weeds.
Protection
Consider using shade cloth or other protective measures if transplanting during hot or windy conditions to reduce plant stress.
Fertilization
Avoid fertilizing immediately after transplanting to prevent root burn. Wait until the plant exhibits new growth before applying a balanced fertilizer.
Troubleshooting Common Issues with Changeable Phacelia Transplantation.
When is the optimal time for transplanting changeable phacelia?
The best period to relocate changeable phacelia is from early spring to late spring for optimal growth.
How much space should I leave between transplants?
Changeable phacelia plants should be spaced 6-12 inches (15-30 cm) apart to ensure healthy development.
What should I do if the leaves wilt after transplanting?
Ensure changeable phacelia is adequately watered but not oversaturated to help the plant recover from transplant shock.
How deep should I plant changeable phacelia in its new location?
Transplant changeable phacelia at the same depth it was growing in its original spot.
Can I transplant changeable phacelia on hot days?
Avoid relocating changeable phacelia during hot days; opt for a cooler, overcast day in spring instead.
Should I fertilize changeable phacelia immediately after transplanting?
Wait a few weeks before fertilizing changeable phacelia post-transplant to avoid stressing the plant further.
Why are my changeable phacelia seedlings not thriving after transplant?
Check for sufficient spacing, proper watering, and ensure transplanting during early to late spring.
What soil conditions are best for transplanting changeable phacelia?
Changeable phacelia prefers well-draining soil with ample organic matter. Ensure the soil is loose and fertile.
How can I reduce transplant shock for changeable phacelia?
Water changeable phacelia thoroughly after transplanting and consider using a root stimulator to promote recovery.
What light conditions are ideal for changeable phacelia after transplanting?
Ensure changeable phacelia receives full sun to partial shade, with at least 4-6 hours of sun daily.



