How to Transplant Curlytop Knotweed?
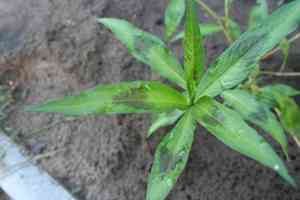
The most favorable time to transplant curlytop Knotweed is in the spring, as the prospect of new development guarantees superior root integration. Select a location featuring damp earth and partial sunlight. Should there be excessive density, carefully separate the plant to foster vigor within your garden area.
What Preparations are Needed Before Transplanting Curlytop Knotweed?
What is the Ideal Time for Transplanting Curlytop Knotweed?
The optimal period for relocating curlytop Knotweed is the spring season, marked by mild temperatures and ample precipitation, which promotes strong root development and reduces stress. Selecting this time ensures curlytop Knotweed gets a strong start with gentle sunlight and nourishing soil, guaranteeing a smooth transition and abundant growth. Trust me, transplanting in spring aligns with nature's cycle of renewal and vigorous life.
How Much Space Should You Leave Between Curlytop Knotweed Plants?
When moving curlytop Knotweed, aim for a spacing of approximately 1-2 feet (30-60 cm) between each individual plant. This provides sufficient room for them to develop and spread out healthily. You're doing great so far!
What is the Best Soil Mix for Curlytop Knotweed Transplanting?
To prepare the soil for curlytop Knotweed, choose well-draining loam or sandy soil, as these are preferred for its growth. Incorporate a foundational fertilizer: compost or aged manure would be perfect. This will create a nutrient-rich bed for our little plant!
Where Should You Relocate Your Curlytop Knotweed?
Seek out a spot where curlytop Knotweed can receive full sun to partial shade. Don't worry, a bit of shade is also acceptable; curlytop Knotweed is a resilient grower and will manage just fine. Keep going, you're nearly there!
What Equipments Should You Prepare Before Transplantation Curlytop Knotweed?
Shovel or Spade
These tools are used to excavate the planting hole for curlytop Knotweed and to lift the plant from its original spot.
Gardening Gloves
To safeguard your hands while handling soil and plants.
Watering Can
Ensures proper hydration of curlytop Knotweed during the relocation process.
Mulch
Applied around the base of curlytop Knotweed post-transplant, it aids in retaining soil moisture.
Compost
Nutrient-rich, it assists curlytop Knotweed in quickly establishing itself in its new environment.
Pruning Shears
Useful for trimming off damaged parts or dead leaves from curlytop Knotweed.
How Do You Remove Curlytop Knotweed from the Soil?
How Do You Remove Curlytop Knotweed from the Soil?
From Ground: Begin by using a shovel or spade to dig a wide circle around the curlytop Knotweed, ensuring you are far enough away to avoid damaging the root system. Try to dig deep enough to encompass most of the curlytop Knotweed roots. Once dislodged, handle it carefully to minimize harm to the plant.From Pot: Water the curlytop Knotweed to moisten the soil, which facilitates easier plant removal. Invert the pot and gently tap it to loosen the soil and slide the plant out.From Seedling Tray: If the curlytop Knotweed was started in a seedling tray, simply press the bottom of each cell to push the plant and root ball out. Always handle seedlings by their leaves to prevent stem damage.
Step-by-Step Guide for Transplanting Curlytop Knotweed
Prepare the New Location
Dig a hole twice the width of the curlytop Knotweed's root ball but the same depth, in the chosen spot.
Transplant
Position curlytop Knotweed in the hole, ensuring the top of the root ball is level with the ground. Backfill the hole, covering the roots, then gently firm the soil around the plant.
Water
Thoroughly water the plant immediately after transplanting to settle the soil.
Mulch
After watering, apply a two to three-inch layer of mulch around the base to conserve moisture and inhibit weed growth.
How Do You Care For Curlytop Knotweed After Transplanting?
Regular Monitoring
Inspect the curlytop Knotweed daily for the initial couple of weeks, then weekly thereafter. Look for indications of nutrient deficiency, pests, or diseases and take appropriate action.
Pruning
Remove any damaged or dying leaves with pruning shears to prevent curlytop Knotweed from expending energy trying to revive them.
Watering
Water deeply and frequently enough to keep the soil around the curlytop Knotweed consistently moist but not waterlogged. Adjust as needed based on weather conditions.
Transplant Shock
If your curlytop Knotweed exhibits signs of transplant shock – wilting, yellowing foliage, stunted growth – do not despair. Continue to care for it and allow it time to acclimate to its new environment.
Troubleshooting Common Issues with Curlytop Knotweed Transplantation.
When is the best time to move curlytop Knotweed plants?
The optimal period to relocate curlytop Knotweed is during its early developmental stages, specifically between S1 and S3. This timeframe offers ideal conditions for the plant's establishment and growth.
How much space should I leave between my curlytop Knotweed plants when transplanting?
Aim to maintain a distance of approximately 1 to 2 feet (30-60 cm) between each curlytop Knotweed during relocation. This ensures adequate room for development and prevents overcrowding, which can lead to pest and disease issues.
Why is my transplanted curlytop Knotweed wilting?
Wilting can be attributed to transplant shock, insufficient watering, or excessive watering. Ensure the plant is adequately hydrated before and after transplanting, but avoid over-watering to prevent root rot.
What kind of soil is best for transplanting curlytop Knotweed?
Curlytop Knotweed prefers well-draining, fertile soil. Enrich the soil with organic matter to enhance its fertility and drainage capabilities, ensuring the plants thrive after being moved.
How deep should I plant curlytop Knotweed when transplanting?
Plant curlytop Knotweed at the same depths they were previously growing. Avoid planting too deeply, as this can cause stem rot, or too shallowly, as this can expose the roots.
Are there specific steps to follow when transplanting curlytop Knotweed?
Absolutely! Begin by digging a hole that is twice the size of the root ball. Position the plant and backfill the hole, gently firming the soil around the base. Water it thoroughly immediately after planting.
What aftercare does curlytop Knotweed require post-transplanting?
After transplanting, apply a layer of mulch around curlytop Knotweed to conserve moisture, suppress weed growth, and provide nutrients as it breaks down. Also, monitor the plant's moisture level and water as necessary.
Can I divide curlytop Knotweed when transplanting?
Curlytop Knotweed can indeed be separated during transplantation. Always ensure each resulting plant possesses a portion of roots and stems for successful growth and survival after the procedure.
Is it normal for curlytop Knotweed leaves to turn yellow after transplantation?
Temporary yellowing may occur due to transplant stress. However, if it persists, your curlytop Knotweed might be over-watered, under-watered, or experiencing a nutrient deficiency. Review your care practices and make necessary adjustments.
Can I use fertilizers immediately after transplanting curlytop Knotweed?
It's advisable to postpone fertilizing until curlytop Knotweed has had a chance to establish itself in its new location, typically about 2-4 weeks. Applying it too soon may damage the roots.



