How to Transplant Woolly panic grass?
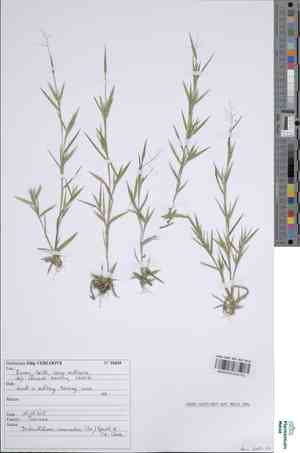
Woolly panic grass flourishes most effectively when relocated from the beginning to the end of spring, owing to advantageous temperatures and ground characteristics. Select a sunny spot with good drainage. Verify that the new environment replicates its initial cultivation circumstances for peak development.
What Preparations are Needed Before Transplanting Woolly Panic Grass?
What is the Ideal Time for Transplanting Woolly Panic Grass?
The best period for relocating woolly panic grass spans from early to late spring. During this timeframe, ground temperatures are rising, which promotes root establishment and development. Moving woolly panic grass in spring maximizes its growing season, allowing it to adapt before summer's demands. This timing ensures vigorous plant growth and resilience.
How Much Space Should You Leave Between Woolly Panic Grass Plants?
When transplanting woolly panic grass, ensure each plant is spaced 18-24 inches (45-60 cm) apart. This provides ample room for them to expand and spread comfortably, guaranteeing sufficient space for thriving.
What is the Best Soil Mix for Woolly Panic Grass Transplanting?
Prepare a soil mixture that drains well and has a loamy consistency for woolly panic grass. Enhance the soil with a balanced foundational fertilizer, such as a 10-10-10 (NPK) ratio, to support robust root development and strong growth.
Where Should You Relocate Your Woolly Panic Grass?
Select a sunny spot for transplanting woolly panic grass. This plant flourishes in full sun, requiring at least 6-8 hours of direct sunlight daily to grow strong and healthy.
What Equipments Should You Prepare Before Transplantation Woolly Panic Grass?
Gardening Gloves
To safeguard your hands while handling soil and plants.
Shovel or Spade
For excavating around the plant and creating the new planting site.
Trowel
To assist with more precise digging and plant placement.
Watering Can/Spray
For hydrating the plant before and after its relocation.
Garden Fork
To aerate the soil in the designated new planting area.
Mulch
To aid in moisture retention and soil temperature regulation post-transplant.
Plant Markers
To identify the new transplant locations if moving multiple plants.
How Do You Remove Woolly Panic Grass from the Soil?
How Do You Remove Woolly Panic Grass from the Soil?
From Ground: First, moisten the soil around the woolly panic grass plant by watering it. Next, use a shovel or spade to dig a wide trench around the plant, making sure the root ball stays intact. Carefully work the spade beneath the root ball to lift the plant from its original spot.From Pot: Gently tap the pot's sides to loosen the soil. Hold the base of the woolly panic grass plant and tilt the pot sideways to slide the plant out. If the plant's roots are tightly packed, gently separate them.From Seedling Tray: Before extracting the woolly panic grass plant, water the seedling tray to dampen the soil. Use a small tool or your fingers to carefully lift each seedling by its leaves or root ball, ensuring the roots remain undamaged.
Step-by-Step Guide for Transplanting Woolly Panic Grass
Site Preparation
Prepare the new planting location by loosening the soil and ensuring it is free of weeds. If necessary, enrich the soil with organic material.
Digging the Hole
Excavate a hole that is twice the width and the same depth as the woolly panic grass's root ball. This allows for easy root expansion.
Placing the Plant
Position the woolly panic grass in the center of the hole, ensuring the top of the root ball is level with the surrounding ground surface.
Backfilling the Hole
Gently refill the hole with soil, lightly pressing around the base of the woolly panic grass to eliminate air pockets.
Watering
Provide the woolly panic grass with a thorough watering immediately after transplanting to help settle the soil around its roots.
Applying Mulch
Spread a layer of mulch around the base of the woolly panic grass, keeping it a few inches away from the stem to prevent rot.
How Do You Care For Woolly Panic Grass After Transplanting?
Watering
Maintain consistent moisture in the soil around the woolly panic grass, avoiding sogginess, for the initial weeks post-transplant to aid in strong root development.
Monitoring
Observe for indications of transplant shock, such as wilting or yellowing foliage, and provide additional care as required.
Protection
Consider utilizing garden fabric or small barriers to shield the woolly panic grass from strong winds or pests during its establishment phase.
Weeding
Regularly remove any unwanted plants around the woolly panic grass to lessen competition for nutrients and water.
Troubleshooting Common Issues with Woolly Panic Grass Transplantation.
When is the best time to transplant woolly panic grass?
The optimal period for relocating woolly panic grass is from early to late spring.
How far apart should I space woolly panic grass plants?
Space woolly panic grass plants 18-24 inches (45-60 cm) apart for ideal growth.
What kind of soil does woolly panic grass prefer?
Woolly panic grass thrives in well-drained, sandy to loamy soil with moderate fertility.
How should I prepare the soil for transplanting woolly panic grass?
Loosen the soil to a depth of 10 inches (25 cm) and incorporate compost.
Should I water woolly panic grass immediately after transplanting?
Yes, water woolly panic grass thoroughly after transplanting to help establish roots.
How much sunlight does woolly panic grass need?
Woolly panic grass prefers full sun but can tolerate partial shade.
How to handle root-bound woolly panic grass plants during transplanting?
Gently loosen the roots before planting to encourage better root growth.
Do I need to fertilize woolly panic grass after transplanting?
A light application of balanced fertilizer can support new growth after transplanting woolly panic grass.
What should I do if woolly panic grass wilts after transplanting?
Ensure woolly panic grass is adequately watered and shaded during the hottest part of the day.
Can I transplant woolly panic grass in the fall?
Transplanting woolly panic grass in the fall is not recommended; early to late spring is best.



