How to Transplant Creeping yellow oxalis?
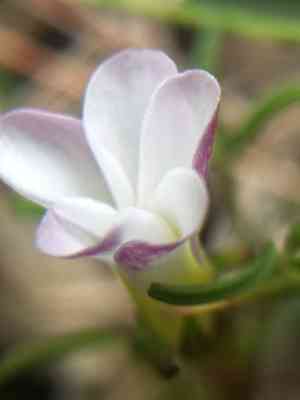
Creeping yellow oxalis flourishes when relocated during the cheerful period from late spring to early summer. Select sites that receive ample sunlight to partial shade. Verify that the ground offers good drainage. Adjusting during these warmer periods assists creeping yellow oxalis in establishing itself well in its new environment.
What Preparations are Needed Before Transplanting Creeping Yellow Oxalis?
What is the Ideal Time for Transplanting Creeping Yellow Oxalis?
The best time to move creeping yellow oxalis is from late spring to early summer. This period offers warm, suitable soil conditions, which aids in strong root development and growth. Relocating creeping yellow oxalis during this season aligns with its natural growth cycles, leading to healthier, more robust plants and avoiding stress from extreme temperatures.
How Much Space Should You Leave Between Creeping Yellow Oxalis Plants?
When relocating creeping yellow oxalis, ensure each plant is spaced approximately 12-18 inches (30-45 cm) apart. This provides ample room for healthy spreading and development.
What is the Best Soil Mix for Creeping Yellow Oxalis Transplanting?
For creeping yellow oxalis, prepare soil that drains well and is rich in organic material. You can incorporate compost or aged manure into your garden bed to establish a foundational fertilizer.
Where Should You Relocate Your Creeping Yellow Oxalis?
Select a location that receives full sun to partial shade for transplanting creeping yellow oxalis. This plant thrives best with a minimum of 6 hours of daily sunlight.
What Equipments Should You Prepare Before Transplantation Creeping Yellow Oxalis?
Gardening Gloves
To safeguard your hands while handling soil and the plant.
Trowel or Small Spade
For excavating the plant from its original spot and for re-planting it in its new position.
Watering Can or Hose
For maintaining soil moisture before and after the relocation.
Pruning Shears
To trim any damaged roots or stems.
Wheelbarrow or Bucket
To move the plant from one place to another.
Root Ball Burlap (Optional)
To wrap around the root mass if transferring a larger plant.
How Do You Remove Creeping Yellow Oxalis from the Soil?
How Do You Remove Creeping Yellow Oxalis from the Soil?
From Ground: First, hydrate the creeping yellow oxalis plant to moisten the soil. Next, excavate a wide trench around the plant using a trowel or small spade, ensuring the plant's root ball remains intact. Carefully work the spade beneath the root ball to lift the plant from its initial location.From Pot: Water the creeping yellow oxalis plant to facilitate easier removal. Gently compress the pot's sides to loosen the soil. Holding the plant at its base, carefully invert the pot and guide the plant out with your other hand, keeping the root ball whole.From Seedling Tray: Water the seedlings to make them simpler to extract. Use a small trowel or your hands to gently pry the creeping yellow oxalis seedlings from the tray, taking care to retain some soil around their roots. Handle them by their leaves to prevent stem damage.
Step-by-Step Guide for Transplanting Creeping Yellow Oxalis
Site Preparation
Select and prepare the new location by ensuring the soil is well-aerated and ready for the creeping yellow oxalis plant.
Digging the Hole
Excavate a hole at the new transplant site that is twice the width and the same depth as the root ball of the creeping yellow oxalis plant.
Plant Placement
Position the creeping yellow oxalis plant in the center of the hole, making sure the top of the root ball is level with or slightly above the surrounding soil.
Backfilling
Refill the hole with soil, gently pressing around the base of the creeping yellow oxalis plant to eliminate any air pockets, ensuring the plant is stable.
Watering
Thoroughly water the creeping yellow oxalis plant to settle the soil around its roots.
How Do You Care For Creeping Yellow Oxalis After Transplanting?
Watering
Keep the soil around the creeping yellow oxalis consistently damp, but not waterlogged, for the initial few weeks post-transplant to aid in developing strong roots.
Mulching
Apply a thin layer of mulch around the base of the creeping yellow oxalis plant to help retain moisture and regulate soil temperature.
Monitoring
Regularly inspect the creeping yellow oxalis plant for indications of stress such as wilting or yellowing leaves, and adjust care as necessary.
Troubleshooting Common Issues with Creeping Yellow Oxalis Transplantation.
When is the best time to transplant creeping yellow oxalis?
The optimal period to relocate creeping yellow oxalis is late spring to early summer for peak growth.
What spacing should I use for creeping yellow oxalis?
Space creeping yellow oxalis 12-18 inches (30-45 cm) apart to ensure adequate room for flourishing.
How do I prepare the soil for creeping yellow oxalis?
Utilize well-draining soil enriched with compost to supply the necessary nutrients for creeping yellow oxalis.
Should I water creeping yellow oxalis before transplanting?
Yes, thoroughly water creeping yellow oxalis prior to transplanting to lessen shock and aid root establishment.
How deep should I plant creeping yellow oxalis?
Plant creeping yellow oxalis at the same depth it was in its original spot to prevent stress.
Do I need to prune creeping yellow oxalis before transplanting?
Trim any damaged or dead foliage on creeping yellow oxalis to encourage healthy new growth after transplant.
What should I do if creeping yellow oxalis's leaves wilt after transplanting?
Ensure creeping yellow oxalis receives sufficient water and is placed in partial shade to assist recovery from transplant shock.
Can I transplant creeping yellow oxalis on a hot day?
Avoid relocating creeping yellow oxalis on hot days; opt for cooler parts of the day instead.
Is fertilization necessary after transplanting creeping yellow oxalis?
Lightly fertilize creeping yellow oxalis with a balanced fertilizer to support its establishment in the new location.
How do I handle the roots of creeping yellow oxalis during transplanting?
Handle creeping yellow oxalis's roots gently and endeavor to keep as much soil around them as possible.



