How to Transplant Skunkbush?
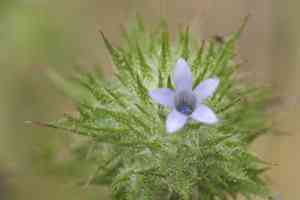
The most favorable period for relocating skunkbush is as the warmth of late spring transitions into the initial phase of summer. Select a site that receives ample sunlight, and carefully amend the ground prior to planting to facilitate the plant's establishment.
Essential Preparations Before Relocating Skunkbush
Optimal Period for Skunkbush Relocation?
The ideal period for placing skunkbush in your garden is when temperatures are rising but haven't reached their peak intensity - consider it the 'mild warmth season'. This timing capitalizes on stable, moderate temperatures and extended daylight, promoting strong root development and adaptation. Moving skunkbush during this phase maximizes its growth potential, ensuring a smooth transition to its new spot and fostering a healthy start to its life cycle.
Required Spacing Between Skunkbush Plants?
Before introducing your skunkbush to its new location, ensure a gap of approximately 4-6 inches (10-15 cm) between each plant. This provides ample room for each to develop and flourish, preventing overcrowding among neighbors.
Preferred Soil Blend for Skunkbush Relocation?
To give your skunkbush the best beginning, prepare a bed with soil that drains effectively. Incorporating a small amount of organic compost will create a rich, nutrient-filled base. Remember to add a balanced, slow-release fertilizer to encourage robust growth.
Optimal Location for Your Skunkbush?
Your skunkbush will thrive in bright sunlight, so choose a garden spot that receives full sun. This ensures your skunkbush obtains the necessary energy from the sun's rays to grow beautifully.
Tools Required Before Skunkbush Transplantation
Gardening Gloves
To safeguard your hands while handling soil and plants.
Spade or Shovel
For excavating and moving earth around the skunkbush.
Watering Can or Hose with a Gentle Nozzle
To hydrate the skunkbush before and after its transfer.
Measuring Tape
To assist with proper plant spacing and depth measurement.
Garden Trowel
For smaller digging tasks and refining the planting hole.
Pruning Shears
To trim any dead or damaged roots if necessary.
Method for Extracting Skunkbush from Soil
Method for Extracting Skunkbush from Soil
From Pot or Seedling Tray: Gently tap the container's sides to loosen the soil. Hold the skunkbush at its base and tip the pot while carefully sliding the plant out. Support the soil and roots to prevent breakage.From Ground: Water the skunkbush to make the soil more manageable. Dig carefully around the plant's perimeter, then angle a shovel or spade beneath the root mass. Use leverage to gently lift the entire skunkbush, including its root ball, from the ground.
Step-by-Step Guide for Skunkbush Transplantation
Assess Plant Vigor
Examine the skunkbush for any indications of pests, diseases, or stress prior to transplanting.
Hydrate Thoroughly
Water the skunkbush several hours before transplanting to ensure roots are moist and soil is cohesive.
Excavate New Hole
Use a spade or trowel to create a ground hole twice the width of the root ball and of equal depth.
Prepare the Specimen
Guide the skunkbush, with its root ball intact, into the new spot. If from a pot, gently untangle any circling roots.
Position and Refill
Place the skunkbush at the same depth it was previously growing. Carefully refill the hole with soil, gently pressing down to remove any air pockets.
Initial Watering
Water the skunkbush thoroughly around its base to settle the soil and provide moisture to the roots.
Apply Mulch
Spread a layer of mulch around the skunkbush's base, keeping it away from the stem, to retain moisture and regulate soil temperature.
Post-Transplant Care for Skunkbush
Regular Observation
Inspect the skunkbush daily for the first week, then periodically thereafter to gauge its adaptation to the new location.
Root Management
Avoid disturbing the soil around the skunkbush's roots to facilitate proper establishment.
Watering Adjustment
After the initial generous watering, modify frequency based on weather, gradually reducing as the skunkbush becomes established.
Structural Support
Provide stakes or supports if the skunkbush shows signs of leaning or instability during its initial growth phase post-transplant.
Resolving Common Skunkbush Transplantation Issues
When is the ideal time for transplanting skunkbush?
The best time is late spring to early summer, when the risk of frost is minimal.
What spacing is recommended for skunkbush seedlings?
Plant them approximately 4-6 inches (10-15 cm) apart to allow for adequate growth.
What if skunkbush wilts after transplanting?
Ensure it receives sufficient water. Wilting can indicate either dehydration or root damage.
Why are my transplanted skunkbush plants turning yellow?
Yellowing may signal overwatering or poor soil drainage. Allow the soil to dry slightly between waterings.
How deep should skunkbush be planted during transplant?
Plant at the same depth as it was in its original pot. Planting too deep can stress the plant.
How do I prepare the soil before planting skunkbush?
Cultivate the soil until it is loose and drains well. Incorporate compost to enrich it.
Can skunkbush be transplanted on an overcast day?
Yes! Cloudy conditions lessen transplant shock by reducing water loss.
Should I fertilize skunkbush immediately after transplanting?
Refrain from immediate fertilization to prevent burning delicate roots. Wait 3-4 weeks.
Can skunkbush tolerate transplanting in wet soil?
No, it's best to wait until the soil is moist, but not saturated.
What is the best way to water skunkbush after transplant?
Water thoroughly to settle the soil around the roots, then water when the top inch (2.5 cm) feels dry.



