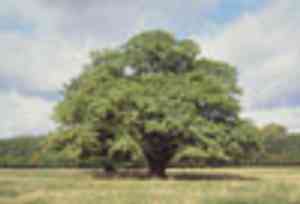
How to Transplant Kolea lau nui?
The most favorable period for relocating kolea lau nui is from the beginning to the end of summer or from the start to the conclusion of autumn, since mild temperatures minimize strain. Select a site with good drainage and partial shade for peak development. Bear in mind that providing the plant with sufficient hydration after transplantation assists its flourishing.
What Preparations are Needed Before Transplanting Kolea Lau Nui?
What is the Ideal Time for Transplanting Kolea Lau Nui?
Kolea lau nui should ideally be moved from early to late summer or early to late fall. These periods offer optimal soil warmth and moisture, aiding root establishment and reducing stress. Relocating during these times enhances the plant's adaptation and growth, ensuring robust health and resilience.
How Much Space Should You Leave Between Kolea Lau Nui Plants?
When relocating kolea lau nui, position them 3-5 feet (0.9-1.5 meters) apart. This provides ample room for each plant to develop and flourish. Utilizing a measuring tape can help ensure precision.
What is the Best Soil Mix for Kolea Lau Nui Transplanting?
For kolea lau nui, prepare well-draining soil with a slightly acidic to neutral pH. Incorporate organic compost or a balanced base fertilizer to supply essential nutrients.
Where Should You Relocate Your Kolea Lau Nui?
Select a site with partial to full sunlight for moving kolea lau nui. The plant thrives best with 4-6 hours of daily sun, so an area receiving morning sun and afternoon shade is perfect.
What Equipments Should You Prepare Before Transplantation Kolea Lau Nui?
Gardening Gloves
To safeguard your hands while handling soil and the plant.
Shovel or Spade
Used for digging the necessary trenches and holes for relocation.
Trowel
Useful for working around smaller root systems.
Watering Can or Hose
To hydrate the plant before and after moving.
Pruning Shears
For trimming any damaged or dead roots.
Mulch
To help maintain soil moisture after relocation.
Wheelbarrow or Bucket
Handy for transporting the plant and soil.
How Do You Remove Kolea Lau Nui from the Soil?
How Do You Remove Kolea Lau Nui from the Soil?
From Ground: First, water the kolea lau nui plant to moisten the soil. Then, dig a wide trench around the plant using a shovel or spade, ensuring the plant's root ball remains intact. Carefully work the spade under the root ball to lift the plant from its original spot.From Pot: Water the kolea lau nui plant thoroughly to make the soil easier to manage. Gently squeeze the sides of the pot to loosen the soil. Tip the pot on its side and carefully slide the plant out, supporting the root ball with your hands.From Seedling Tray: Water the seedlings to facilitate their removal. Use a trowel or your fingers to gently lift the seedlings from the tray, taking care not to harm the delicate roots. Hold by the leaves, not the stem, to avoid breakage.
Step-by-Step Guide for Transplanting Kolea Lau Nui
Dig the New Hole
Excavate a hole in the new location that is twice as wide and the same depth as the root ball of your kolea lau nui.
Prepare the Soil
Loosen the soil at the bottom of the hole and incorporate compost if needed to ensure proper drainage and nutrient distribution.
Place the Plant
Position your kolea lau nui plant into the hole, ensuring that the top of the root ball is level with or slightly above the surrounding soil.
Backfill the Hole
Refill the hole with soil, pressing gently around the base of the plant to eliminate air pockets. Water thoroughly to settle the soil.
Apply Mulch
Spread a layer of mulch around the base of the plant to help retain moisture and regulate soil temperature.
How Do You Care For Kolea Lau Nui After Transplanting?
Watering
Keep the soil around the kolea lau nui consistently moist, but not waterlogged, for the initial weeks after transplanting to help establish strong roots.
Monitoring
Regularly inspect the plant for any indications of stress or disease, such as wilting leaves or discoloration. Address any issues promptly.
Support
If the plant is tall or fragile, consider staking it to provide support while it establishes its new root system.
Pruning
Trim any damaged or dead leaves and branches to encourage new growth and healthy development.
Troubleshooting Common Issues with Kolea Lau Nui Transplantation.
When is the best time to transplant kolea lau nui?
The best time to move kolea lau nui is from early summer to early fall.
How far apart should I space kolea lau nui plants?
Space kolea lau nui plants 3-5 feet (0.9-1.5 meters) apart for optimal growth.
What should the soil conditions be for transplanting kolea lau nui?
Ensure the soil is well-draining and rich in organic matter for relocating kolea lau nui.
How deep should the transplant hole for kolea lau nui be?
Dig a hole twice as wide and as deep as the root ball of kolea lau nui.
Should I water kolea lau nui immediately after transplanting?
Yes, water kolea lau nui thoroughly right after relocating to settle the soil around the roots.
How much sun does kolea lau nui need after transplanting?
Kolea lau nui prefers partial to full sun exposure after being moved.
Do I need to prune kolea lau nui before transplanting?
Lightly prune kolea lau nui to remove any damaged or dead branches before relocating.
What temperature range is ideal for transplanting kolea lau nui?
Kolea lau nui relocation is best done when temperatures are between 65-75°F (18-24°C).
Is fertilizing necessary when transplanting kolea lau nui?
Incorporate a balanced, slow-release fertilizer into the soil when relocating kolea lau nui.
How can I prevent transplant shock in kolea lau nui?
Adequate watering and mulching around the base can help prevent transplant shock in kolea lau nui.


