How to Transplant Wartremoving herb?
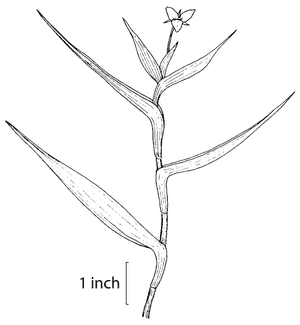
Relocate wartremoving herb during the mild period of late spring or the inviting warmth of early summer, enabling its root system to firmly anchor itself with the season's energy. Select a sunny spot featuring damp, adequately draining earth to foster robust development.
Preparations Before Moving Wartremoving Herb
Optimal Time for Relocating Wartremoving Herb?
The perfect window for moving wartremoving herb spans from the gentle embrace of mid-spring to the onset of early summer. This period provides the moderate temperatures wartremoving herb prefers, encouraging robust development. Allowing your plants this transition phase ensures they settle into their new spot with minimal stress, leveraging the extended daylight and ideal soil conditions of this revitalizing season. With favorable weather and soil just warming up, wartremoving herb is set to establish strong roots, forming a solid base for health and vigor.
Required Spacing Between Wartremoving Herb Plants?
When preparing to plant your wartremoving herb, proper spacing is crucial for a thriving garden. Aim for ample room for each plant, roughly 6 to 12 inches (15-30 cm) apart. This provides your wartremoving herb sufficient area to flourish without becoming overcrowded.
Best Soil Blend for Wartremoving Herb Relocation?
Your wartremoving herb will thrive in soil that drains effectively. Incorporate some organic compost as a foundational fertilizer to enrich the soil. A mixture with good aeration will foster robust root development.
Where to Replant Your Wartremoving Herb?
Select a sunny location for your wartremoving herb that receives at least 4 to 6 hours of daily sunlight. Gentle morning sun is ideal if possible. They enjoy absorbing light but also appreciate some afternoon shade.
Equipment Needed Before Moving Wartremoving Herb
Gardening Gloves
To safeguard your hands while handling soil and plants.
Trowel or Shovel
Useful for excavating and moving the wartremoving herb plant or preparing a hole for it.
Watering Can or Hose
For hydrating the wartremoving herb plant both before and after its relocation.
Gardening Fork
Aids in loosening the soil around the wartremoving herb plant's roots during removal.
Wheelbarrow or Bucket
To transport the wartremoving herb plant and soil without causing harm.
Pruning Shears
To trim any damaged roots or foliage prior to transplanting.
Mulch
To help retain moisture and suppress weeds around the new planting site.
How to Extract Wartremoving Herb from the Ground?
How to Extract Wartremoving Herb from the Ground?
From Ground: Hydrate the wartremoving herb plant to moisten the soil. Use a gardening fork to gently loosen the soil surrounding the plant and carefully dig a wide circle around it. Employ a shovel or trowel to carefully lift out the root ball, preserving as much of the root system as possible.From Pot: Begin by watering the wartremoving herb plant in its current container to facilitate root ball removal. Gently tilt the pot sideways and tap or squeeze the sides to loosen the root ball. Carefully slide the plant out, supporting the base and root ball to prevent damage.From Seedling Tray: Water the tray thoroughly before removal to prevent root damage. Use a trowel or a specialized seedling tool to gently lift individual plants from their cells, ensuring intact root balls.
Step-by-Step Guide for Moving Wartremoving Herb
Preparation
Ensure all necessary tools are ready and select the appropriate time for transplanting, ideally during a cooler part of the day to minimize stress on the wartremoving herb.
Plant Extraction
Follow the removal method suitable for the wartremoving herb's original location, taking care to keep the root ball and as many roots as possible intact.
Hole Excavation
Dig a hole in the chosen spot that is twice as wide and the same depth as the wartremoving herb's root ball, using a shovel or trowel.
Plant Placement
Position the wartremoving herb in the center of the hole without burying it deeper than its previous level. The top of the root ball should be flush with the ground.
Hole Backfilling
Refill the hole with the excavated soil, gently compacting it around the root ball to prevent air pockets that can dry out roots.
Watering
Thoroughly water the wartremoving herb to settle the soil and hydrate the roots. Water should be directed over the root zone.
Mulching
Apply a layer of mulch around the base of the wartremoving herb to help maintain soil moisture and regulate temperature.
Post-Transplant Care for Wartremoving Herb
Initial Watering
Provide ample water for the wartremoving herb immediately after transplanting and continue to water regularly to maintain consistently moist soil.
Monitoring
Observe the wartremoving herb for signs of transplant shock, such as wilting or discolored leaves, and address any issues promptly.
Support Staking
If the wartremoving herb is tall or appears unstable, consider staking it to provide support until its roots can establish.
Weeding
Keep the area around the wartremoving herb free of weeds to prevent competition for nutrients and water.
Addressing Common Issues with Wartremoving Herb Relocation.
When is the best time to move wartremoving herb?
The ideal period for relocating wartremoving herb is during the mild warmth of late spring to early summer.
How far apart should I space wartremoving herb when moving them?
Space wartremoving herb approximately 6-12 inches (15-30 cm) apart to ensure they have adequate room to flourish.
Why is my moved wartremoving herb showing signs of wilting?
Wilting can indicate stress from insufficient watering or an abrupt environmental change. Ensure consistent moisture and gradually acclimate your plant to its new setting.
How deep should I plant wartremoving herb when relocating?
The root ball of wartremoving herb should be planted at the same depth it was previously growing. Avoid planting too deep or too shallow.
Can wartremoving herb be moved on a hot, sunny day?
Moving wartremoving herb on a cooler, overcast day is best to minimize transplant shock. Avoid hot, sunny days whenever possible.
What soil conditions are optimal for moving wartremoving herb?
Relocate wartremoving herb into well-draining soil rich in organic matter to encourage healthy growth.
How much water does wartremoving herb need immediately after relocation?
Water wartremoving herb generously right after transplanting to help settle the soil around its roots and eliminate air pockets.
Should I fertilize wartremoving herb right after moving it?
Wait a few weeks before fertilizing wartremoving herb to prevent burning delicate roots. Allow them to establish first in their new location.
How do I safeguard moved wartremoving herb from pests and diseases?
Keep the area free of weeds, and regularly check for pests. Implement appropriate disease-prevention measures based on local advice.
What should I do if the leaves of wartremoving herb turn yellow after relocation?
Yellowing leaves may signal overwatering, underwatering, or a nutrient deficiency. Adjust watering practices and consider a soil test to check nutrient levels.



