How to Transplant Claspleaf pennycress?
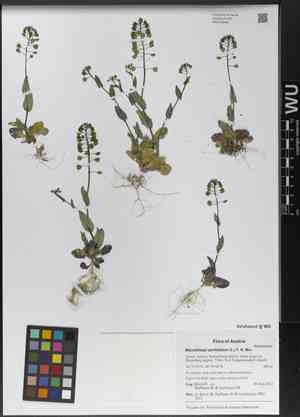
The most suitable period for relocating claspleaf pennycress is from the middle to the end of spring, capitalizing on vigorous development under beneficial circumstances. Choose a location that receives full sun to partial shade and possesses soil with good drainage. Should it be necessary, lessen the shock of transplantation by thoroughly hydrating the plant after its relocation.
Essential Preparations Before Relocating Claspleaf Pennycress
Optimal Period for Moving Claspleaf Pennycress?
The ideal period to move claspleaf pennycress is during the gentle warmth of late spring. This timing leverages the season's rising temperatures, which promote robust root development and vigorous growth. Relocating claspleaf pennycress within this window ensures its short life cycle is maximized, allowing it to flourish and reproduce effectively before the year concludes.
Recommended Spacing Between Claspleaf Pennycress Plants?
Before placing your young claspleaf pennycress specimens, it's wise to provide them with adequate room. Aim for a spacing of approximately 4-6 inches (10-15 cm) between each plant. This ensures every individual has sufficient space to thrive without competing for essential nutrients or sunlight.
Ideal Soil Blend for Claspleaf Pennycress Relocation?
To provide your claspleaf pennycress with the best possible start, prepare a well-draining soil mixture enriched with a balanced, slow-release fertilizer. A rich, loamy soil that retains moisture without becoming waterlogged will create an inviting environment for your claspleaf pennycress to prosper.
Preferred Location for Your Claspleaf Pennycress?
Your claspleaf pennycress thrives in sunlight, so select a site where it can receive ample golden rays for most of the day. A bright, open location will ensure your claspleaf pennycress radiates vitality. Just confirm the area receives several hours of direct sunlight daily.
Tools Required for Claspleaf Pennycress Transplantation
Gardening Gloves
To safeguard your hands while handling soil and plants.
Shovel or Spade
For excavating the claspleaf pennycress and preparing the new planting site.
Watering Can or Hose
To hydrate the plant before and after its relocation.
Garden Trowel
For managing smaller plants or refining the planting hole.
Pruning Shears
To remove any damaged roots or foliage if necessary.
Measuring Tape
To maintain appropriate distances between transplanted plants.
Wheelbarrow or Plant Carrier
For moving the claspleaf pennycress to its new spot without causing harm.
Procedure for Extracting Claspleaf Pennycress from the Ground
Procedure for Extracting Claspleaf Pennycress from the Soil?
From Ground: Hydrate the claspleaf pennycress to moisten the soil, facilitating easier excavation. Use a shovel or spade to create a perimeter trench around the plant, then carefully lift it, keeping the root ball and surrounding soil as intact as possible.From Pot: Incline the pot sideways and tap its base to dislodge the plant. Gently ease the claspleaf pennycress out while supporting its base. If roots are circling the pot, carefully untangle them before transplanting.From Seedling Tray: Water the seedlings, then use a garden trowel or fork to meticulously lift each claspleaf pennycress from its cell, aiming to keep the root ball whole and minimize root disturbance.
Detailed Guide for Transplanting Claspleaf Pennycress
Preparation
Ensure the new planting site has been adequately prepared in advance.
Removal
Follow the instructions from the extraction process to ready your claspleaf pennycress for its new home.
Hole Digging
Excavate a hole in the new location that is twice the width of the root ball and of equivalent depth, ensuring the claspleaf pennycress sits at the same level as its previous spot.
Plant Positioning
Center the claspleaf pennycress in the new hole and gently spread its roots to encourage growth.
Backfilling
Fill the hole halfway with soil, then water the claspleaf pennycress to settle the soil before completing the fill. This eliminates air pockets.
Final Adjustments
Once the hole is completely backfilled, make any necessary adjustments to ensure the claspleaf pennycress is upright and at the correct depth.
Watering
Provide your newly transplanted claspleaf pennycress with a thorough watering to aid root establishment. Water slowly and deeply to reach the entire root zone.
Post-Transplantation Care for Claspleaf Pennycress
Monitoring
Inspect the claspleaf pennycress daily for indications of stress, such as drooping or discolored leaves, and adjust care as needed.
Supporting
Provide stakes for the claspleaf pennycress if it shows signs of leaning or instability until its roots are sufficiently strong to support it.
Mulching
Apply a layer of organic mulch around the base of claspleaf pennycress to help maintain soil moisture and regulate temperature.
Pruning
Remove any dead or damaged foliage to direct the claspleaf pennycress's energy towards developing new roots.
Gradual Sun Exposure
If claspleaf pennycress was previously in a shadier location, acclimate it to brighter conditions by offering temporary shade for a few days.
Resolving Common Issues with Claspleaf Pennycress Transplantation.
Why is my claspleaf pennycress drooping after being moved?
Drooping may occur if claspleaf pennycress experiences shock. Ensure careful handling, adequate watering, and minimal root disturbance during relocation.
What distance should I maintain between claspleaf pennycress when transplanting?
Space your claspleaf pennycress approximately 4-6 inches (10-15 cm) apart to allow sufficient room for development.
When is the best time to transplant claspleaf pennycress for healthy growth?
The optimal period for relocating claspleaf pennycress is during mid to late spring, maximizing warmer temperatures and growth potential.
How deep should claspleaf pennycress seedlings be planted?
Transplant claspleaf pennycress at the same depth it was in its previous container, avoiding burying the stem too deeply.
Is it advisable to transplant claspleaf pennycress during summer?
Relocating claspleaf pennycress in the intense heat of summer can stress the plants; aim for cooler spring days for better establishment.
What soil conditions are favorable for claspleaf pennycress after transplanting?
Claspleaf pennycress thrives in well-draining soil rich in organic matter. Ensure the soil is consistently moist but not waterlogged after transplanting.
Why are the leaves of my transplanted claspleaf pennycress turning yellow?
Yellowing may indicate excessive watering or a nutrient deficiency. Ensure the soil is moist but not soggy and consider soil testing for fertility issues.
Should I fertilize claspleaf pennycress immediately after transplanting?
Wait a few weeks before applying fertilizer to prevent root burn. Afterward, use a balanced, mild fertilizer suitable for claspleaf pennycress.
Is it acceptable to transplant claspleaf pennycress on a rainy day?
Transplanting claspleaf pennycress on a cloudy or lightly rainy day can lessen transplant shock by providing cooler, moist conditions.
How do I determine if claspleaf pennycress requires water after transplanting?
Check the soil moisture by touch; water when the top inch (2.5 cm) of soil feels dry, but avoid overwatering.



