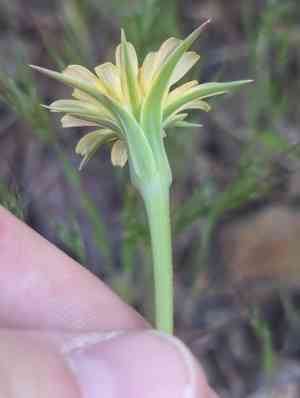
How to Transplant Lindleys silverpuffs?
The ideal period for relocating lindleys silverpuffs extends from the onset of early spring through the vigor of late spring, leveraging peak growing circumstances. Select a brightly lit spot with soil that drains effectively, and when manipulating lindleys silverpuffs, extreme care is essential.
What Preparations are Needed Before Transplanting Lindleys Silverpuffs?
What is the Ideal Time for Transplanting Lindleys Silverpuffs?
The optimal period for relocating lindleys silverpuffs is after the last frost, as new life emerges. This timeframe, often referred to as early spring's awakening, extends through late spring. Moving lindleys silverpuffs during this phase leverages the mild temperatures and increasing daylight, which collectively promote strong root establishment and growth. Introducing lindleys silverpuffs to your garden during this lively interval ensures a smooth transition and a thriving beginning for these charming annuals.
How Much Space Should You Leave Between Lindleys Silverpuffs Plants?
Hello, gardening enthusiast! Before settling your lindleys silverpuffs into their new spot, let's ensure they have ample room to thrive. Aim for '12-18 inches (30-46 cm)' between each plant. This spacing allows for proper air circulation and prevents competition for nutrients.
What is the Best Soil Mix for Lindleys Silverpuffs Transplanting?
To provide your lindleys silverpuffs with the best start, prepare a well-draining soil blend enriched with compost or a balanced, slow-release fertilizer. This nutrient-rich foundation will encourage robust root development and vibrant blooms.
Where Should You Relocate Your Lindleys Silverpuffs?
Sunlight is essential for your lindleys silverpuffs! Select a location where they can receive at least '6-8 hours' of direct sunlight daily. This bright spot will ensure your lindleys silverpuffs flourish with vitality.
What Equipments Should You Prepare Before Transplantation Lindleys Silverpuffs?
Gardening Gloves
To safeguard your hands while handling soil and plants.
Shovel or Spade
For excavating the plant and preparing the new planting site.
Watering Can or Hose
To hydrate the plant before removal and after replanting.
Garden Trowel
For delicate work around roots and managing smaller specimens.
Wheelbarrow or Plant Tray
To safely move the lindleys silverpuffs from one spot to another.
Pruning Shears
To carefully trim any damaged roots or foliage.
How Do You Remove Lindleys Silverpuffs from the Soil?
How Do You Remove Lindleys Silverpuffs from the Soil?
From Ground: First, moisten the lindleys silverpuffs plant's soil. Then, dig a wide trench around the plant using a shovel or spade, ensuring the root ball remains intact. Carefully work the spade beneath the root ball to lift the plant from its original position.From Pot: Hydrate the soil in the pot before gently tilting the lindleys silverpuffs sideways and supporting the plant with your hand. Carefully slide the plant out of the pot, keeping the soil and roots as undisturbed as possible.From Seedling Tray: Water the seedlings thoroughly. Use a garden trowel or similar tool to gently extract each seedling from its cell, taking care to preserve the root ball and minimize root disturbance.
Step-by-Step Guide for Transplanting Lindleys Silverpuffs
Prepare the New Location
Dig a hole in the ground that is twice the width of the lindleys silverpuffs's root ball and deep enough to accommodate the roots without bending or crowding them.
Root Pruning
Examine the lindleys silverpuffs's roots and use pruning shears to gently trim away any damaged or excessively long roots.
Placement
Lower the lindleys silverpuffs into the hole, ensuring it is centered and upright. The top of the root ball should be level with the surrounding soil surface.
Backfill the Hole
Gently refill the hole with the excavated soil, lightly tamping around the lindleys silverpuffs to remove any air pockets.
Initial Watering
Thoroughly water the lindleys silverpuffs at its base to settle the soil and hydrate the roots, encouraging them to establish in their new environment.
How Do You Care For Lindleys Silverpuffs After Transplanting?
Monitoring
Observe the lindleys silverpuffs for signs of stress, such as wilting or discolored leaves, and address them promptly.
Staking
If the lindleys silverpuffs is tall or top-heavy, provide support with a plant stake gently tied to the stem to prevent bending or breakage.
Mulching
Apply a layer of organic mulch around the base of the lindleys silverpuffs to help retain moisture and suppress weeds.
Pruning
As the lindleys silverpuffs grows, prune it to maintain its form and remove any dead or yellowing leaves to ensure its health.
Troubleshooting Common Issues with Lindleys Silverpuffs Transplantation.
What's the best time to transplant lindleys silverpuffs?
The ideal period for transplanting lindleys silverpuffs is from early to late spring, coinciding with the start of the growing season.
How far apart should I space lindleys silverpuffs seedlings?
Allow each lindleys silverpuffs seedling ample room to thrive, aiming for a spacing of 12-18 inches (30-46 cm).
Can lindleys silverpuffs be transplanted on cloudy days?
Yes, transplanting lindleys silverpuffs on overcast days can lessen stress, as cooler temperatures aid in a smoother transition.
Should I water lindleys silverpuffs immediately after transplanting?
Absolutely! Water lindleys silverpuffs right after transplanting to help roots settle and recover from the move.
Why is my lindleys silverpuffs wilting after transplanting?
Wilting may be due to transplant shock. Ensure careful handling and adequate watering to help lindleys silverpuffs recover.
How deep should I plant lindleys silverpuffs's roots?
The root ball of lindleys silverpuffs should be planted at the same depth it was growing prior to relocation.
Is it important to loosen the soil before transplanting lindleys silverpuffs?
Indeed, loosening the soil improves drainage and facilitates the expansion of lindleys silverpuffs's roots.
What should I do if the leaves of lindleys silverpuffs turn yellow after transplanting?
Lindleys silverpuffs showing yellow leaves may require nutrients. Consider a balanced fertilizer and maintain consistent watering.
Can I transplant lindleys silverpuffs even if it has begun to flower?
It's preferable to transplant lindleys silverpuffs before flowering. If they have started, proceed with extra caution to avoid stress.
How do I protect lindleys silverpuffs from pests during transplant?
Keep the transplant area clean and closely monitor lindleys silverpuffs. Employ suitable pest control methods if necessary.


