How to Transplant Golden flax?
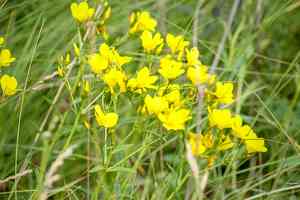
Golden flax flourishes when relocated during the peak bloom season from late spring through early summer. Select a bright spot with soil that drains effectively for its best development. Sufficient distance between plants guarantees robust growth, maximizing the vivid charm of golden flax.
Essential Preparations Before Moving Golden Flax?
Optimal Period for Relocating Golden Flax?
Moving golden flax during 'mid to late spring or early summer' ensures the ground is warm, fostering robust root development and vigorous growth. This timing allows golden flax to establish itself prior to peak summer heat, maximizing its flowering potential and resilience. By avoiding colder periods, the plant can adapt efficiently and flourish throughout the growing season.
Recommended Spacing Between Golden Flax Plants?
When relocating golden flax, maintain a separation of 12 inches (30 cm) between individual plants. This provides each plant with sufficient room to expand and guarantees good air circulation, thereby reducing the likelihood of pests and diseases.
Best Soil Mixture for Golden Flax Relocation?
Prepare well-draining soil, rich in organic matter, for golden flax. Incorporate a balanced, slow-release base fertilizer to encourage healthy development. Aim for a soil pH between 6.0 and 6.5.
Where to Replant Your Golden Flax?
Golden flax flourishes in full sunlight. Choose a spot that receives a minimum of 6 to 8 hours of direct sun daily, ensuring the plants obtain the energy required for optimal growth.
Equipment Needed Before Transplanting Golden Flax?
Gardening Gloves
To safeguard your hands while handling soil and plants.
Trowel
Useful for excavating small holes and shifting earth.
Shovel or Spade
Essential for digging larger holes and creating trenches around plants in the ground.
Watering Can or Hose
To hydrate your plants before and after relocation.
Hand Fork
To gently loosen the soil surrounding the plant.
Garden Knife or Pruners
For trimming any damaged roots or stems.
How to Extract Golden Flax from the Soil?
How to Extract Golden Flax from the Soil?
From Ground: First, moisten the golden flax plant's soil by watering. Next, dig a wide trench around the plant using a shovel or spade, ensuring the plant's root ball remains intact. Carefully work the spade beneath the root ball to lift the plant from its original spot.From Pot: Begin by thoroughly watering the golden flax plant to facilitate soil removal. Gently tilt the pot sideways and tap the bottom to dislodge the plant. Carefully slide the plant out while supporting its base and root ball.From Seedling Tray: Water the seedlings to dampen the soil. Use a hand fork or your fingers to gently loosen the soil around the seedling. Carefully lift the seedling by holding the leaves, not the stem, to prevent damage.
Step-by-Step Guide for Relocating Golden Flax
Prepare the New Site
Select a location that meets the golden flax's sun and soil requirements. Dig a hole twice as wide and the same depth as the plant's root ball.
Hydrate the Plant
Before removing the golden flax, water it thoroughly to minimize transplant shock.
Extract the Plant
Carefully remove the golden flax from its original spot using the methods described for ground, pot, or seedling tray.
Plant the golden flax
Place the golden flax into the prepared hole, ensuring the top of the root ball is level with the soil surface. Backfill the hole with soil, gently firming it around the base.
Water Again
Provide a generous watering to settle the soil around the plantâs roots and aid its establishment in its new location.
Mulch
Add a layer of mulch around the base of the golden flax to help retain moisture and suppress weeds. Ensure the mulch does not directly touch the stem.
Post-Transplant Care for Golden Flax?
Watering
Keep the soil around the golden flax consistently moist, but not waterlogged, for the initial few weeks to help establish strong roots.
Monitor Growth
Observe for indications of transplant shock, such as wilting or yellowing leaves, and provide additional care if necessary.
Fertilize Sparingly
Avoid immediate fertilization after transplanting to allow the plant to adjust. Consider a mild, balanced fertilizer after a few weeks if needed.
Protection
If transplanting in a windy area, consider temporarily staking the plant until it develops strong roots.
Pruning
Remove any damaged or dead foliage to redirect energy towards healthy growth.
Resolving Common Issues with Golden Flax Transplantation.
When is the optimal time to transplant golden flax?
The best time to transplant golden flax is mid to late spring and early summer for optimal growth.
How should I prepare the soil for transplanting golden flax?
Prepare the soil by loosening it and adding organic compost to enhance nutrients and drainage.
What is the ideal spacing for transplanting golden flax?
Ensure to space golden flax plants 12 inches (30 cm) apart for proper air circulation and growth.
How deep should I plant golden flax seedlings?
Plant golden flax seedlings at the same depth as they were in their original pots to avoid shock.
Should I water golden flax immediately after transplanting?
Yes, water golden flax immediately after transplanting to help settle the soil and support root establishment.
How do I prevent transplant shock in golden flax?
Prevent transplant shock by minimizing root disturbance and keeping the root-ball intact during the move.
What type of soil is suitable for golden flax?
Golden flax thrives in well-draining, moderately fertile soil. Avoid heavy clay to prevent root rot.
How much sunlight does golden flax need after transplanting?
Golden flax requires full sun, at least 6 to 8 hours daily, for optimal growth and blooming.
What should I do if golden flax appears wilted post-transplant?
If golden flax wilts post-transplant, ensure it is adequately watered and temporarily provide some shade.
Can I use fertilizer when transplanting golden flax?
It's best to avoid fertilizing immediately after transplanting golden flax. Wait a few weeks until roots are established.



