How to Transplant Sierra tidytips?
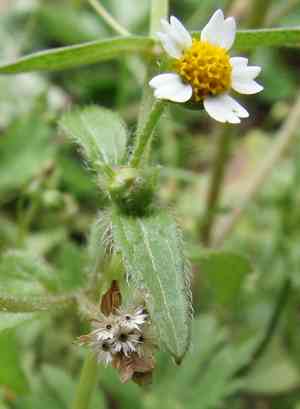
Sierra tidytips flourishes when relocated from the beginning to the end of spring, since the mild temperatures foster vigorous root growth. Select a bright spot with soil that drains effectively. Make certain the soil remains somewhat damp to facilitate the adjustment.
Necessary Preparations Before Relocating Sierra Tidytips?
Optimal Period for Transplanting Sierra Tidytips?
Sierra tidytips, an annual, flourishes when moved 'from early to late spring.' This timeframe offers ideal soil temperature and moisture, fostering robust root development. Relocating sierra tidytips then guarantees vigorous growth, vibrant blooms, and maximizes its adaptation to the new setting, leading to a healthy and visually striking garden addition.
Required Spacing Between Sierra Tidytips Plants?
When moving sierra tidytips, ensure a 6-12 inch (15-30 cm) gap between them. This provides ample room for each plant to develop and thrive without being overcrowded.
Best Soil Blend for Sierra Tidytips Relocation?
Prepare well-draining soil for sierra tidytips, ideally sandy or loamy. Prior to planting, enrich the soil with a balanced base fertilizer. A general-purpose compost or a 10-10-10 (N-P-K) fertilizer can be highly beneficial.
Ideal Location for Your Sierra Tidytips?
Position sierra tidytips where it will receive full sun. Aim for at least 6 hours of direct sunlight daily for optimal development and flowering.
Equipment Needed Before Transplanting Sierra Tidytips?
Gardening Gloves
To safeguard your hands when handling soil and the plant.
Shovel or Spade
For excavating the plant from its initial spot and preparing the new planting area.
Watering Can or Hose
To hydrate the plant before and after its relocation.
Trowel
Useful for smaller excavations and precise work around the root system.
Wheelbarrow
Optional but helpful for moving the plant or soil.
Mulch
To aid in retaining soil moisture post-transplant.
Measuring Tape or Ruler
To ensure correct spacing between plants.
How to Extract Sierra Tidytips from the Soil?
How to Extract Sierra Tidytips from the Soil?
From Ground: First, water the sierra tidytips plant to moisten the soil. Then, dig a wide trench around the plant using a shovel or spade, ensuring the plant's root ball remains intact. Carefully work the spade beneath the root ball to lift the plant from its original position.From Pot: Water the sierra tidytips plant generously before removal. Gently tilt the pot on its side and tap the bottom to loosen the soil. Hold the plant at its base and carefully pull it out, keeping the root ball intact.From Seedling Tray: Water the sierra tidytips plant lightly before removal. Use a trowel or your fingers to gently loosen the soil around the seedling. Carefully lift the plant by its base, ensuring you don't damage the roots.
Step-by-Step Guide for Relocating Sierra Tidytips
Prepare New Planting Site
Dig a hole in the ground that is twice as wide and equally deep as the root ball of the sierra tidytips plant.
Remove the Plant
Follow the appropriate extraction method based on the plant's current location.
Plant the sierra tidytips
Place the sierra tidytips plant into the hole, ensuring it sits at the same depth as it was in its original location. Fill the hole with soil, pressing it gently to eliminate air pockets.
Water Thoroughly
Water the sierra tidytips plant generously immediately after planting to help settle the soil and reduce transplant shock.
Add Mulch
Apply a layer of mulch around the base of the sierra tidytips plant to help retain soil moisture and prevent weeds.
How to Care for Sierra Tidytips After Relocation?
Watering
Keep the soil around the sierra tidytips consistently moist, but not waterlogged, for the initial weeks post-transplant to aid in root establishment.
Monitoring
Regularly inspect the sierra tidytips plant for indications of stress, such as wilting or yellowing leaves, and adjust care as needed.
Protection
If necessary, provide temporary shade for the sierra tidytips plant during the hottest part of the day by placing a light fabric or shade cloth over it.
Weeding
Keep the area around the sierra tidytips plant free of weeds to minimize competition for nutrients and water.
Fertilization
Wait a few weeks after transplanting before fertilizing to allow the sierra tidytips plant to recover from any shock.
Addressing Common Issues with Sierra Tidytips Relocation.
When is the best time to move sierra tidytips?
Relocate sierra tidytips from early to late spring once the danger of frost has passed.
What spacing should I use for sierra tidytips?
Space sierra tidytips plants 6-12 inches (15-30 cm) apart to ensure they have sufficient room to grow.
How do I prepare the soil for sierra tidytips?
Use well-draining, sandy soil enriched with compost to provide sierra tidytips with essential nutrients.
How deep should I plant sierra tidytips seedlings?
Plant sierra tidytips seedlings at the same depth they were growing in their original containers.
What if sierra tidytips looks wilted after transplanting?
Ensure adequate hydration and provide some shade until sierra tidytips adjusts and recovers.
Should I fertilize sierra tidytips after transplanting?
Apply a balanced, water-soluble fertilizer weekly to help sierra tidytips establish strong roots.
How can I prevent transplant shock in sierra tidytips?
Move sierra tidytips in the evening or on a cloudy day to reduce stress and shock.
Do I need to trim roots when moving sierra tidytips?
Trim only damaged roots. Healthy roots should remain untouched during sierra tidytips's relocation.
What watering routine should I follow post-transplant?
Water sierra tidytips thoroughly immediately after transplanting and maintain consistently moist soil.
Can I mulch around sierra tidytips after transplanting?
Apply a light mulch around sierra tidytips to retain moisture but avoid direct contact with stems.



