How to Transplant Indigofera verrucosa?
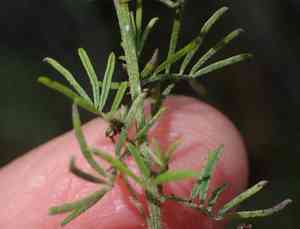
Indigofera verrucosa, an appealing perennial, flourishes when relocated in the pleasant period of late summer. Choose a bright spot with soil that drains effectively for the best outcome. Bear in mind that careful manipulation guarantees successful integration into its new environment.
What Preparations are Needed Before Transplanting Indigofera Verrucosa?
What is the Ideal Time for Transplanting Indigofera Verrucosa?
The best times for relocating indigofera verrucosa, a perennial, are mid-to-late summer. These periods offer warmer soil and adequate moisture, aiding root establishment. Transplanting then also lessens plant stress, promoting better growth and vigor in the next season. Proper timing maximizes plant health and development.
How Much Space Should You Leave Between Indigofera Verrucosa Plants?
When transplanting indigofera verrucosa, position them approximately 24-36 inches (60-90 cm) apart. This spacing allows ample room for growth and prevents competition for resources.
What is the Best Soil Mix for Indigofera Verrucosa Transplanting?
Prepare soil that drains well and is enriched with compost or a balanced fertilizer. Ensure the soil pH is slightly acidic to neutral for optimal indigofera verrucosa growth.
Where Should You Relocate Your Indigofera Verrucosa?
Indigofera verrucosa thrives in full sun, so select a spot that receives at least 6-8 hours of direct sunlight daily for optimal results.
What Equipments Should You Prepare Before Transplantation Indigofera Verrucosa?
Gardening Gloves
To safeguard your hands while handling soil and plants.
Shovel or Spade
For excavating holes and trenches around the plant and its new location.
Hand Trowel
Used for precise digging and maneuvering around the plant's root system.
Pruning Shears
To trim any damaged or overgrown roots and foliage.
Watering Can or Hose
For hydrating the plant before and after its relocation.
Bucket or Wheelbarrow
To move the plant if necessary.
Mulch
To cover the soil around the transplanted plant and help retain moisture.
How Do You Remove Indigofera Verrucosa from the Soil?
How Do You Remove Indigofera Verrucosa from the Soil?
From Ground: First, moisten the soil around the indigofera verrucosa. Then, dig a wide trench around the plant with a shovel, keeping the root ball intact. Carefully work the spade beneath the root ball to lift the plant.From Pot: Water the indigofera verrucosa 30 minutes prior. Gently invert the pot, supporting the plant. Tap the pot's sides and bottom to release it. Carefully ease the plant out, preserving roots and soil.From Seedling Tray: Water the indigofera verrucosa 30 minutes beforehand. Use a hand trowel or fingers to gently loosen soil around each seedling. Lift by the leaves, not the stem, to prevent damage.
Step-by-Step Guide for Transplanting Indigofera Verrucosa
Site Preparation
Prepare the new planting area by digging a hole twice as wide and equally deep as the indigofera verrucosa plant's root ball.
Soil Prep
Ensure the soil in the new spot is loosened and enriched with compost to aid the plant's establishment.
Removal
Carefully extract the indigofera verrucosa plant from its original position, using one of the previously described methods.
Placement
Position the indigofera verrucosa plant into the prepared hole, ensuring the top of the root ball is level with the surrounding soil.
Backfilling
Refill the hole with soil, gently pressing it down to remove air pockets, taking care not to harm the roots.
Watering
Thoroughly water the plant immediately after transplanting to settle the soil and provide moisture to the roots.
Mulching
Apply a layer of mulch around the plant's base to maintain soil moisture and protect against temperature changes.
How Do You Care For Indigofera Verrucosa After Transplanting?
Watering
Keep the soil around the indigofera verrucosa consistently moist, but not waterlogged, for the initial weeks post-transplant to encourage strong root development.
Monitoring
Observe the indigofera verrucosa plant closely for several weeks to ensure it's adapting well. Look for signs of stress like wilting or discolored leaves.
Pruning
Trim any damaged or diseased leaves and stems after a few weeks to promote healthy growth.
Mulching
Add mulch if needed to maintain soil moisture and prevent weed competition.
Troubleshooting Common Issues with Indigofera Verrucosa Transplantation.
When is the best time to transplant indigofera verrucosa?
Mid to late summer is optimal for transplanting indigofera verrucosa to ensure robust growth.
How much space should I leave between indigofera verrucosa plants?
Maintain a spacing of 24 to 36 inches (61-91 cm) between plants for ideal growth.
What soil type is best for transplanting indigofera verrucosa?
Well-draining soil enriched with organic matter is most suitable for transplanting indigofera verrucosa.
How deep should I plant indigofera verrucosa when transplanting?
Plant indigofera verrucosa at its original growing depth to minimize transplant shock.
What should I do if indigofera verrucosa shows signs of transplant shock?
Water consistently and provide partial shade until indigofera verrucosa establishes itself to mitigate transplant shock.
How should I prepare the location for transplanting indigofera verrucosa?
Loosen the soil and clear any weeds or debris before transplanting indigofera verrucosa.
How often should I water indigofera verrucosa after transplanting?
Water indigofera verrucosa thoroughly right after transplanting, then keep the soil consistently moist.
Can I use fertilizer when transplanting indigofera verrucosa?
Incorporate a balanced, slow-release fertilizer into the soil during the transplanting process.
What should I do if indigofera verrucosa wilts after transplanting?
Ensure consistent watering and avoid direct sunlight until indigofera verrucosa recovers and establishes roots.
How to avoid root damage while transplanting indigofera verrucosa?
Dig a generous root ball and handle gently to minimize root disturbance during transplanting.



