How to Transplant New zealand mallow?
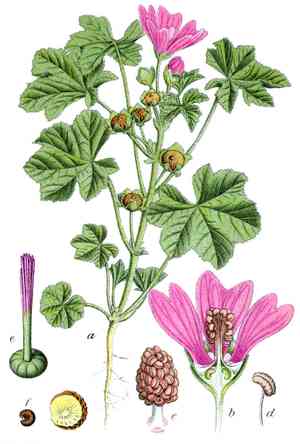
For new zealand mallow, the ideal period for relocation is during the vigorous phase of late spring through early summer. This schedule guarantees strong root development prior to the onset of colder seasons. Place new zealand mallow in a location with good drainage and ample sunlight for peak development.
Preparations Required Before Relocating New Zealand Mallow
Optimal Period for Transplanting New Zealand Mallow?
The best time to move your new zealand mallow is during the gentle warmth of spring or the early days of summer. This timing allows new zealand mallow to settle in when conditions are most favorable. Placing new zealand mallow in its new spot during these seasons ensures it has ample opportunity to root comfortably under mild sunlight and increasing daylight hours. These months offer a balanced mix of moderate temperatures and nourishing light, encouraging strong development before the intense summer heat or autumn coolness. A helpful tip: your new zealand mallow will benefit greatly from a spring or early summer relocation, as it can smoothly adapt and flourish, taking advantage of the entire upcoming growing season.
Recommended Spacing Between New Zealand Mallow Plants?
To provide your new zealand mallow ample room for development, aim for a distance of 4-6 feet (1.2-1.8 meters) between each specimen. This spacing guarantees sufficient area for healthy growth and branch expansion.
Ideal Soil Blend for New Zealand Mallow Relocation?
New zealand mallow thrives best in rich, well-draining loam. To prepare, incorporate compost or aged manure into your existing soil. This ensures the soil retains adequate moisture and nutrients for the plant's vitality.
Preferred Location for Your New Zealand Mallow?
Regarding placement, new zealand mallow performs best in full sun to partial shade. Select a garden spot that receives abundant sunlight but offers some protection during the hottest parts of the day.
Equipment Needed Before Transplanting New Zealand Mallow
Gardening Gloves
To safeguard your hands from soil and sharp implements used during the relocation process.
Gardening Spade or Shovel
Essential for carefully excavating the new zealand mallow without harming its roots and for preparing the new planting site.
Garden Trowel
A smaller implement useful for extracting the new zealand mallow from a container or seedling tray.
Gardening Hose or Watering Can
Used for hydrating the plant both before and after its transfer.
Gardening Fork
Helps to loosen the soil surrounding the plant and facilitate its removal.
Wheelbarrow or another sturdy container
For securely transporting the new zealand mallow plant from its original spot to its new home.
How to Extract New Zealand Mallow from the Ground?
How to Extract New Zealand Mallow from the Ground?
From the ground: First, water the new zealand mallow plant to moisten the surrounding soil. Use a gardening fork to loosen the earth around the plant. Next, employ a gardening spade to dig a wide circle around the new zealand mallow, ensuring the root system remains intact. Gradually guide the spade beneath the root-ball and gently lift the plant. From a pot: Initially, ensure the new zealand mallow is adequately hydrated. Then, turn the pot on its side, hold the plant steady, and tap the pot's rim against a firm surface. The new zealand mallow should slide out with its root ball undisturbed. If the plant is stuck, you might need a garden trowel to loosen the soil along the edges. From a seedling tray: Again, water your new zealand mallow seedling beforehand. Use a garden trowel or similar tool to carefully lift the seedling, taking care not to damage its delicate roots.
Step-by-Step Guide for Relocating New Zealand Mallow
Preparation
Ensure the new planting hole is twice the width of the new zealand mallowâs root ball and of equal depth. Position the new zealand mallow in the hole so that the top of the root ball is level with or slightly above the surrounding soil surface.
Plant Placement
Center the new zealand mallow within the planting hole. Verify that it stands upright.
Backfilling
Carefully refill the hole, firming the soil around the root ball without compacting it excessively. Water the new zealand mallow thoroughly after backfilling to help settle the soil.
Adjustments
If needed, make minor adjustments to the new zealand mallow's position until it is exactly as desired.
Final watering
Provide one last deep watering to help reduce transplant shock and encourage root development.
Post-Transplant Care for New Zealand Mallow
Observation
Regularly inspect the new zealand mallow during the initial weeks. Look for any indications of transplant shock, such as wilting, yellowing, or drooping foliage. Signs of recovery include new growth and the emergence of robust, healthy leaves.
Watering
Check the soil's moisture levels daily. Maintain consistent watering, but avoid overwatering, which can lead to root rot. The goal is to keep the soil uniformly moist.
Pruning
If necessary, trim back the plant to lessen stress and encourage denser growth. Remove any damaged or diseased parts, if present, to prevent disease spread.
Monitor pests and diseases
Keep an eye out for common garden pests or symptoms of disease. Early detection and intervention will ensure your new zealand mallow remains healthy and thrives in its new location.
Addressing Common Issues During New Zealand Mallow Transplantation.
What is the optimal season to transplant new zealand mallow?
The best time to move your new zealand mallow is during the first to fourth season of the year. Be sure to avoid extreme temperatures or heavy rainfall.
How much space should I leave between new zealand mallow plants when transplanting?
Allow for a distance of approximately 4-6 feet (about 1.2-1.8 meters) between each new zealand mallow to ensure each receives ample sunlight and nutrients from the soil.
What soil type is best suited for new zealand mallow?
New zealand mallow generally prefers well-draining soil. Enhance the soil with compost and organic matter to boost nutrient levels before transplanting.
How should I prepare the hole for transplanting new zealand mallow?
The hole should be twice the size of the root ball. This will provide your new zealand mallow plenty of room to spread out and establish itself securely.
Can I transplant new zealand mallow into a container?
Absolutely! New zealand mallow can grow in containers. Just ensure the container is sufficiently large and has adequate drainage to prevent waterlogging.
How frequently should I water new zealand mallow after transplanting?
Water new zealand mallow deeply once every week after transplanting. This promotes root growth. However, avoid overwatering to prevent root diseases.
How much sunlight does transplanted new zealand mallow require?
New zealand mallow needs full sunlight or partial shade. Ensure it receives at least 6 hours of sunlight daily for optimal growth.
How should I handle new zealand mallow seedlings during transplanting?
Handle new zealand mallow seedlings with care. Avoid touching the stem or roots; hold the plant by its leaves. Damaging these parts can hinder growth.
Can I use fertilizer when transplanting new zealand mallow?
Certainly, a slow-release fertilizer can accelerate new zealand mallow's establishment. However, too much can harm the roots. Follow the manufacturer's instructions.
What should I do if my transplanted new zealand mallow shows signs of wilting?
Wilting might be due to transplant shock. Give it some time. Keep the soil moist but not saturated, and ensure the plant is not exposed to drastic temperature changes.



