How to Transplant Island bristleweed?
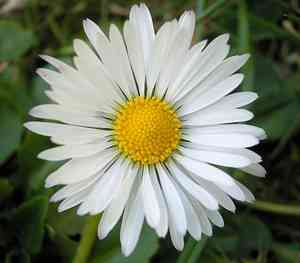
Island bristleweed flourishes when relocated between the beginning of spring and its conclusion. Select a bright, adequately drained spot to guarantee peak development. To achieve superior outcomes, exercise caution to lessen root disruption.
Essential Preparations Before Relocating Island Bristleweed
Optimal Period for Relocating Island Bristleweed?
Island bristleweed, a perennial species, flourishes when moved between early and late spring. This timing allows the plant to benefit from rising soil temperatures and ample rainfall, fostering strong root development. Successful relocation during this period enhances the plant's resilience and growth, leading to a more robust and vibrant life cycle.
Recommended Spacing Between Island Bristleweed Plants?
When relocating island bristleweed, position individual plants 24-36 inches (60-90 cm) apart. This spacing provides adequate room for growth and ensures proper air circulation.
Ideal Soil Blend for Island Bristleweed Relocation?
Prepare a well-draining soil mixture, incorporating organic compost or a balanced slow-release fertilizer. This will furnish island bristleweed with a nutrient-rich environment and promote its development.
Selecting a New Location for Your Island Bristleweed?
Choose a sunny location for island bristleweed, as it thrives best in full sun, receiving at least 6-8 hours of direct sunlight daily. This will guarantee optimal growth and flowering.
Equipment Needed Before Transplanting Island Bristleweed?
Gardening Gloves
To safeguard your hands while handling soil and the plant.
Shovel or Spade
For excavating and extracting the plant with its root system intact.
Garden Trowel
Useful for smaller, more precise digging tasks.
Watering Can
To hydrate the plant before and after its relocation.
Pruning Shears
To trim any damaged roots or foliage.
Mulch
To spread around the plant's base for moisture retention.
How to Extract Island Bristleweed from its Current Location?
How to Extract Island Bristleweed from its Current Location?
From Ground: First, moisten the soil around the island bristleweed plant. Then, excavate a wide trench around the plant using a shovel or spade, ensuring the plant's root ball remains undisturbed. Carefully work the spade beneath the root ball to lift the plant from its original spot.From Pot: Ensure the soil in the container is damp. Gently turn the pot on its side and tap the edges to loosen the plant. Hold the plant's base and carefully slide it out, taking care not to disrupt the root ball.From Seedling Tray: Water the seedlings thoroughly before removal. Use a garden trowel or your hands to gently lift the seedlings from the tray, ensuring you support the root ball and avoid damaging the delicate roots.
Step-by-Step Instructions for Relocating Island Bristleweed
Prepare the New Site
Dig a hole in the new location that is twice as wide and equally deep as the root ball of your island bristleweed.
Amend the Soil
Incorporate some compost into the excavated soil to provide nutrients and enhance drainage.
Extract the Plant
Follow the appropriate method to remove the island bristleweed based on whether it is in the ground, a pot, or a seedling tray.
Position the Plant
Carefully place the island bristleweed into the prepared hole, ensuring it is at the same depth as it was in its initial location.
Backfill the Hole
Refill the hole with the soil-compost mixture, gently pressing it around the root ball to eliminate air pockets.
Water Thoroughly
Water the island bristleweed well after relocation to settle the soil and aid root establishment.
Mulch (Optional)
Apply a layer of mulch around the plant's base to retain moisture and suppress weed growth.
Post-Transplant Care for Island Bristleweed
Watering
Maintain consistent moisture in the soil around the island bristleweed, avoiding sogginess, for the initial weeks after relocation to promote strong root development.
Monitoring
Regularly inspect the plant for signs of distress, such as wilting or yellowing leaves, and provide additional care as necessary.
Protection
Shield the island bristleweed from harsh weather conditions, like frost or strong winds, using appropriate covers or windbreaks.
Pruning
Trim any damaged or dead leaves and stems to encourage healthy growth and prevent disease.
Addressing Common Issues During Island Bristleweed Relocation.
What is the optimal season to relocate island bristleweed?
Early to late spring is ideal for relocation, ensuring the plant establishes before summer heat.
How much space do island bristleweed plants require?
Space each island bristleweed plant 24-36 inches (61-91 cm) apart for optimal growth and air circulation.
How should I prepare the soil for island bristleweed?
Utilize well-draining, sandy or loamy soil. Enrich it with compost for added nutrients.
What action should I take if island bristleweed exhibits signs of transplant shock?
Water thoroughly, provide shade, and refrain from fertilizing until the plant recovers and shows new growth.
How can I ensure robust root development for island bristleweed during relocation?
Water the plant thoroughly before and after relocation, and keep the soil consistently moist.
Should I prune island bristleweed before relocating?
Lightly prune any damaged or dead parts to direct energy towards root establishment.
What depth should I plant island bristleweed?
Plant it at the same depth as it was in its original container to minimize stress.
What temperature range is suitable for relocating island bristleweed?
Relocate when temperatures are between 60-70°F (15-21°C) to avoid extreme weather conditions.
How can I safeguard island bristleweed from pests after relocation?
Employ organic pest control methods like neem oil and ensure proper spacing for airflow.
How frequently should I water island bristleweed after relocation?
Water thoroughly after relocation, then maintain a consistent watering schedule, avoiding waterlogged conditions.



