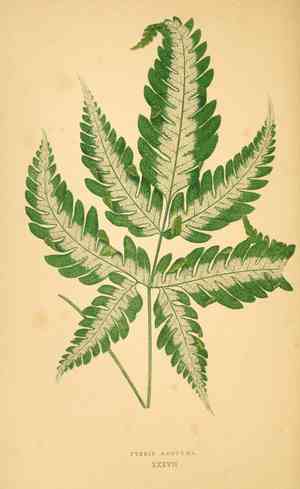
How to Transplant Tape fern?
The optimal time to transplant tape fern spans from the pleasant warmth of late spring through the mild onset of early summer, guaranteeing its thriving in adequately drained soil under dappled light. Ensure continuous hydration and offer delicate attention during its adjustment phase.
Essential Preparations Before Relocating Tape Fern
Optimal Timing for Tape Fern Relocation?
The perfect window for moving tape fern spans from the gentle awakening of spring to the onset of early summer. This period allows tape fern to firmly anchor its roots prior to intense summer heat, ensuring a strong beginning. A careful transition during this time promotes vigorous development, capitalizing on moist soil and extended daylight hours that support photosynthesis and root growth. Moving tape fern now guarantees smooth adaptation to its new environment, utilizing the season's mild conditions for prime establishment.
Required Spacing Between Tape Fern Plants?
Before transferring tape fern to their new spot, it's crucial to provide adequate room for them to thrive. Aim for a separation of approximately 10-12 inches (25-30 cm). This ensures each tape fern has sufficient area to expand and absorb nutrients without competition.
Best Soil Mixture for Tape Fern Transplanting?
For tape fern, a soil blend that drains well is crucial. Improve your garden soil with organic compost to encourage robust growth. A mild, balanced fertilizer, such as a 10-10-10 mix applied as directed, will give your tape fern an excellent start!
Ideal Location for Your Tape Fern Relocation?
Tape fern prefers not to be in direct sunlight all day, so select a location with partial shade where it can receive some light without the harsh midday sun. This will mimic its natural environment and keep tape fern healthy and flourishing.
Necessary Equipment for Tape Fern Transplantation
Gardening Gloves
To safeguard your hands while handling soil and tape fern.
Spade or Shovel
For excavating the tape fern from its original spot and preparing the new planting site.
Hand Trowel
For minor adjustments and digging small holes if moving young plants.
Watering Can or Hose
To hydrate the tape fern before extraction and after replanting.
Gardening Fork
To gently loosen the soil around the tape fern's root system without causing damage.
Bucket or Wheelbarrow
To transport the tape fern and soil.
Pruning Shears
To trim any damaged roots or foliage.
How to Extract Tape Fern from the Soil?
How to Extract Tape Fern from the Soil?
From Ground: First, moisten the tape fern's soil with water. Next, dig a wide circle around the plant using a spade or shovel, making sure to preserve the root ball. Use the gardening fork to loosen the soil surrounding the roots, then carefully slide the spade beneath the root ball and lift the tape fern from the ground.From Pot: Gently tap the pot's sides to loosen the soil. Turn the pot sideways and support the tape fern with one hand. Carefully pull the pot away while easing out the plant. If the tape fern is root-bound, gently untangle the roots before transplanting.From Seedling Tray: Water the seedlings thoroughly before transplanting. Use a hand trowel or appropriate tool to lift the seedling by its leaves, not the stem, to prevent damage. Carefully separate individual seedlings if needed, ensuring each has a healthy root system attached.
Step-by-Step Guide for Transplanting Tape Fern
Pre-Transplant Preparation
Thoroughly water the tape fern before beginning the transplant to ensure the plant is hydrated and the soil is easier to manage.
Root and Soil Management
Carefully remove the tape fern from its current location with minimal disruption to the roots. Handle the root ball gently to lessen stress on the plant.
Transplant Hole
Excavate a hole in the ground that is twice as wide and the same depth as the tape fern's root ball to provide ample room for root expansion.
Placement
Position the tape fern in the hole at the identical depth it was previously growing. This ensures the plant is neither too deep nor too shallow in the ground.
Backfilling
Refill the area around the plant with soil, gently patting it down to eliminate air pockets. Be careful not to harm the roots during this process.
Initial Watering
Water the tape fern generously immediately after transplanting to settle the soil and help mitigate transplant shock.
Post-Transplant Care for Tape Fern
Consistent Watering
Maintain steady moisture in the soil surrounding the tape fern, especially during the initial weeks. This aids the plant in establishing itself in its new spot.
Root Support
Promote robust root development by occasionally aerating the soil around the tape fern to improve air and water penetration.
Mulching
Apply a layer of mulch around the base of the tape fern to retain moisture and stabilize soil temperature.
Monitoring
Regularly inspect the tape fern for indications of stress, such as wilting or discolored leaves, and provide appropriate care.
Resolving Common Issues with Tape Fern Transplantation.
When is the best time to transplant tape fern?
Transplant tape fern during mild weather, typically from late spring to early summer, allowing roots time to establish.
What spacing should I use for tape fern during transplanting?
Space tape fern about 10-12 inches (25-30 cm) apart to ensure sufficient growth room and air circulation.
What soil conditions benefit tape fern after transplanting?
Utilize well-draining soil with moderate moisture for tape fern, avoiding excessively dry or waterlogged areas.
How deep should the hole be for transplanting tape fern?
Dig a hole slightly larger than the root ball, allowing tape fern to sit at its original growing depth.
Why is my tape fern wilting after transplanting?
Wilting can result from transplant shock. Ensure proper watering, initially avoid full sun, and shield tape fern from harsh elements.
Can tape fern be transplanted into containers?
Yes, tape fern can flourish in containers with adequate root space and proper drainage holes.
What signs indicate tape fern is ready for transplanting?
Roots outgrowing the current container or a noticeable decline in plant vitality suggest tape fern may benefit from transplanting.
Should I fertilize tape fern immediately after transplanting?
Wait a few weeks before fertilizing to prevent burning new roots. Then, use a balanced, slow-release fertilizer.
How do I water tape fern after transplanting?
Water tape fern generously after transplanting to settle the soil around the roots, then maintain consistent moisture.
What if tape fern leaves turn brown after transplanting?
Browning leaves can signal stress. Provide shade, remove affected foliage, and ensure the soil is neither too wet nor too dry.


