How to Transplant Yellow avens?
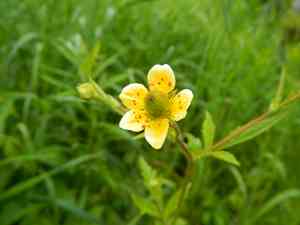
For yellow avens, the ideal period for relocation is from mid-spring through early summer, capitalizing on prime growing circumstances. Select a site that receives full sun to partial shade and features soil that drains effectively. Adequate spacing will foster robust development.
Preparations Required Before Relocating Yellow Avens
Optimal Period for Transplanting Yellow Avens
The best time to move yellow avens is during the middle to late spring or early summer. This timeframe encourages strong root development prior to winter dormancy. Relocating yellow avens during this period takes advantage of the season's mild temperatures, ensuring the plant establishes itself with minimal stress. A successful early transplant leads to increased resilience and vigorous growth in yellow avens's subsequent flowering cycles.
Recommended Spacing Between Yellow Avens Plants
Ensure adequate room for yellow avens to expand. Ideally, position each plant 2-3 feet (60-90 cm) apart. This prevents competition for underground nutrients and provides ample space for development.
Best Soil Mixture for Yellow Avens Transplantation
Preparing the soil for yellow avens is crucial. It thrives in well-draining, humus-rich soil. Amend your garden bed by incorporating compost or an all-purpose, slow-release granular fertilizer to supply essential nutrients. You're doing great!
Ideal Location for Relocating Your Yellow Avens
Selecting the correct spot for yellow avens is important. It flourishes in full sun to partial shade. Therefore, choose a garden area where it will receive at least 6 hours of daily sunlight. Happy planting!
Equipment to Prepare Before Transplanting Yellow Avens
Gardening Gloves
To safeguard your hands while handling soil and the plant.
Shovel or Hand Trowel
Essential for excavating holes and extracting the plant from its original position.
Pruning Shears
Useful for trimming any overgrown or dead plant parts, promoting healthy development.
Garden Fork
Used to aerate the soil surrounding the yellow avens plant to enhance oxygen circulation.
Watering Can
For hydrating the yellow avens plant both before and after the relocation process.
Organic Compost
To be added into the hole to supply the plant with vital nutrients.
Method for Removing Yellow Avens from the Soil
How to Extract Yellow Avens from the Soil
From Ground: Start by thoroughly watering the yellow avens plant. This helps the plant cope with the stress of relocation. Using a shovel or hand trowel, carefully dig a wide, shallow trench around the plant, ensuring to include a substantial portion of the root system. Gently lift the plant from the ground, minimizing root damage.From Pot: After watering the yellow avens plant, turn the pot on its side and slowly ease the plant out, preserving as much of the root ball as possible. Be careful not to pull forcefully at the stem to prevent unnecessary harm.From Seedling Tray: For smaller, younger plants, use a teaspoon or similar tool to gently pry the plant from the tray. Hold the plant by its leaves rather than its stem to avoid any injury, making sure to keep the roots and soil intact as much as possible.
Step-by-Step Guide for Relocating Yellow Avens
Preparation
Ensure your chosen relocation site is well-prepared. Loosen the soil with a garden fork to improve oxygen flow.
Digging
Excavate a hole that is wide and deep enough to accommodate the yellow avens plant's root ball. Add organic compost to the bottom of the hole.
Transplanting
Position the yellow avens plant in the hole, aligning the top of the root ball with the surrounding soil level. Backfill the hole with soil, gently compacting it around the plant's base, leaving no air pockets.
Watering
Provide the newly relocated yellow avens plant with a thorough watering, also ensuring the surrounding soil is moist to encourage new roots to spread.
Trimming
Use pruners to cut back any excessively long or dead parts of the plant. This will stimulate new growth and redirect the yellow avens plant's energy towards establishing its roots.
Post-Transplant Care for Yellow Avens
Regular Inspection
Examine the yellow avens plant frequently for indications of stress or disease. Symptoms might include leaf discoloration, wilting, or poor development.
Protection
Provide stable support, such as a plant stake, if the plant appears weak or begins to lean. Also, shield the plant from harsh weather conditions like strong winds or intense sunlight initially.
Watering
Maintain consistently moist soil for the yellow avens plant during the first few weeks after relocation. Insufficient water will stress the plant, while excessive water can lead to root rot.
Resolving Common Issues with Yellow Avens Transplantation.
When is the optimal time to move yellow avens?
The best period to transplant yellow avens is from late spring to early autumn (S2-S4). It thrives in the temperatures of these milder seasons.
What distance should I maintain between yellow avens during relocation?
Ensure ample breathing room for each yellow avens by keeping a distance of 2-3 feet (60-90cm). This promotes growth and prevents overcrowding.
What type of soil does yellow avens prefer during transplantation?
Yellow avens favors well-draining, fertile soil. It thrives in a soil pH that is slightly acidic to neutral for optimal growth.
What is the process for evaluating the transplant location for yellow avens?
First, assess the soil's pH level and fertility. Next, confirm the location receives sufficient sunlight and has excellent drainage. Remember, yellow avens requires space to spread.
How deep should I plant the yellow avens?
Dig a hole deep enough to accommodate the root ball. Typically, 10-12 inches (25-30cm) is sufficient. The top of the root ball should be at the surface.
How can I ensure successful transplantation of yellow avens?
Water yellow avens thoroughly after transplanting. Apply mulch around the base to retain moisture and regulate soil temperature. Remember to care for the plant with consistent watering afterward.
Why do the leaves of my transplanted yellow avens wilt and what can I do?
Wilting after relocation is common, known as transplant shock. Keep the soil moist, protect the plant from strong sunlight; it will recover with proper care.
How crucial is sun exposure for my relocated yellow avens?
Yellow avens requires adequate sunlight for growth. Select a location with full sun to partial shade. Too much shade can result in weak growth and reduced flowering.
Can yellow avens be transplanted into containers?
Yes, yellow avens can be successfully grown in containers. Choose pots with sufficient drainage and space to accommodate its mature size.
What if my transplanted yellow avens is not blooming?
Lack of blooms can be attributed to insufficient sunlight or nutrients. Ensure your yellow avens receives enough sun, and enrich the soil with a balanced fertilizer.



