How to Transplant Canary broom?
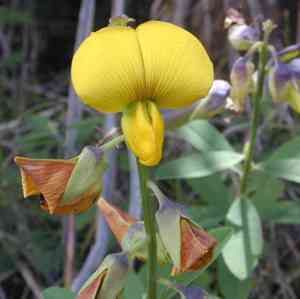
Canary broom is best relocated between late spring and early summer, during periods of consistent warmth. Select a bright, adequately drained spot to facilitate robust development. Bear in mind that careful handling during the transfer process promotes successful rooting.
What Preparations are Necessary Before Relocating Canary Broom?
What is the Optimal Period for Moving Canary Broom?
Canary broom, a perennial plant, flourishes when moved between late spring and early summer. This timeframe promotes excellent root development and growth due to increased daylight and warmer ground temperatures. Relocating during this period minimizes transplant shock and encourages robust growth, giving canary broom the best chance to thrive in its new spot.
What Spacing is Recommended Between Canary Broom Plants?
When relocating canary broom, ensure each plant is positioned 5-6 feet (1.5-1.8 meters) apart. This provides ample room for expansion and air circulation, which aids in maintaining plant vitality.
What is the Best Soil Mixture for Canary Broom Relocation?
Utilize well-draining soil enriched with organic material for canary broom. Incorporate a phosphorus-rich base fertilizer before moving to support strong root formation. Compost or aged manure is an excellent choice for enhancing soil quality.
Where Should You Replant Your Canary Broom?
Choose a sunny spot for relocating canary broom, where it will receive full sun for most of the day. This plant thrives best with at least 6-8 hours of direct sunlight.
What Tools Should You Prepare Before Relocating Canary Broom?
Gardening Gloves
To safeguard your hands while handling soil and the plant.
Garden Spade or Shovel
For excavating the plant and its surrounding earth.
Trowel
For smaller, more precise digging tasks and working in confined areas.
Pruners or Scissors
To trim damaged roots or remove any excess foliage.
Watering Can or Hose
To hydrate the plant before and after relocation.
Wheelbarrow or Tarp
To move the plant from its initial spot to the new location.
How Do You Extract Canary Broom from the Soil?
How Do You Extract Canary Broom from the Soil?
From Ground: First, water the canary broom plant to moisten the soil. Then, dig a wide trench around the plant using a shovel or spade, ensuring the plant's root ball remains intact. Carefully work the spade under the root ball to lift the plant from its original location.From Pot: Water the canary broom plant to loosen the soil. Gently invert the pot while supporting the plant with your other hand. Tap the bottom of the pot to release the plant. If necessary, use a trowel to dislodge any stubborn roots clinging to the pot.From Seedling Tray: Water the canary broom plant to make the soil moist. Gently push up from the bottom of the tray cell to release the seedling. Handle the plant by its leaves, not its delicate stem, to prevent damage.
Step-by-Step Guide for Relocating Canary Broom
Plant Preparation
Trim any damaged or excessively long roots with pruners. Remove any dead or damaged leaves.
Hole Preparation
Dig a hole in the new location twice as wide and just as deep as the root ball of the canary broom plant. This allows the roots to spread easily in the new soil.
Plant Placement
Position the canary broom plant into the hole, ensuring it sits at the same depth it was in its original location. Fill the hole with the excavated soil, gently patting it down to remove any air pockets.
Watering
Water the plant thoroughly after planting to help settle the soil around the roots and provide moisture for establishment.
How Do You Care For Canary Broom After Relocation?
Watering
Keep the soil around the canary broom consistently moist, but not waterlogged, for the first few weeks after relocating to help establish strong roots.
Mulching
Apply a layer of mulch around the base of the canary broom plant to retain moisture and regulate soil temperature. Keep the mulch away from the stem to prevent rot.
Monitoring
Check the canary broom plant regularly for signs of transplant shock, such as wilting or yellowing leaves. If needed, provide additional water or shade to help the plant recover.
Fertilizing
Wait until the canary broom plant shows new growth before applying any fertilizer. Use a balanced, slow-release fertilizer to provide essential nutrients gradually.
Troubleshooting Common Issues with Canary Broom Relocation.
When is the best time to relocate canary broom?
The optimal time to relocate canary broom is from late spring to early summer for ideal growth.
How far apart should I space canary broom plants?
Space canary broom plants 5-6 feet (1.5-1.8 meters) apart to allow ample room for growth.
How do I prepare the soil for canary broom?
Ensure well-draining soil, enriched with organic matter, to help canary broom thrive after relocating.
How deep should I plant canary broom?
Plant canary broom at the same depth it was growing originally to prevent stress.
What should I do if canary broom looks wilted after relocating?
Keep the soil evenly moist and avoid overwatering to help canary broom recover from transplant shock.
How long should I water canary broom after relocating?
Water canary broom deeply for the first few weeks, making sure the soil remains consistently moist.
Can I relocate canary broom during hot weather?
Avoid relocating canary broom during hot weather as it can cause significant stress and hinder growth.
What type of fertilizer should I use for canary broom after relocating?
Use a balanced, slow-release fertilizer to provide canary broom with continuous nutrients for healthy growth.
How do I handle canary broom roots during relocating?
Handle canary broom roots gently, ensuring they remain intact to minimize transplant shock.
Should I prune canary broom after relocating?
Prune canary broom minimally after relocating, focusing on removing dead or damaged branches.



