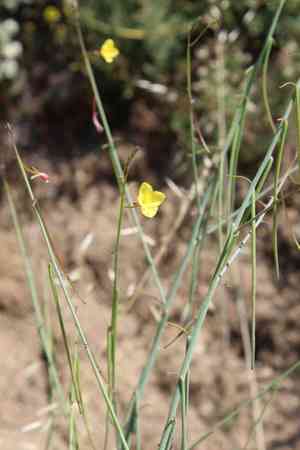
How to Transplant California primrose?
For California primrose to flourish, relocating it during late spring to early summer provides the best environment for development. Select a bright spot with soil that drains effectively. Only move the plant if you observe excessive density, preserving the soil's composition to prevent stress.
What Preparations are Needed Before Transplanting California Primrose?
What is the Ideal Time for Transplanting California Primrose?
The optimal period to relocate california primrose spans from the end of spring into the beginning of summer. Moving california primrose during this timeframe leverages the moderate temperatures and increasing daylight, fostering robust root development and minimizing plant stress. This timing is crucial for giving california primrose the best start in its new spot, ensuring it flourishes and brightens your garden with its vibrant colors throughout the growing season.
How Much Space Should You Leave Between California Primrose Plants?
Before planting california primrose, plan your layout so each plant has ample room to thrive. Position them approximately 15-18 inches (38-45 cm) apart. This spacing allows roots to expand freely and foliage to access sunlight effectively.
What is the Best Soil Mix for California Primrose Transplanting?
For healthy california primrose roots, prepare a soil that drains well. A loamy soil type is ideal. To provide essential nutrients, incorporate a balanced, slow-release fertilizer to create a nourishing environment for your new plant.
Where Should You Relocate Your California Primrose?
Provide your california primrose with a sunny location. A spot receiving at least 6 hours of direct sunlight daily is perfect. This ensures your california primrose gets the energy needed for abundant, beautiful blooms.
What Equipments Should You Prepare Before Transplantation California Primrose?
Gardening Gloves
To safeguard your hands while handling soil and plants.
Hand Trowel
For digging small holes and moving soil during planting.
Gardening Shovel or Spade
For excavating the plant if it's already in the ground.
Watering Can or Hose
To hydrate the california primrose before and after its relocation.
Pruning Shears
To trim any damaged or excess growth prior to transplanting.
Measuring Tape
To ensure correct spacing between individual plants.
Garden Fork
To aerate the soil before the transplanting process.
Wheelbarrow or Planting Tray
To transport the california primrose and soil materials.
Organic Mulch
To aid in retaining soil moisture and stabilizing temperature after transplant.
How Do You Remove California Primrose from the Soil?
How Do You Remove California Primrose from the Soil?
From Ground: First, water the california primrose to moisten the soil, facilitating easier plant removal without root damage. Dig a wide trench around the plant using a shovel or spade, ensuring sufficient distance to avoid cutting into the root ball. Gently slide the spade beneath the root mass and carefully lift the california primrose from the ground.From Pot: Thoroughly water the california primrose to ensure the soil is damp. Turn the pot on its side and gently tap or squeeze the sides to loosen the root ball. Invert the pot while supporting the california primrose with your other hand, allowing the plant to slide out naturally, without pulling on the stem.From Seedling Tray: Water the seedlings to dampen the soil, making removal simple. Use a hand trowel or dibbler to lift the seedling by digging around the soil to minimize root disturbance. Gently hold the seedling by its leaves, not its stem, and ease it out.
Step-by-Step Guide for Transplanting California Primrose
Preparation
Ensure all necessary tools are readily available for a smooth transplanting process. Wear gardening gloves to protect your hands.
Removal
Follow the appropriate removal method to carefully extract the california primrose from its original growing spot, taking care to preserve its root system.
New Location
Prepare a hole in the ground that is twice as wide and equal in depth to the root ball. Loosen the surrounding soil with a garden fork to encourage root expansion.
Planting
Position the california primrose in the center of the prepared hole. Ensure the top of the root ball is level with the surrounding soil for proper stem support.
Backfilling
Gently refill the hole with soil, being careful not to compact it too tightly. Firm the soil around the root ball to eliminate any air pockets.
Watering
Water the california primrose generously after planting to settle the roots and provide hydration. Ensure the water penetrates deeply into the root zone.
Mulching
Spread organic mulch around the california primrose to retain moisture and regulate soil temperature. Avoid placing mulch directly against the stem to prevent rot.
How Do You Care For California Primrose After Transplanting?
Watering
Maintain consistently moist soil around the california primrose, especially during the initial weeks. Regularly check moisture levels to prevent over or under-watering.
Mulching
Keep the mulch around the california primrose fresh and at the correct thickness to provide ongoing benefits.
Pruning
Trim any damaged or unhealthy stems to promote more vigorous growth and a better plant structure.
Monitoring
Regularly inspect the california primrose for indications of stress or pests. Early detection significantly simplifies management.
Supporting
As the california primrose grows, it might need support to remain upright. Gently stake if necessary, using soft ties to avoid stem damage.
Troubleshooting Common Issues with California Primrose Transplantation.
What's the best time to transplant california primrose?
The ideal period for transplanting california primrose is from late spring to early summer when conditions are mild.
How far apart should I space california primrose when planting?
Allow approximately 15-18 inches (38-45 cm) between plants for adequate growth and air circulation.
Why is my california primrose wilting after transplanting?
Wilting may indicate transplant shock. Keep the soil consistently moist and provide temporary shade for a few days.
What soil conditions favor california primrose after transplanting?
Ensure well-drained soil rich in organic matter. Avoid excessively wet or dry conditions to encourage healthy root development.
Can I transplant california primrose on a hot day?
It's best to transplant california primrose on cooler, overcast days or in the early evening to minimize plant stress.
Should I water california primrose immediately after transplanting?
Yes, absolutely! Water thoroughly after transplanting to settle the soil around the roots and eliminate air pockets.
How deep should I plant california primrose during transplanting?
Plant california primrose at the same depth it was in its previous container or location to prevent stem rot or drying out.
What if the leaves of california primrose turn yellow after transplanting?
Yellow leaves can signal stress. Ensure proper watering, avoid direct sunlight for a few days, and check for root damage.
How can I tell if california primrose has transplant shock?
Signs include drooping, yellowing foliage, and stunted growth. Mitigate by providing consistent moisture, mulch, and initial partial shade.
Is it necessary to fertilize california primrose right after transplanting?
Wait 4-6 weeks before fertilizing to allow california primrose to establish. Fertilizing too soon can harm delicate roots and stress the plant.


